> ## Documentation Index
> Fetch the complete documentation index at: https://docs.gameball.co/llms.txt
> Use this file to discover all available pages before exploring further.
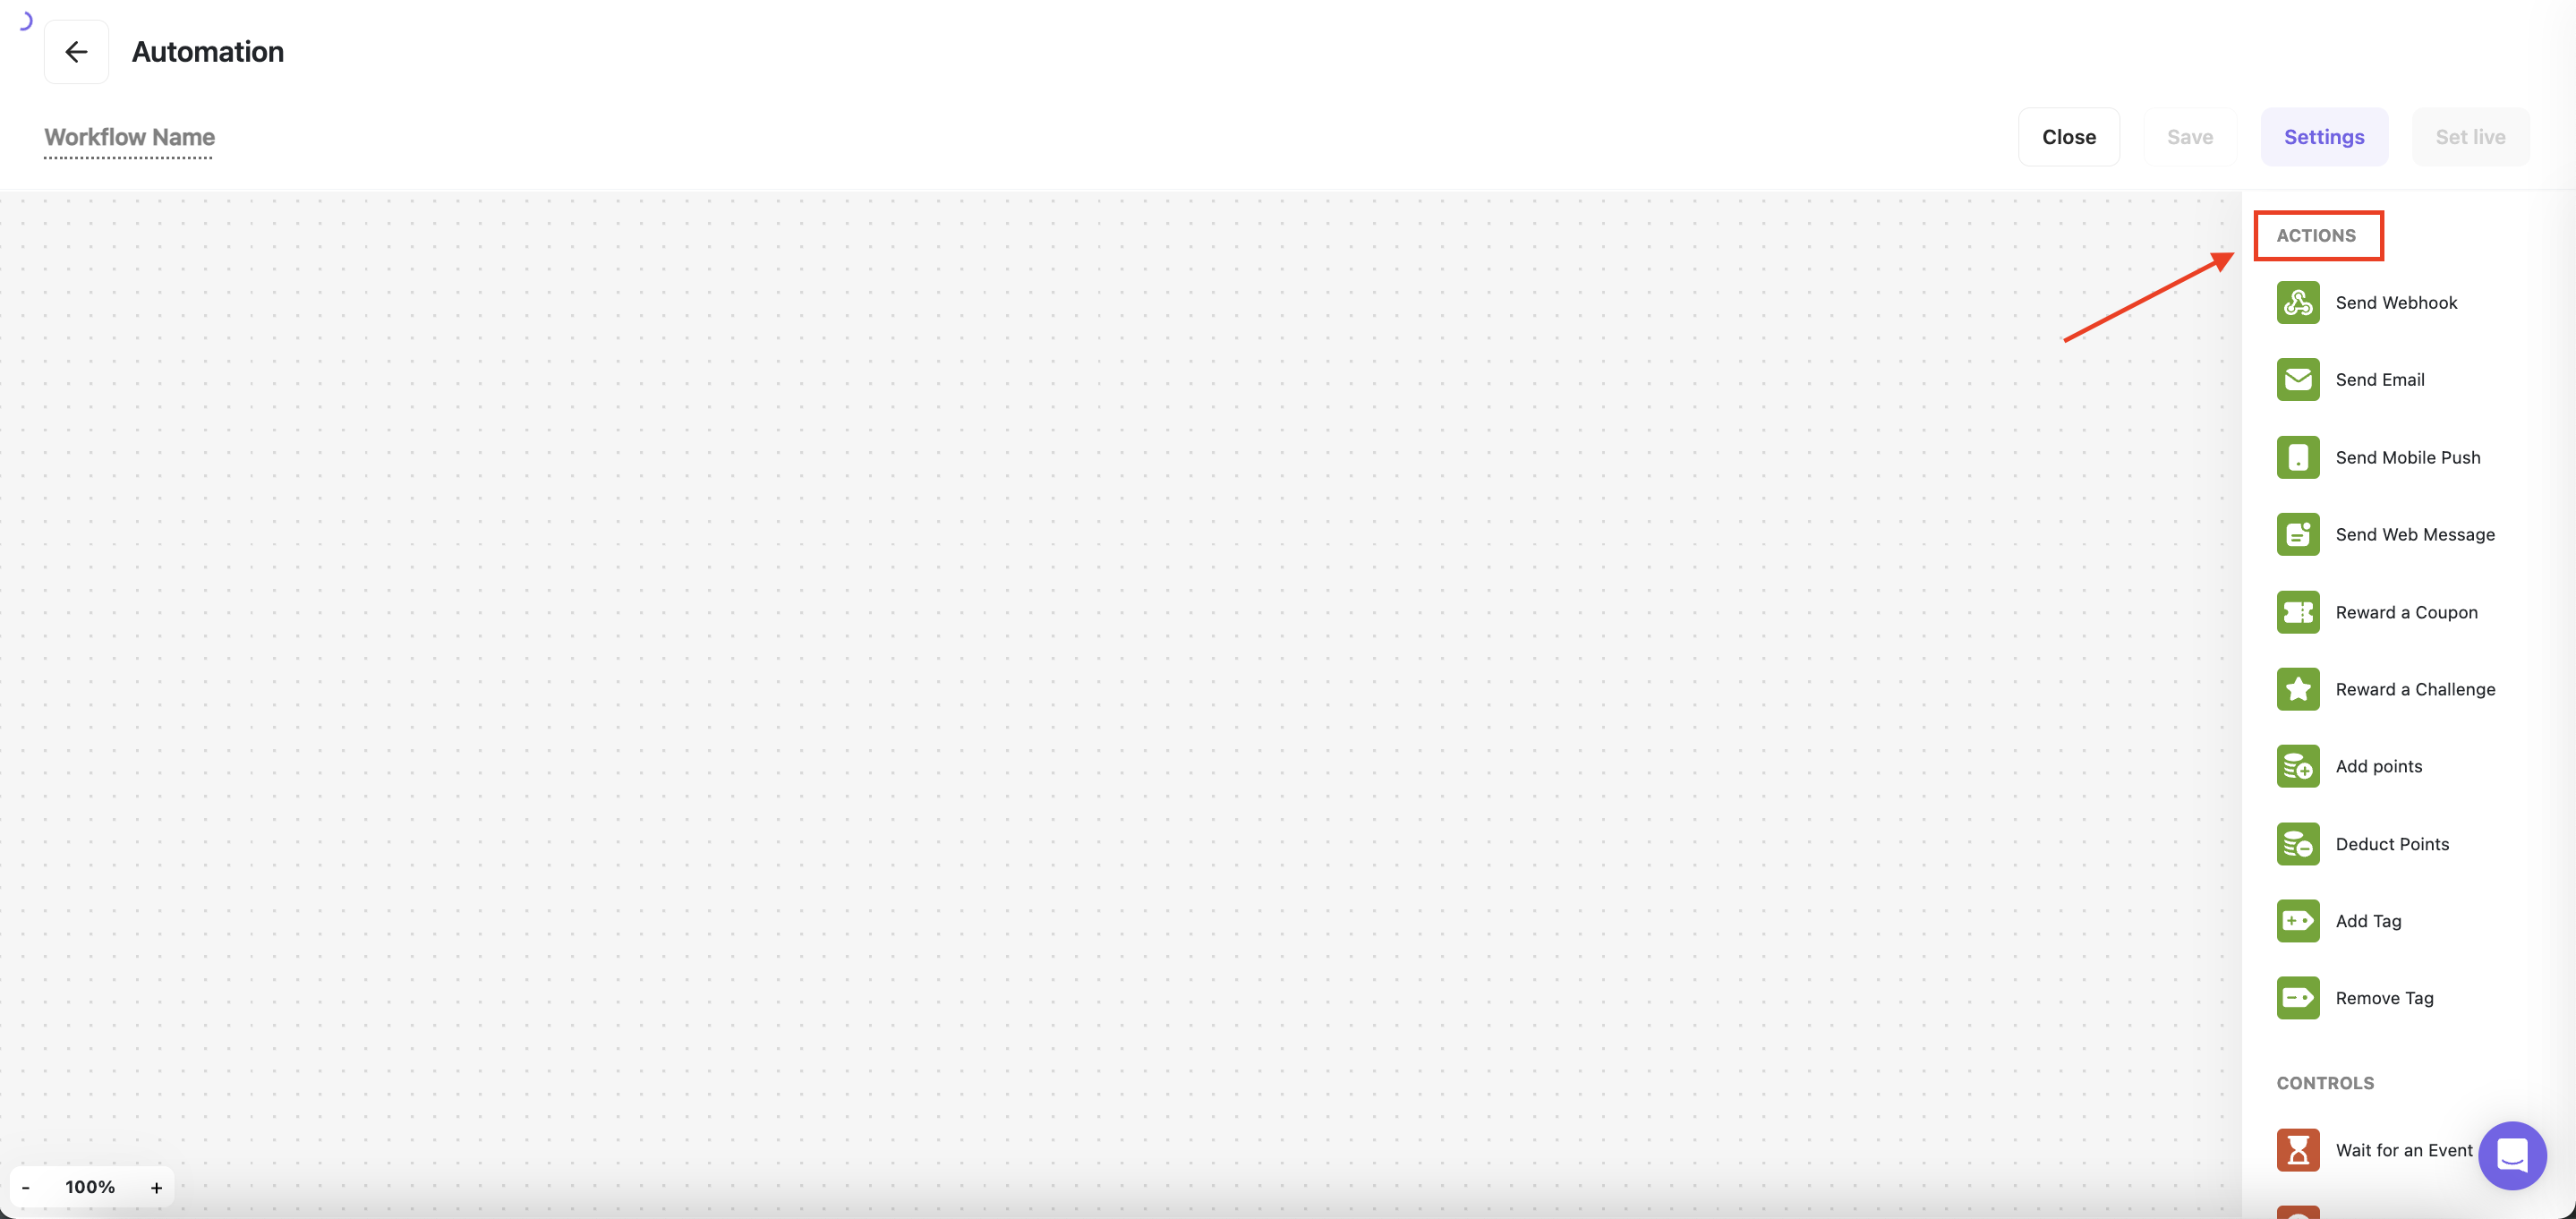
# What Are Automation Actions?
> Learn more about Gameball's Automation Campaigns actions, and how to use them.
Automation actions are the building blocks of effective workflows, allowing you to deliver personalized experiences and drive engagement. In this article, we'll explore the diverse range of automation actions offered by Gameball, providing detailed insights into their functionalities and implementation.
## Exploring Automation Actions
Automation actions enable you to automate tasks and deliver targeted communications to customers based on specific triggers and conditions.
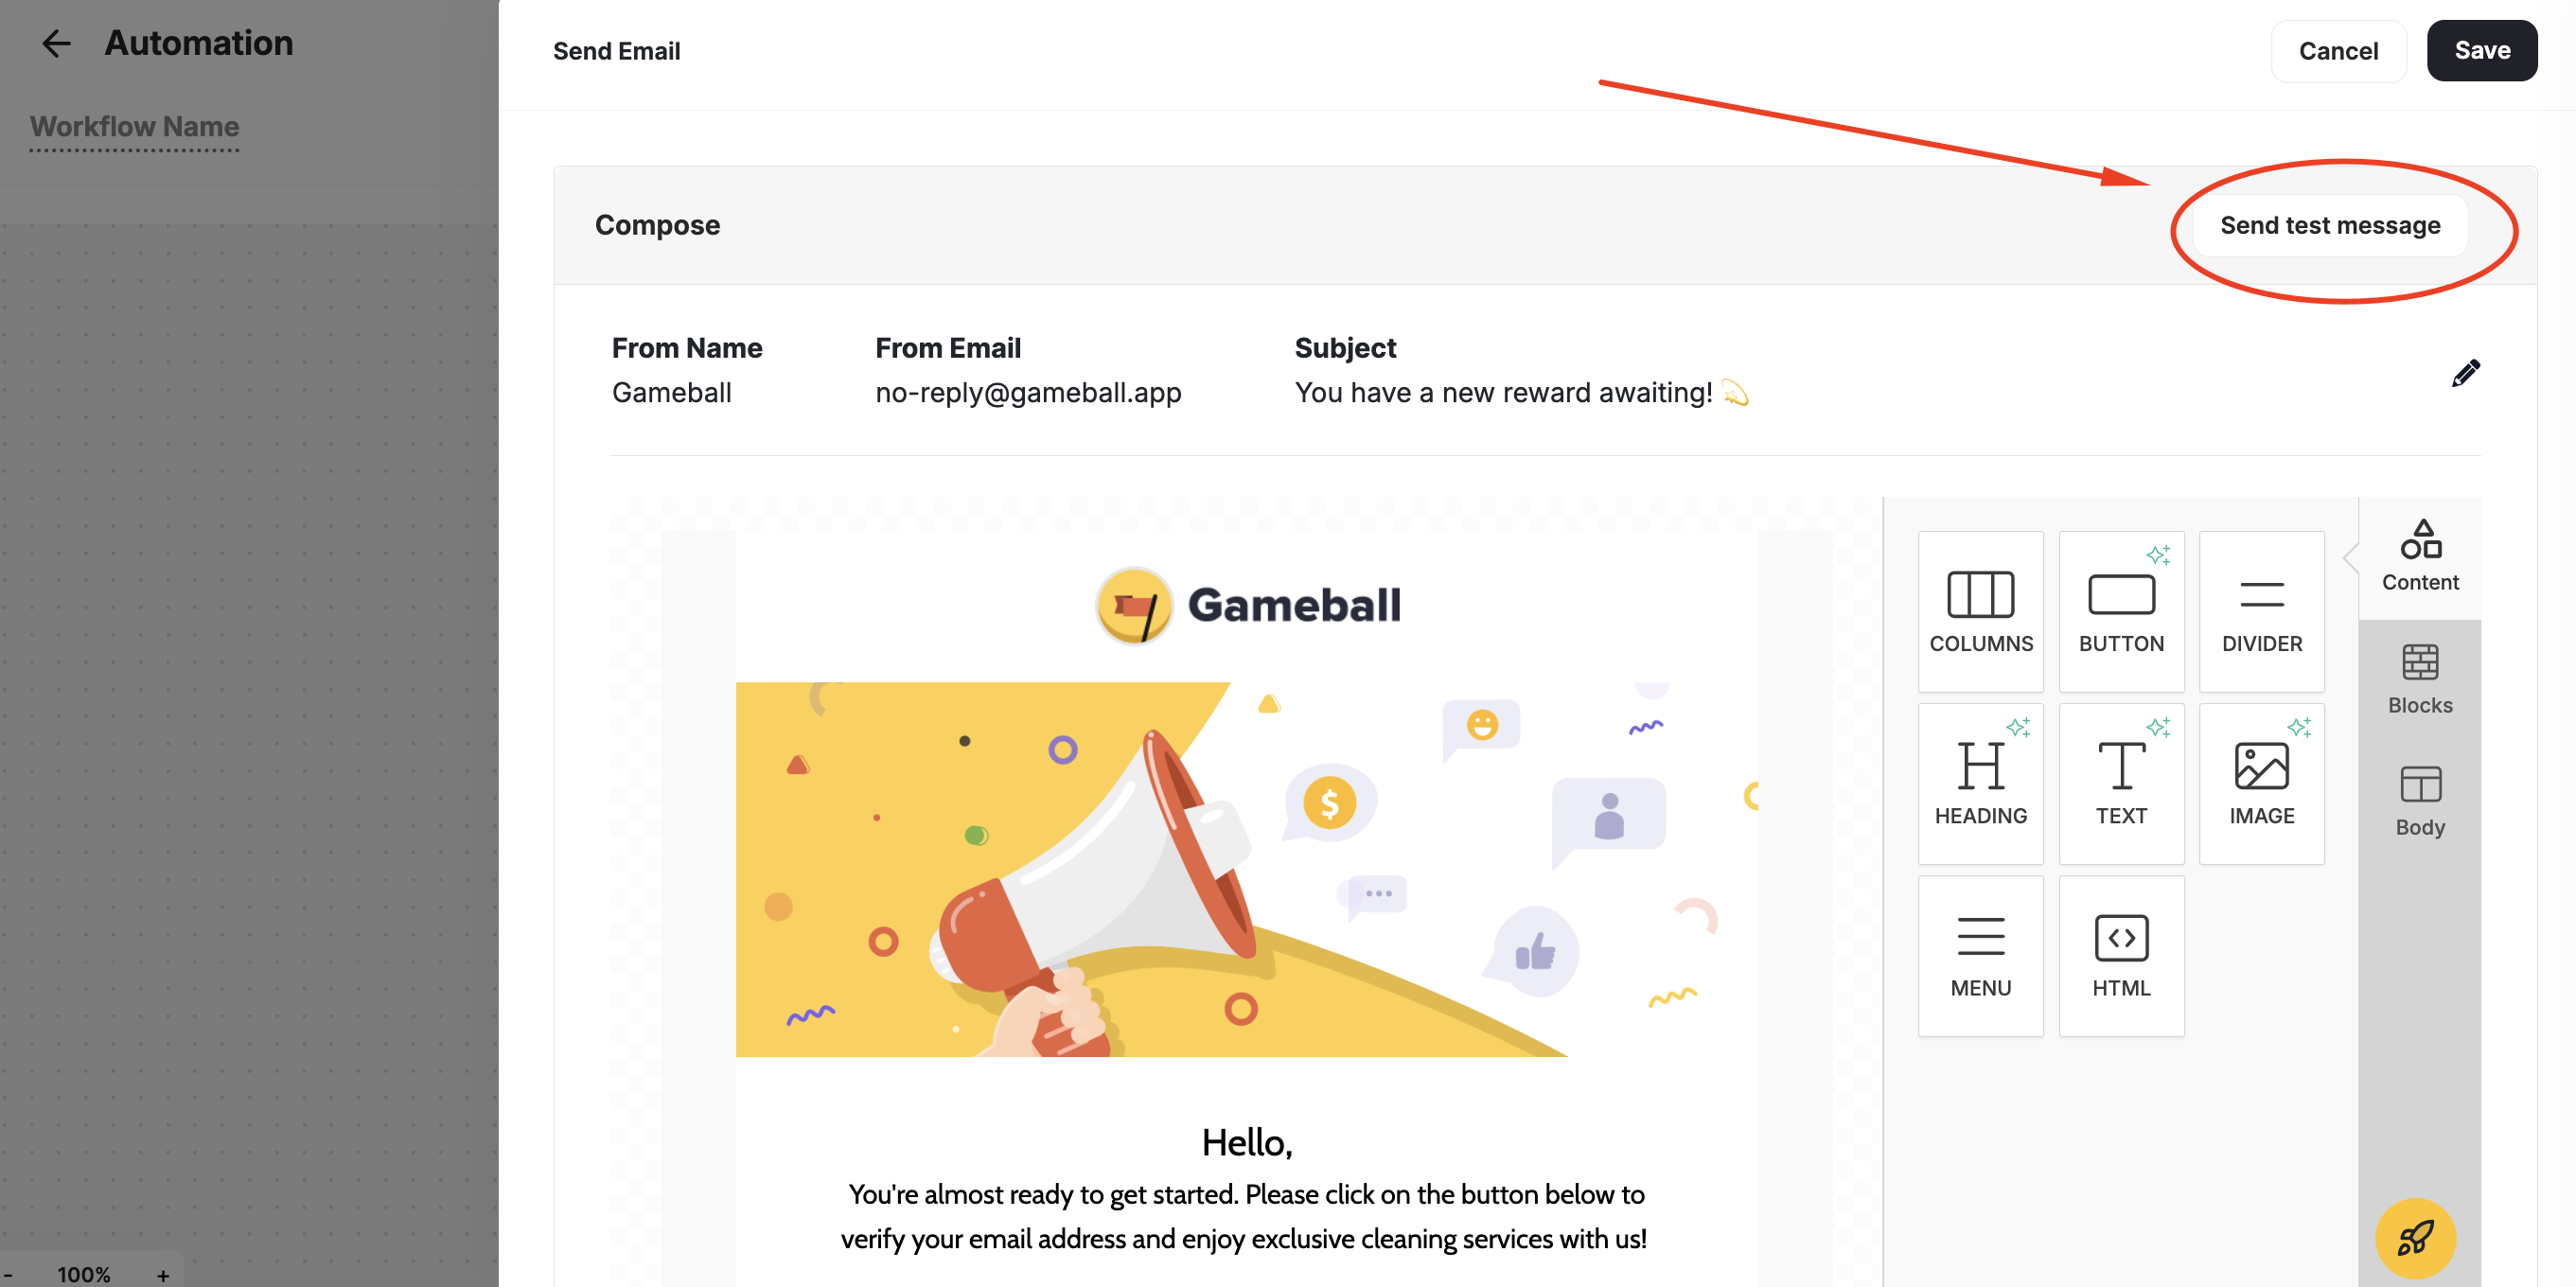
 Send customers a customized email once a workflow is triggered or a condition is met. With Gameball, you can craft compelling email messages tailored to your audience, maximizing the impact of your communication efforts.
### How to compose an email
Click on **Configure Email** on the card.
From the pop-up window to the side, fill in the email header fields:
* **From Name:** the name of your business, or representative.
* **From Email:** the email you want to appear in the email header. No need to write the domain here.
* **Domain:** pick the email address's domain. If the domain is not saved on Gameball, click **Change domain** and add it through **Gameball's Admin Settings**.
* **Subject:** write a single line appealing for more open rates. Make sure it's descriptive of the email content.
Write the body content of your email.
Press **Save**.
#### Sending Test Email
You can send a test email to yourself when using the "**Send Email**" as an action to a trigger in an automation. Click **Send test Message** after composing your email to review it before you launch the automation campaign.
Send customers a customized email once a workflow is triggered or a condition is met. With Gameball, you can craft compelling email messages tailored to your audience, maximizing the impact of your communication efforts.
### How to compose an email
Click on **Configure Email** on the card.
From the pop-up window to the side, fill in the email header fields:
* **From Name:** the name of your business, or representative.
* **From Email:** the email you want to appear in the email header. No need to write the domain here.
* **Domain:** pick the email address's domain. If the domain is not saved on Gameball, click **Change domain** and add it through **Gameball's Admin Settings**.
* **Subject:** write a single line appealing for more open rates. Make sure it's descriptive of the email content.
Write the body content of your email.
Press **Save**.
#### Sending Test Email
You can send a test email to yourself when using the "**Send Email**" as an action to a trigger in an automation. Click **Send test Message** after composing your email to review it before you launch the automation campaign.
 ### View Sent & Clicked Email Analytics Within Automation
You can view **email performance metrics**, including **Sent** and **Clicked** counts, directly inside each **Send Email** action node in your automations.
### View Sent & Clicked Email Analytics Within Automation
You can view **email performance metrics**, including **Sent** and **Clicked** counts, directly inside each **Send Email** action node in your automations.
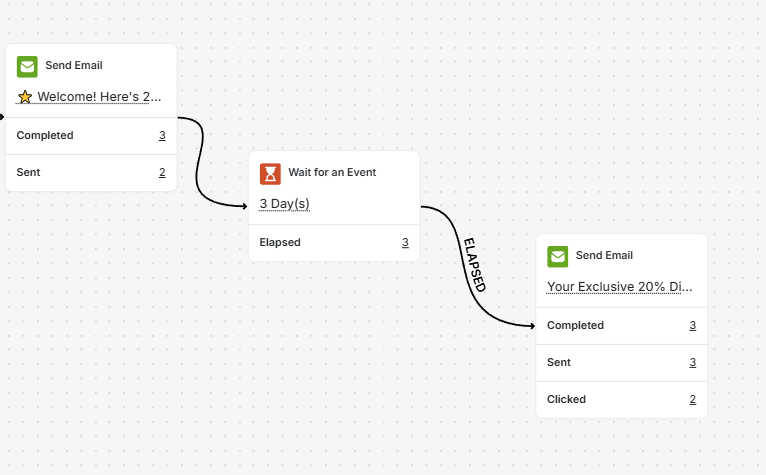 Each **Send Email** action node now displays:
* **Emails Sent**: the total number of successfully delivered emails (excluding bounces and failures).
* **Emails Clicked**: the number of unique customers who clicked the email.
Data refreshes in **real-time** (or within a few minutes).
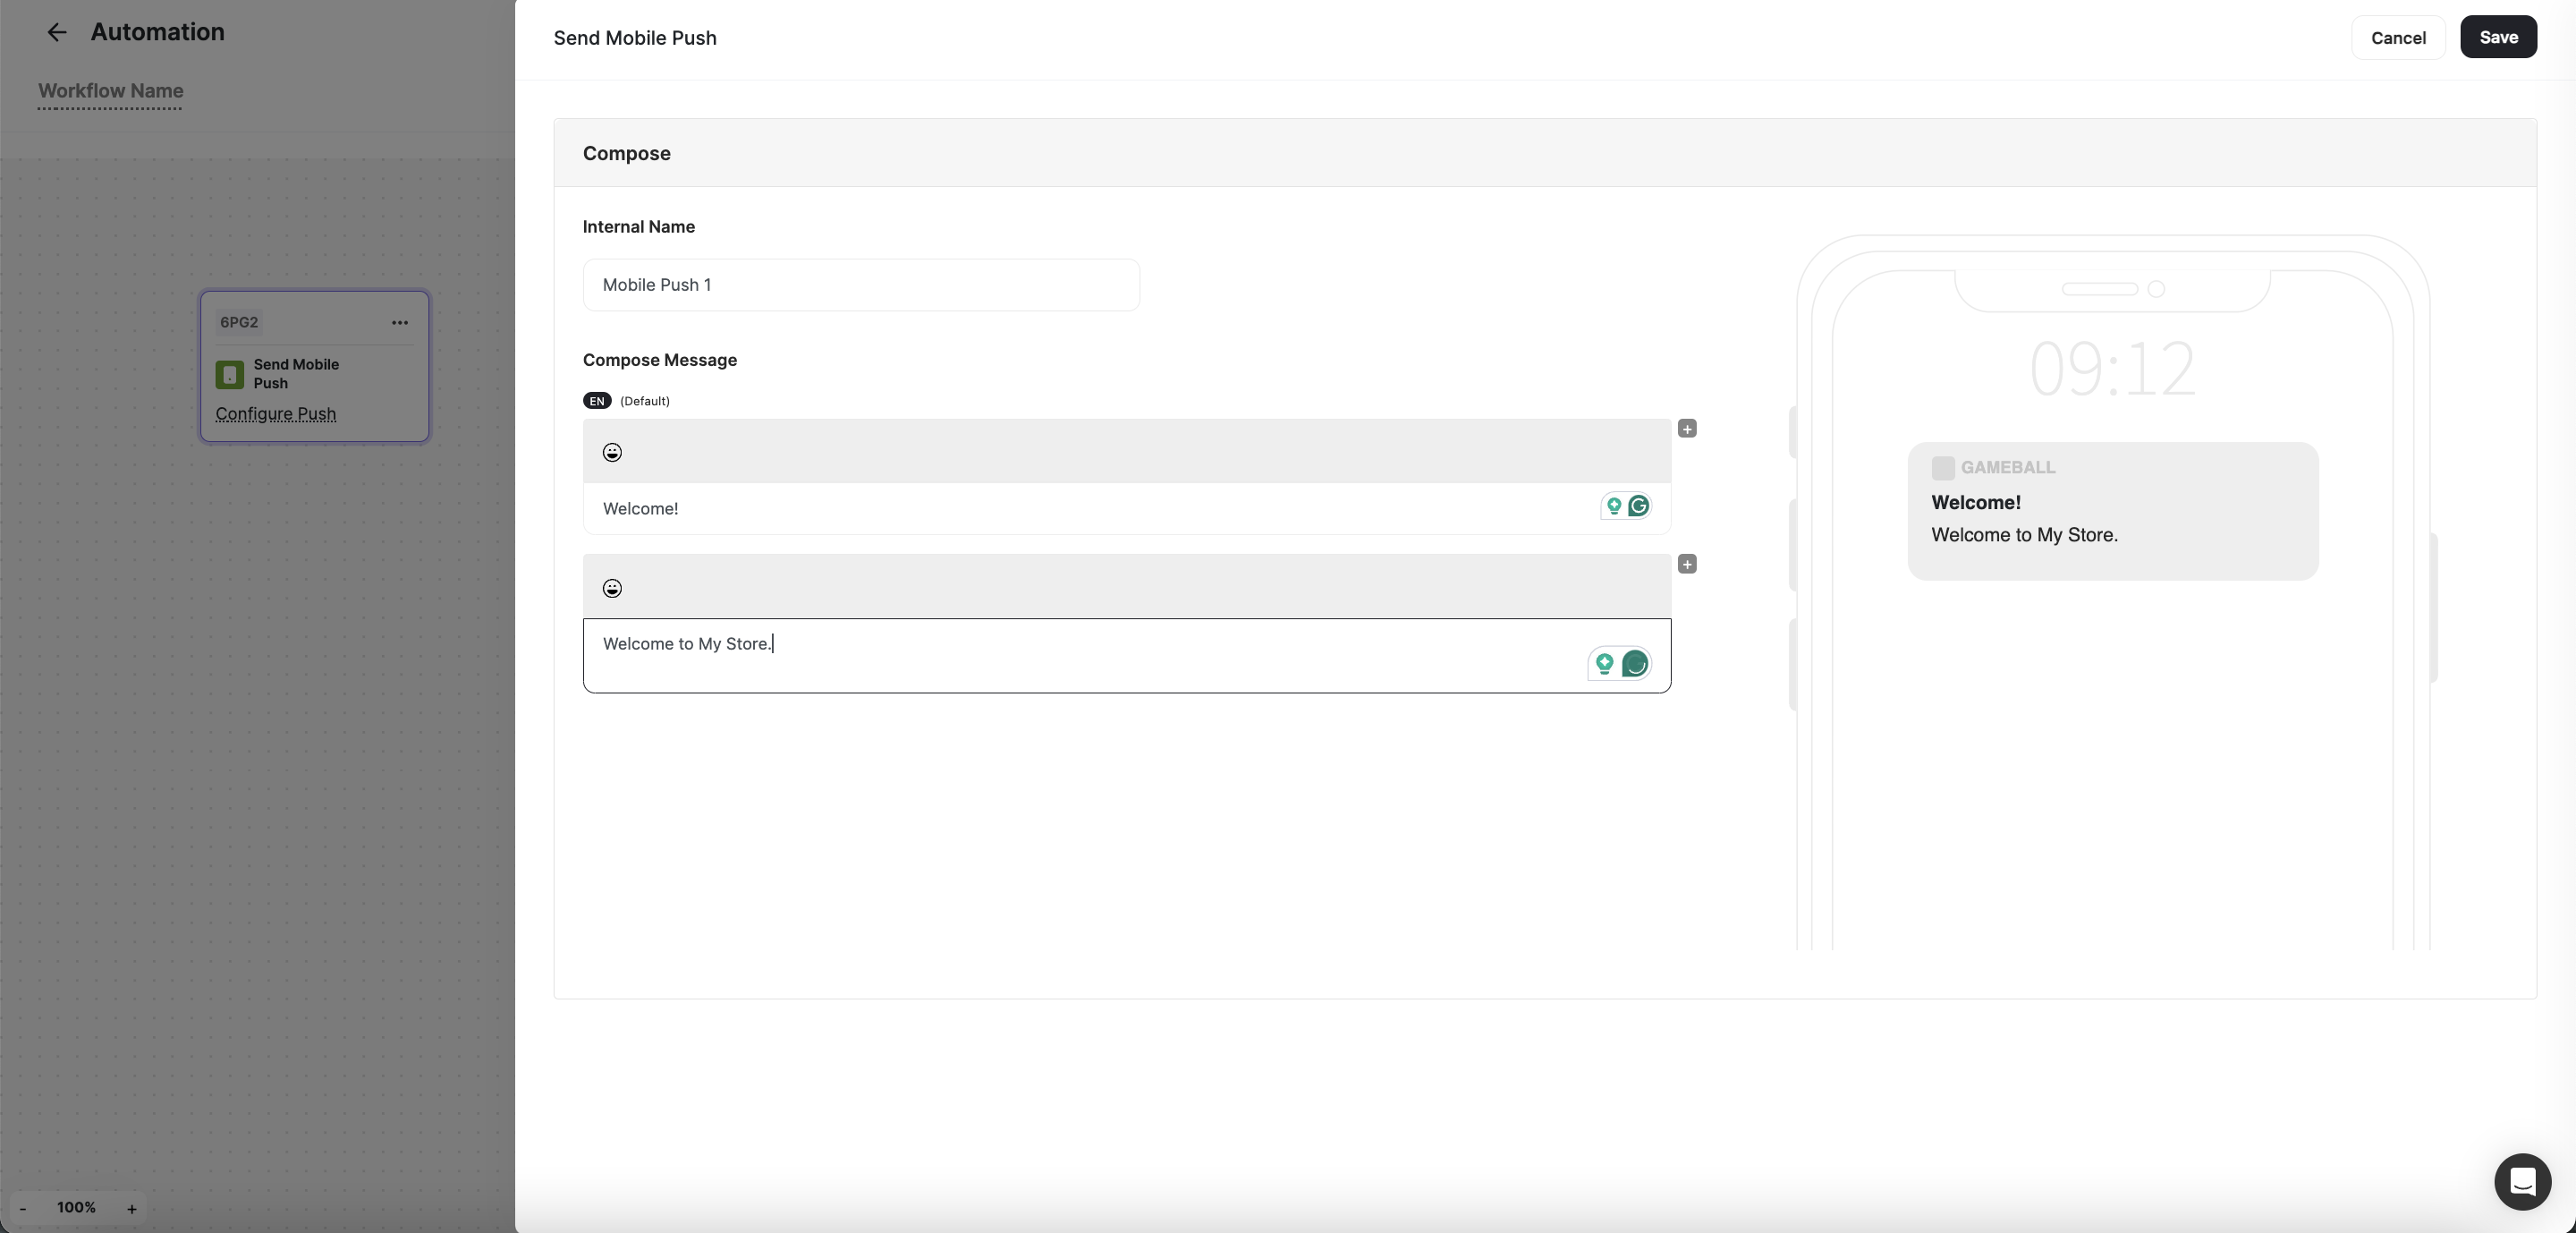
Deliver personalized mobile push messages to customers, enhancing engagement and driving action. Gameball enables you to create mobile push notifications that resonate with your audience, driving meaningful interactions with your app or platform.
You need to set up your Firebase integration first to be able to send out Push Notifications.
### How to compose a mobile push
Click on **Configure Push** on the card.
From the pop-up window to the side, fill in the **Internal Name** (this name does not show to customers through the message).
* **Message title:** a short bolded header that grabs the customer's attention.
* **Write your message here:** compose a short line that is straight to the point and persuasive.
Press **Save**.
Each **Send Email** action node now displays:
* **Emails Sent**: the total number of successfully delivered emails (excluding bounces and failures).
* **Emails Clicked**: the number of unique customers who clicked the email.
Data refreshes in **real-time** (or within a few minutes).
Deliver personalized mobile push messages to customers, enhancing engagement and driving action. Gameball enables you to create mobile push notifications that resonate with your audience, driving meaningful interactions with your app or platform.
You need to set up your Firebase integration first to be able to send out Push Notifications.
### How to compose a mobile push
Click on **Configure Push** on the card.
From the pop-up window to the side, fill in the **Internal Name** (this name does not show to customers through the message).
* **Message title:** a short bolded header that grabs the customer's attention.
* **Write your message here:** compose a short line that is straight to the point and persuasive.
Press **Save**.
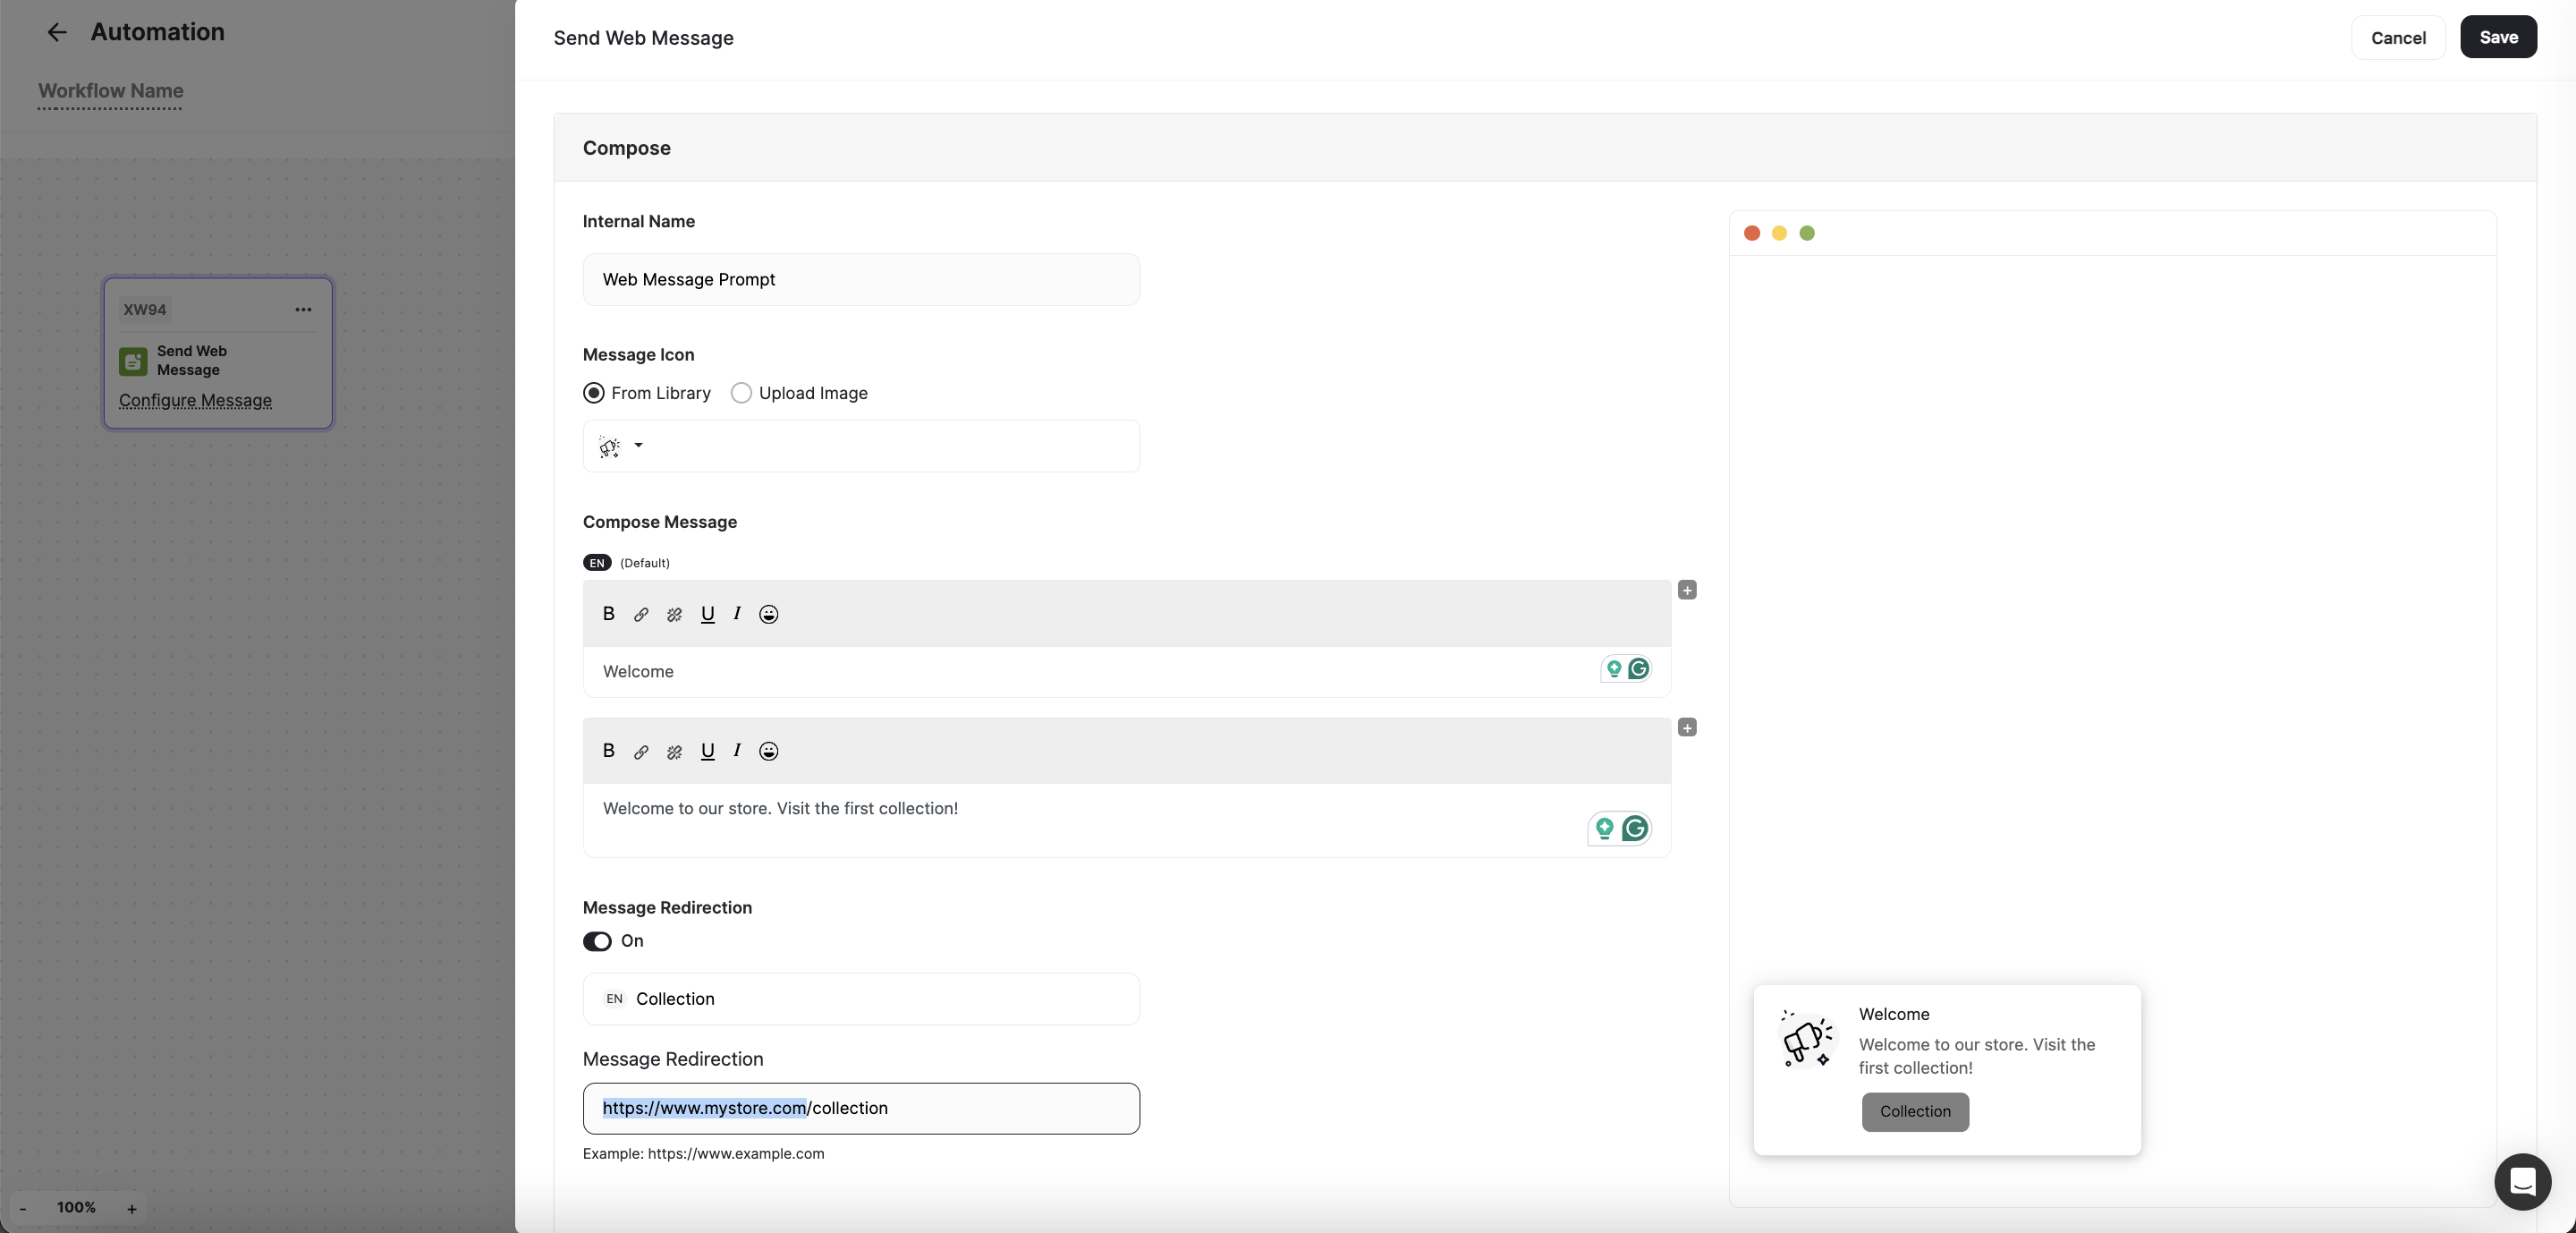
 Engage customers with targeted web messages delivered directly to their browsers. Whether it's announcing promotions, providing updates, or delivering personalized recommendations, Gameball allows you to craft compelling web messages that capture attention and drive engagement.
### How to compose a web message
Click on **Configure Message** on the card.
From the pop-up window to the side, fill in the **Internal Name** (this name does not show to customers through the message).
Select or upload the **Message Icon**.
* **Message title:** a short bolded header that grabs the customer's attention.
* **Write your message here:** compose a short line that is straight to the point and persuasive.
* **Button Text:** A few words that describe where this button leads to when clicked on.
* **Redirection URL:** insert the link of the page you want the customer to land on when they click on the button.
Press **Save**.
Engage customers with targeted web messages delivered directly to their browsers. Whether it's announcing promotions, providing updates, or delivering personalized recommendations, Gameball allows you to craft compelling web messages that capture attention and drive engagement.
### How to compose a web message
Click on **Configure Message** on the card.
From the pop-up window to the side, fill in the **Internal Name** (this name does not show to customers through the message).
Select or upload the **Message Icon**.
* **Message title:** a short bolded header that grabs the customer's attention.
* **Write your message here:** compose a short line that is straight to the point and persuasive.
* **Button Text:** A few words that describe where this button leads to when clicked on.
* **Redirection URL:** insert the link of the page you want the customer to land on when they click on the button.
Press **Save**.
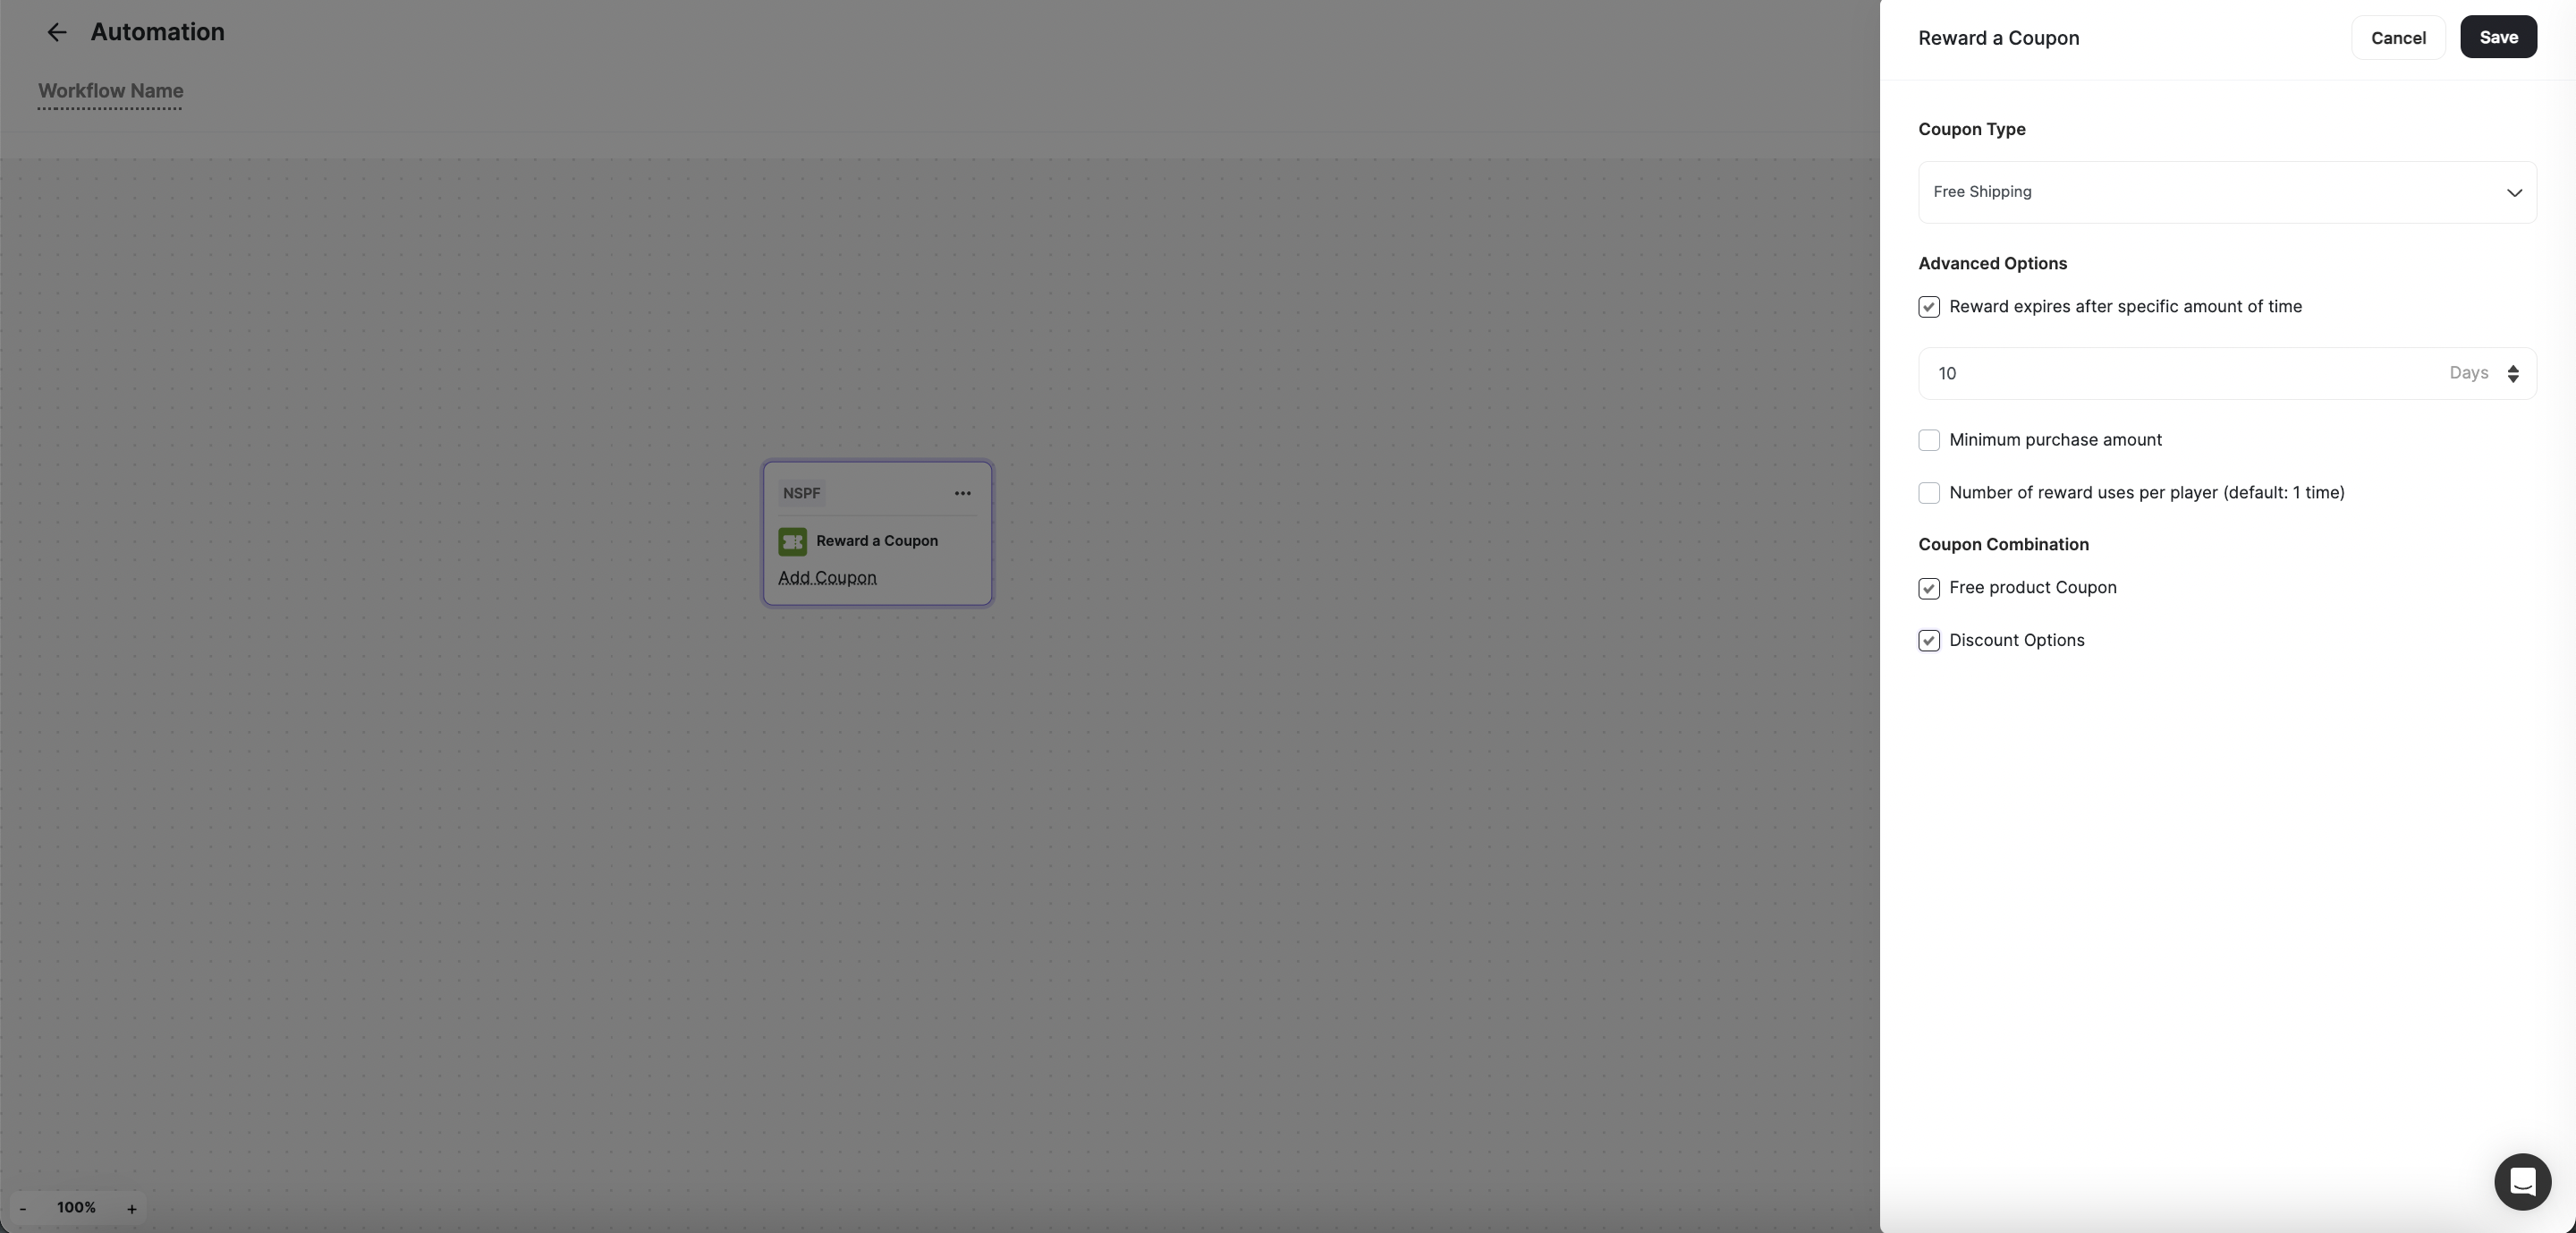
 Incentivize customer behavior by rewarding them with coupons once a workflow is triggered or a condition is met. With Gameball, you can choose from a drop-down list of existing coupons or create new ones to drive conversions and loyalty.
### How to set up the Reward a Coupon action
Click on **Add Coupon** on the card.
From the side pop-up, **Choose the Coupon Type**.
Set up the **Advanced Rewards Options**.
Press **Save**.
Incentivize customer behavior by rewarding them with coupons once a workflow is triggered or a condition is met. With Gameball, you can choose from a drop-down list of existing coupons or create new ones to drive conversions and loyalty.
### How to set up the Reward a Coupon action
Click on **Add Coupon** on the card.
From the side pop-up, **Choose the Coupon Type**.
Set up the **Advanced Rewards Options**.
Press **Save**.
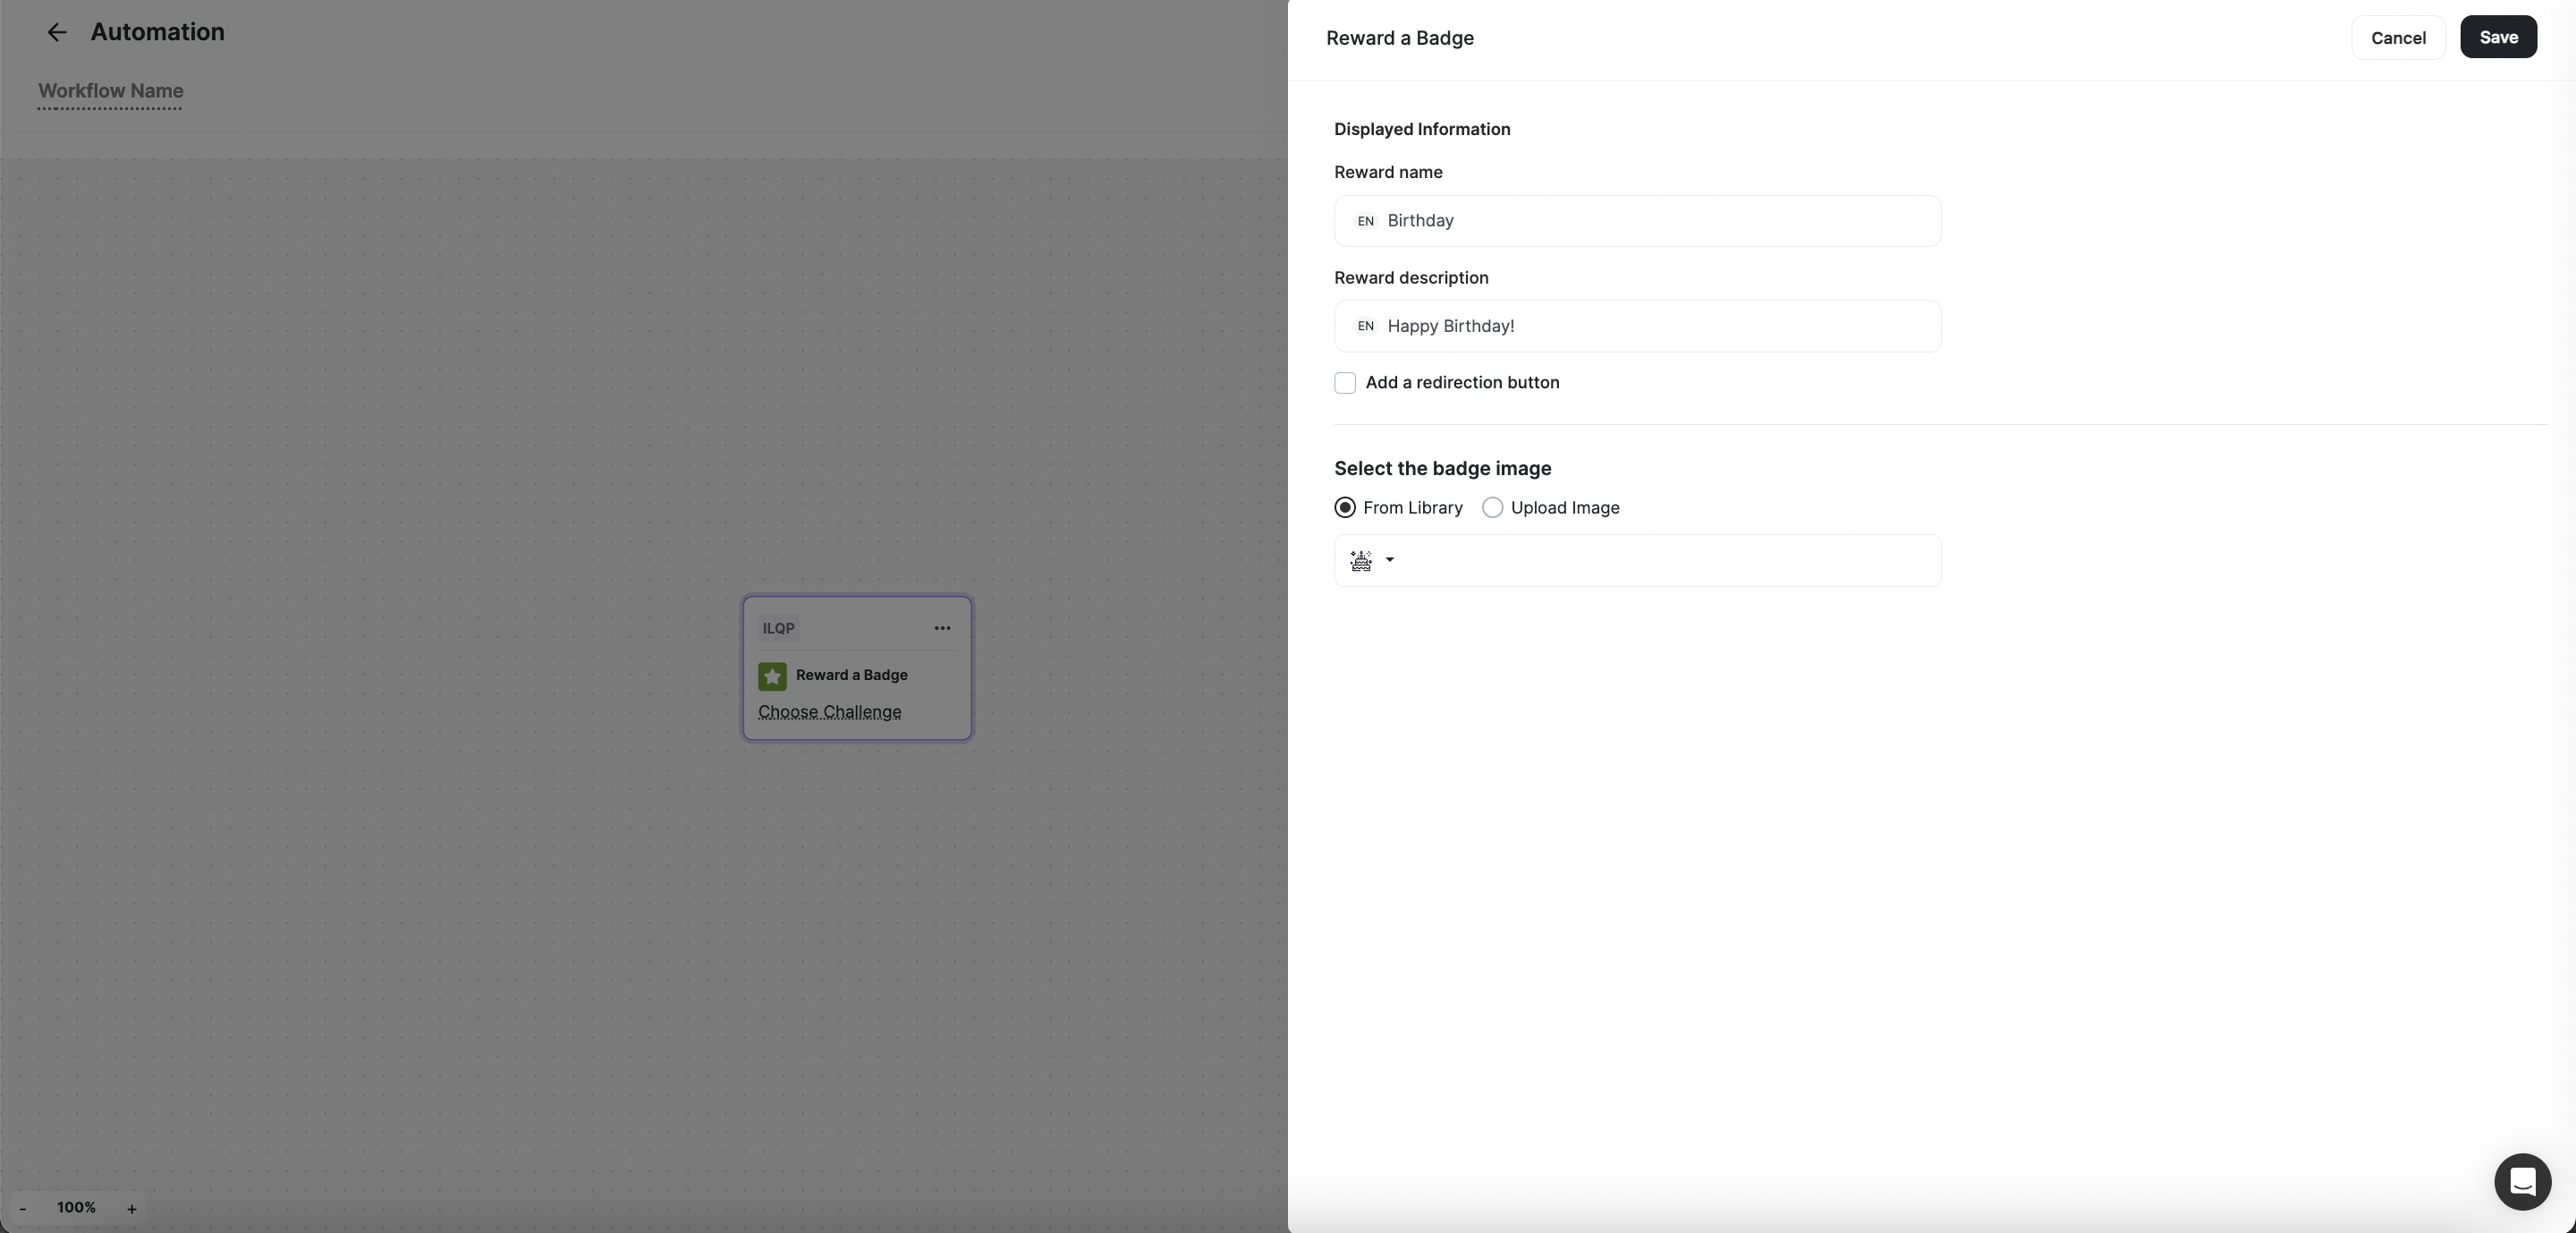
 Motivate customers by rewarding them with a badge once a workflow is triggered or a condition is met. Gameball enables you to choose from a drop-down list of existing badges or create new ones to encourage continuous engagement and progression.
### How to set up the Reward a Badge action
Click on **Choose Badge** on the card.
From the side pop-up, **Choose the badge**.
Press **Save**.
Motivate customers by rewarding them with a badge once a workflow is triggered or a condition is met. Gameball enables you to choose from a drop-down list of existing badges or create new ones to encourage continuous engagement and progression.
### How to set up the Reward a Badge action
Click on **Choose Badge** on the card.
From the side pop-up, **Choose the badge**.
Press **Save**.
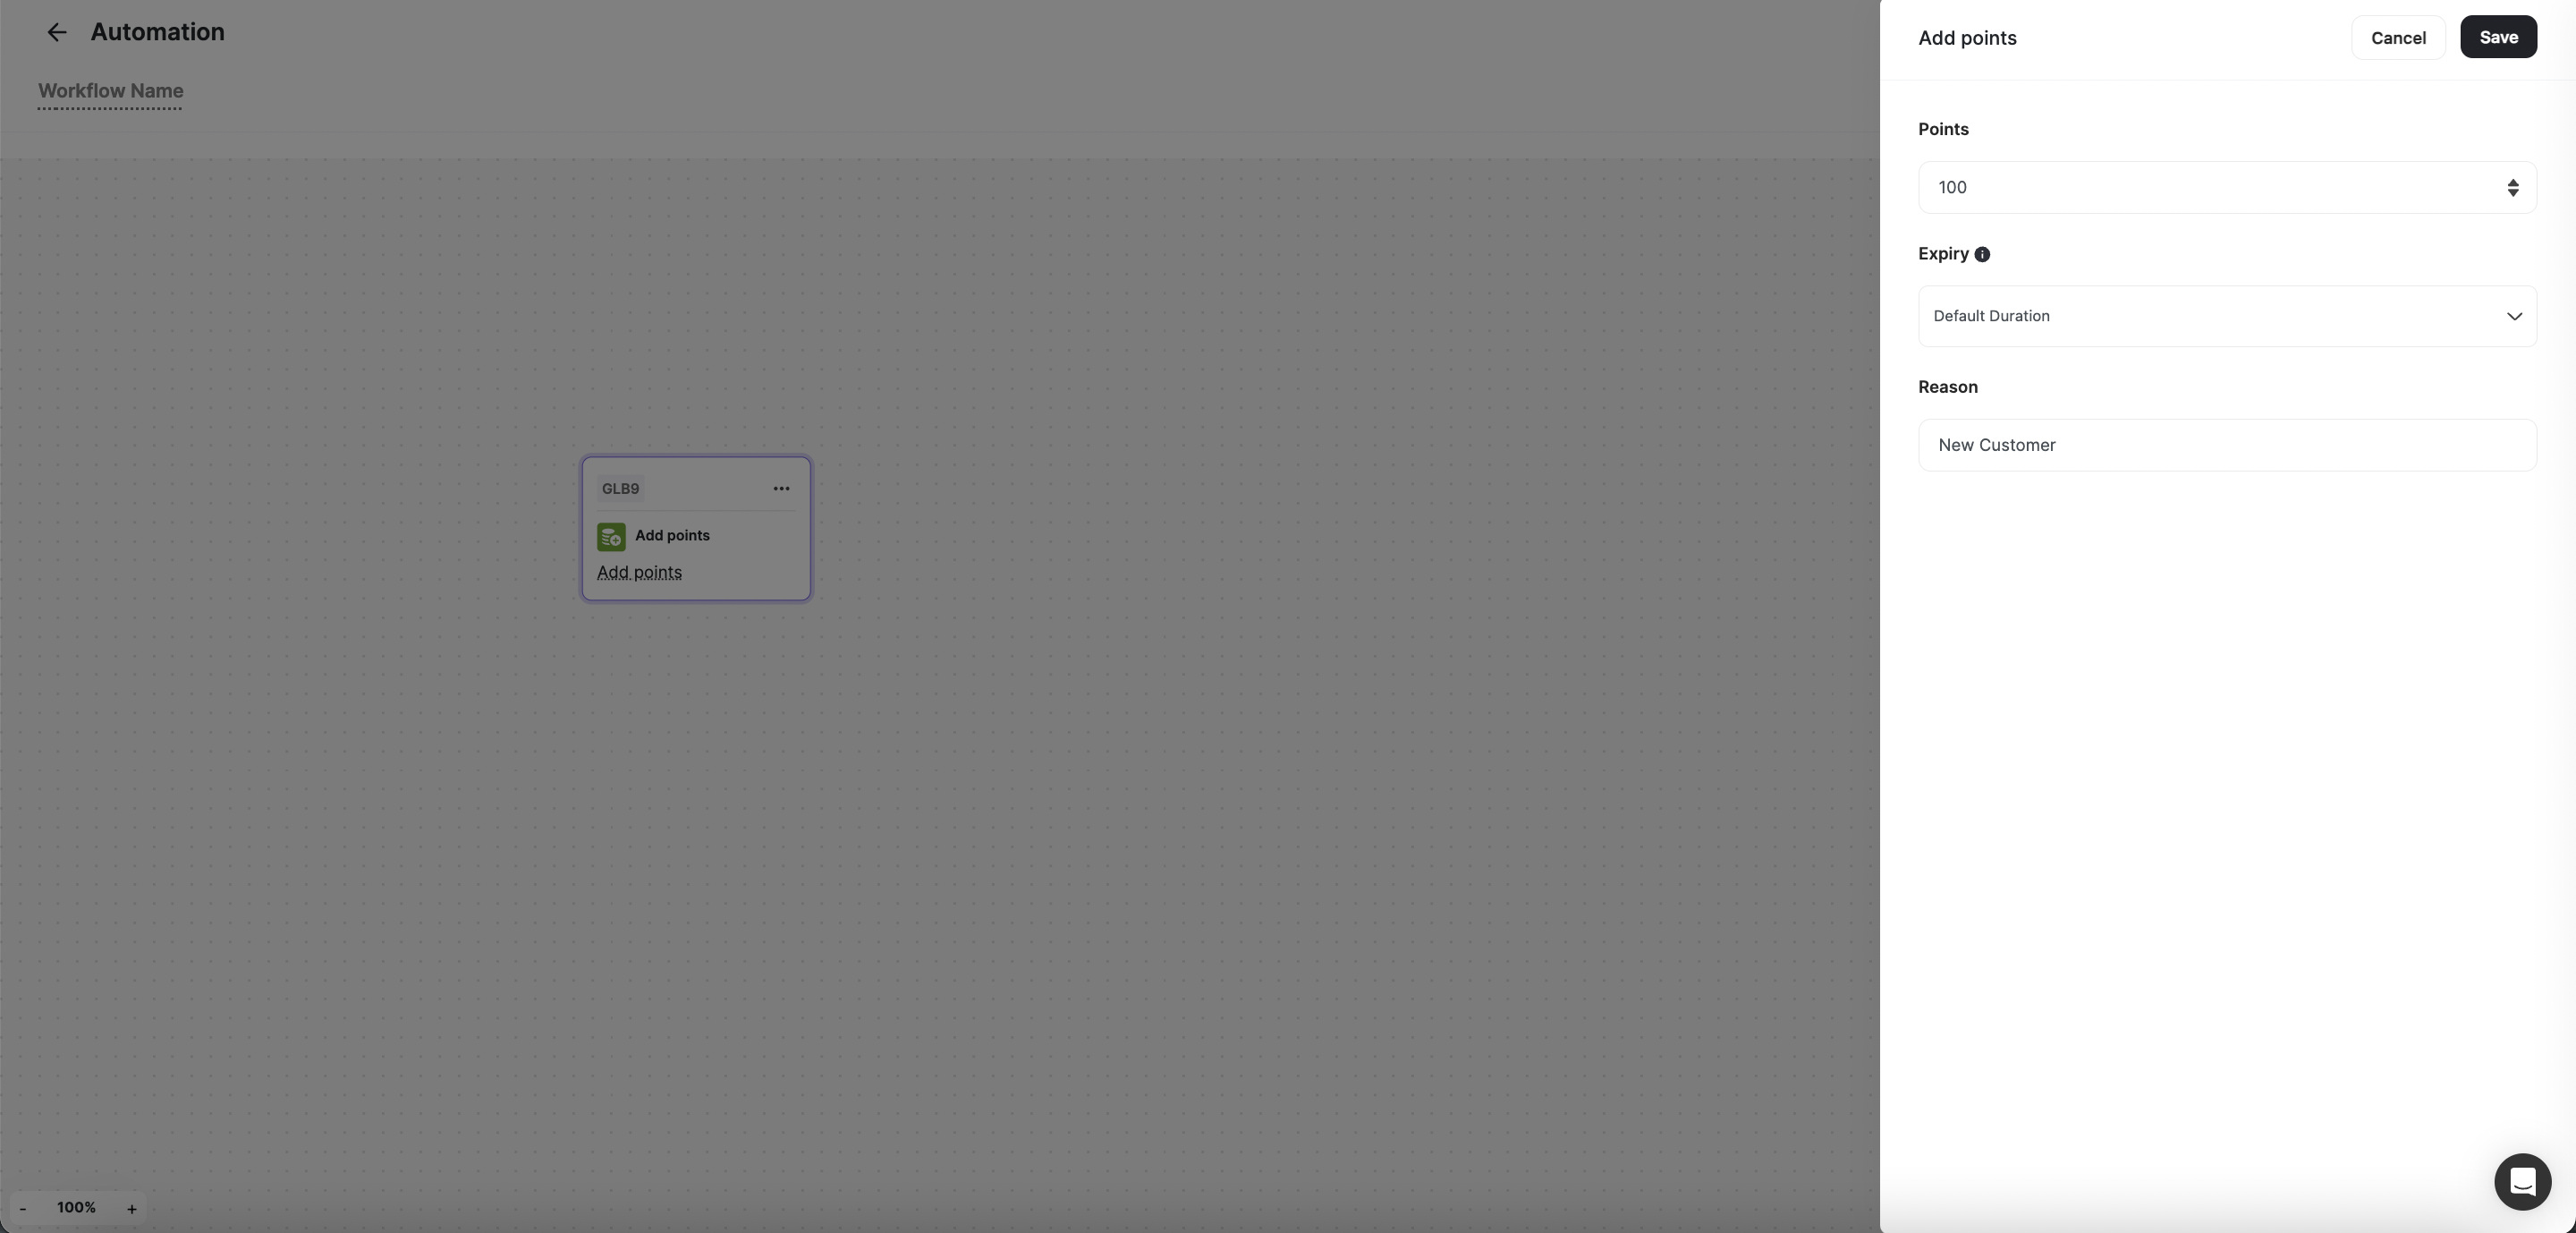
 Recognize customer achievements by granting them a certain number of points once a workflow is triggered or a condition is met. You can easily specify the number of points to be added and provide a reason for the reward, fostering a sense of accomplishment and motivation.
### How to set up the Add Points action
Click on **Add Points** on the card.
From the side pop-up, set the **Number of Points**.
Add the **Reason** for the points being added.
Press **Save**.
Recognize customer achievements by granting them a certain number of points once a workflow is triggered or a condition is met. You can easily specify the number of points to be added and provide a reason for the reward, fostering a sense of accomplishment and motivation.
### How to set up the Add Points action
Click on **Add Points** on the card.
From the side pop-up, set the **Number of Points**.
Add the **Reason** for the points being added.
Press **Save**.
 Maintain balance and fairness by deducting points from customers when necessary. Gameball allows you to specify the number of points to be removed and provide a reason for the deduction, ensuring transparency and accountability in your rewards program.
### How to set up the Deduct Points action
Click on **Deduct Points** on the card.
From the side pop-up, set the **Number of Points**.
Add the **Reason** for the deduction.
Press **Save**.
Maintain balance and fairness by deducting points from customers when necessary. Gameball allows you to specify the number of points to be removed and provide a reason for the deduction, ensuring transparency and accountability in your rewards program.
### How to set up the Deduct Points action
Click on **Deduct Points** on the card.
From the side pop-up, set the **Number of Points**.
Add the **Reason** for the deduction.
Press **Save**.
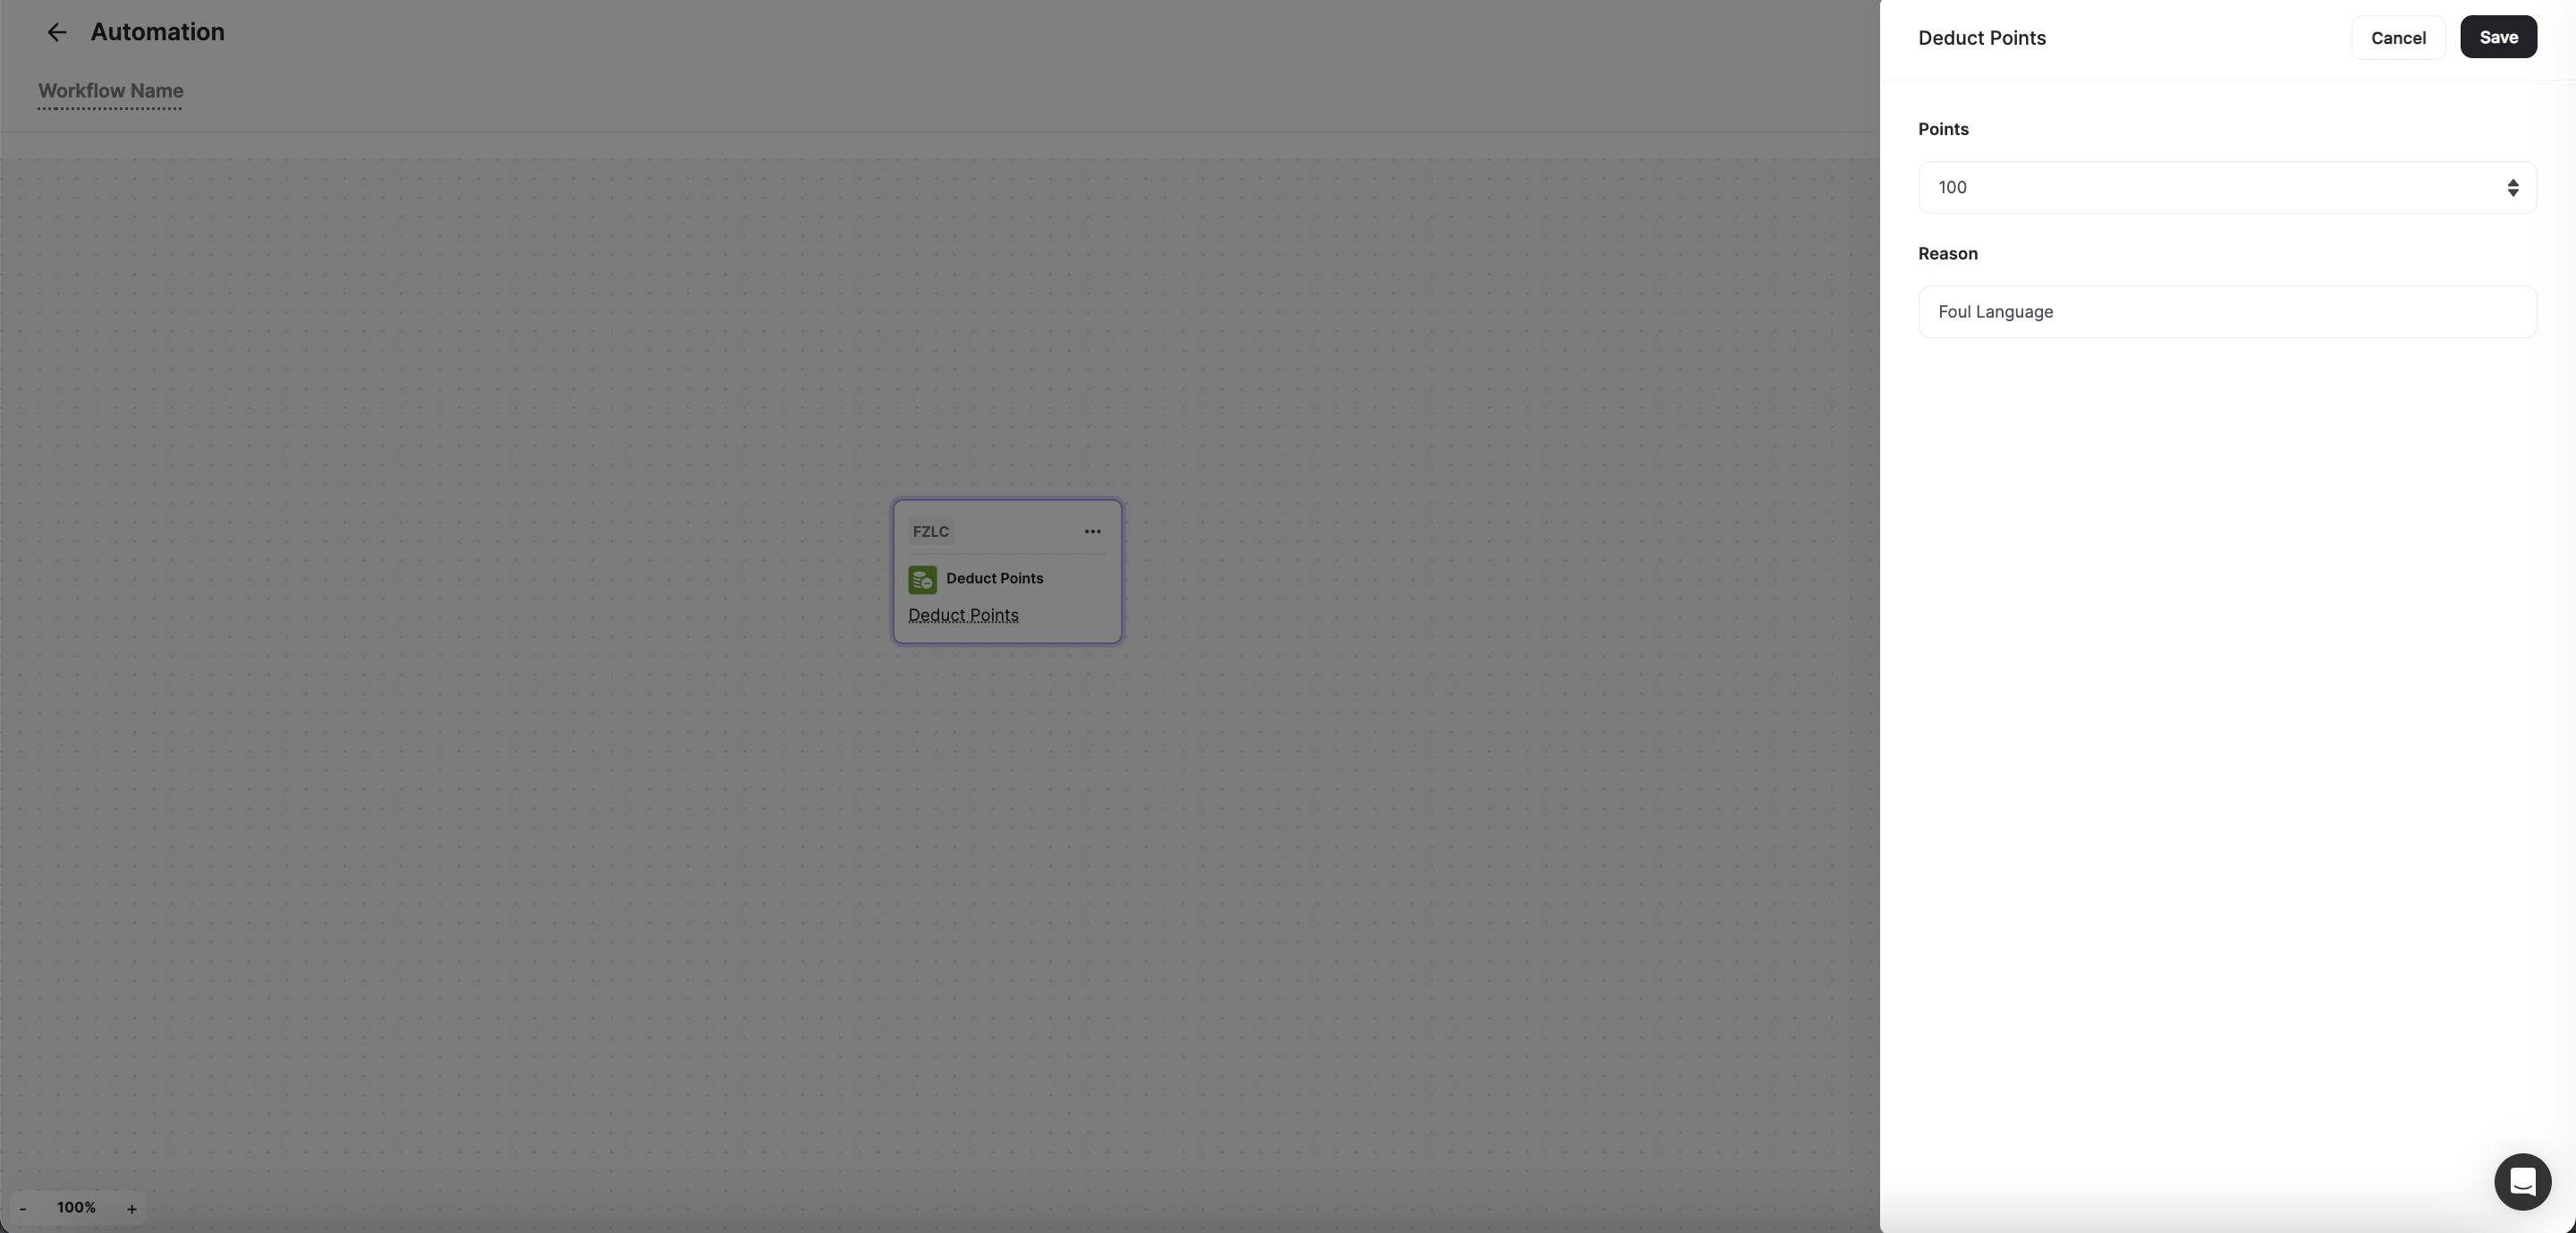 Segment customers effectively by applying specific tags once a workflow is triggered or a condition is met. With Gameball, you can choose from a drop-down list of existing tags to categorize customers based on their behavior, preferences, or characteristics.
### How to set up the Add Tag action
Click on **Choose Tag** on the card.
From the side pop-up, **Select the Tag**.
Press **Save**.
Segment customers effectively by applying specific tags once a workflow is triggered or a condition is met. With Gameball, you can choose from a drop-down list of existing tags to categorize customers based on their behavior, preferences, or characteristics.
### How to set up the Add Tag action
Click on **Choose Tag** on the card.
From the side pop-up, **Select the Tag**.
Press **Save**.
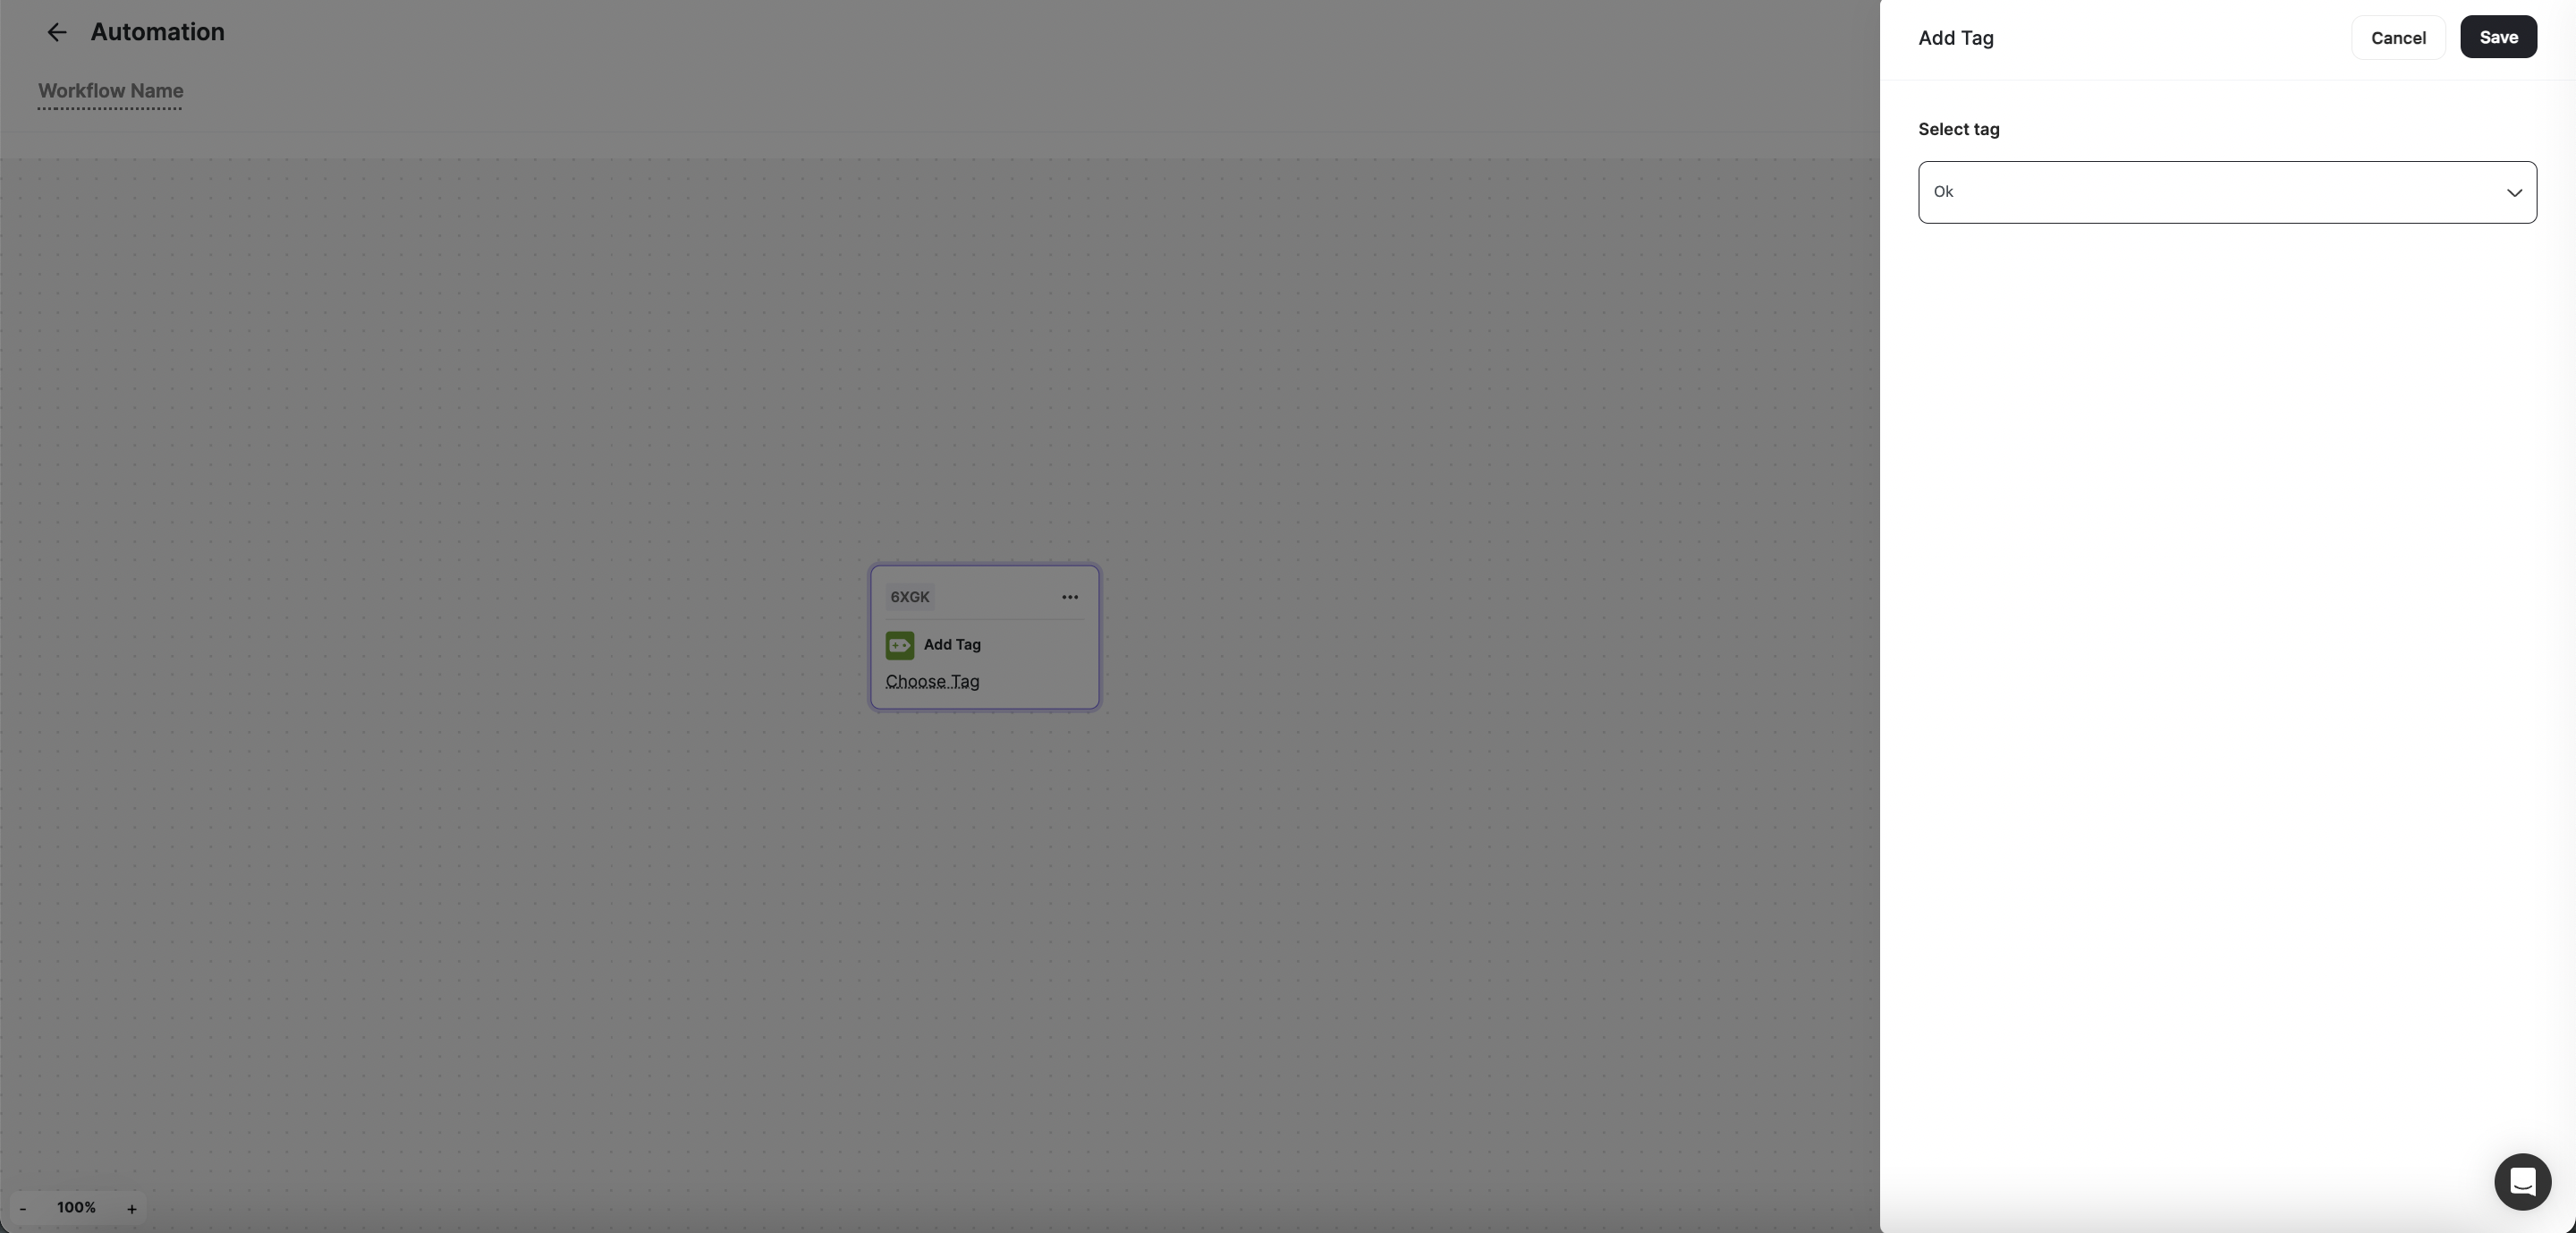 Refine customer segmentation by removing specific tags once a workflow is triggered or a condition is met. Gameball enables you to choose from a drop-down list of existing tags, ensuring that your customer data remains organized and actionable.
### How to set up the Remove Tag action
Click on **Choose Tag** on the card.
From the side pop-up, **Select the Tag**.
Press **Save**.
Refine customer segmentation by removing specific tags once a workflow is triggered or a condition is met. Gameball enables you to choose from a drop-down list of existing tags, ensuring that your customer data remains organized and actionable.
### How to set up the Remove Tag action
Click on **Choose Tag** on the card.
From the side pop-up, **Select the Tag**.
Press **Save**.
 Integrate seamlessly with external apps and services by sending customers' information via webhooks. Gameball allows you to set up webhooks to transfer data securely, enabling real-time communication and synchronization between systems. [Learn how to set up the Send Webhook action](/product-documentation/automation-campaigns/webhooks-in-automation).
Mastering automation actions is key to unlocking the full potential of your automation campaigns. By leveraging the diverse range of automation actions provided by Gameball, you can create personalized experiences, drive engagement, and achieve your goals effectively.
***
### Related Articles
Step-by-step guide to building your first automation campaign.
Learn about all available triggers that can initiate your automation workflows.
Learn about conditions and branching logic available in automations.
Integrate seamlessly with external apps and services by sending customers' information via webhooks. Gameball allows you to set up webhooks to transfer data securely, enabling real-time communication and synchronization between systems. [Learn how to set up the Send Webhook action](/product-documentation/automation-campaigns/webhooks-in-automation).
Mastering automation actions is key to unlocking the full potential of your automation campaigns. By leveraging the diverse range of automation actions provided by Gameball, you can create personalized experiences, drive engagement, and achieve your goals effectively.
***
### Related Articles
Step-by-step guide to building your first automation campaign.
Learn about all available triggers that can initiate your automation workflows.
Learn about conditions and branching logic available in automations.