> ## Documentation Index
> Fetch the complete documentation index at: https://docs.gameball.co/llms.txt
> Use this file to discover all available pages before exploring further.
# What Are Automation Triggers?
> Learn more about Gameball's Automation Campaigns triggers, and how to use them.
Automation triggers serve as the backbone of efficient workflows, enabling businesses to automate tasks seamlessly. In this article, we delve into the various automation triggers offered by Gameball, exploring their functionalities and applications in detail.
## Exploring Automation Campaign Triggers
Automation triggers are the catalysts that initiate predefined actions within workflows. Understanding these triggers is essential for maximizing the efficiency of automation campaigns.
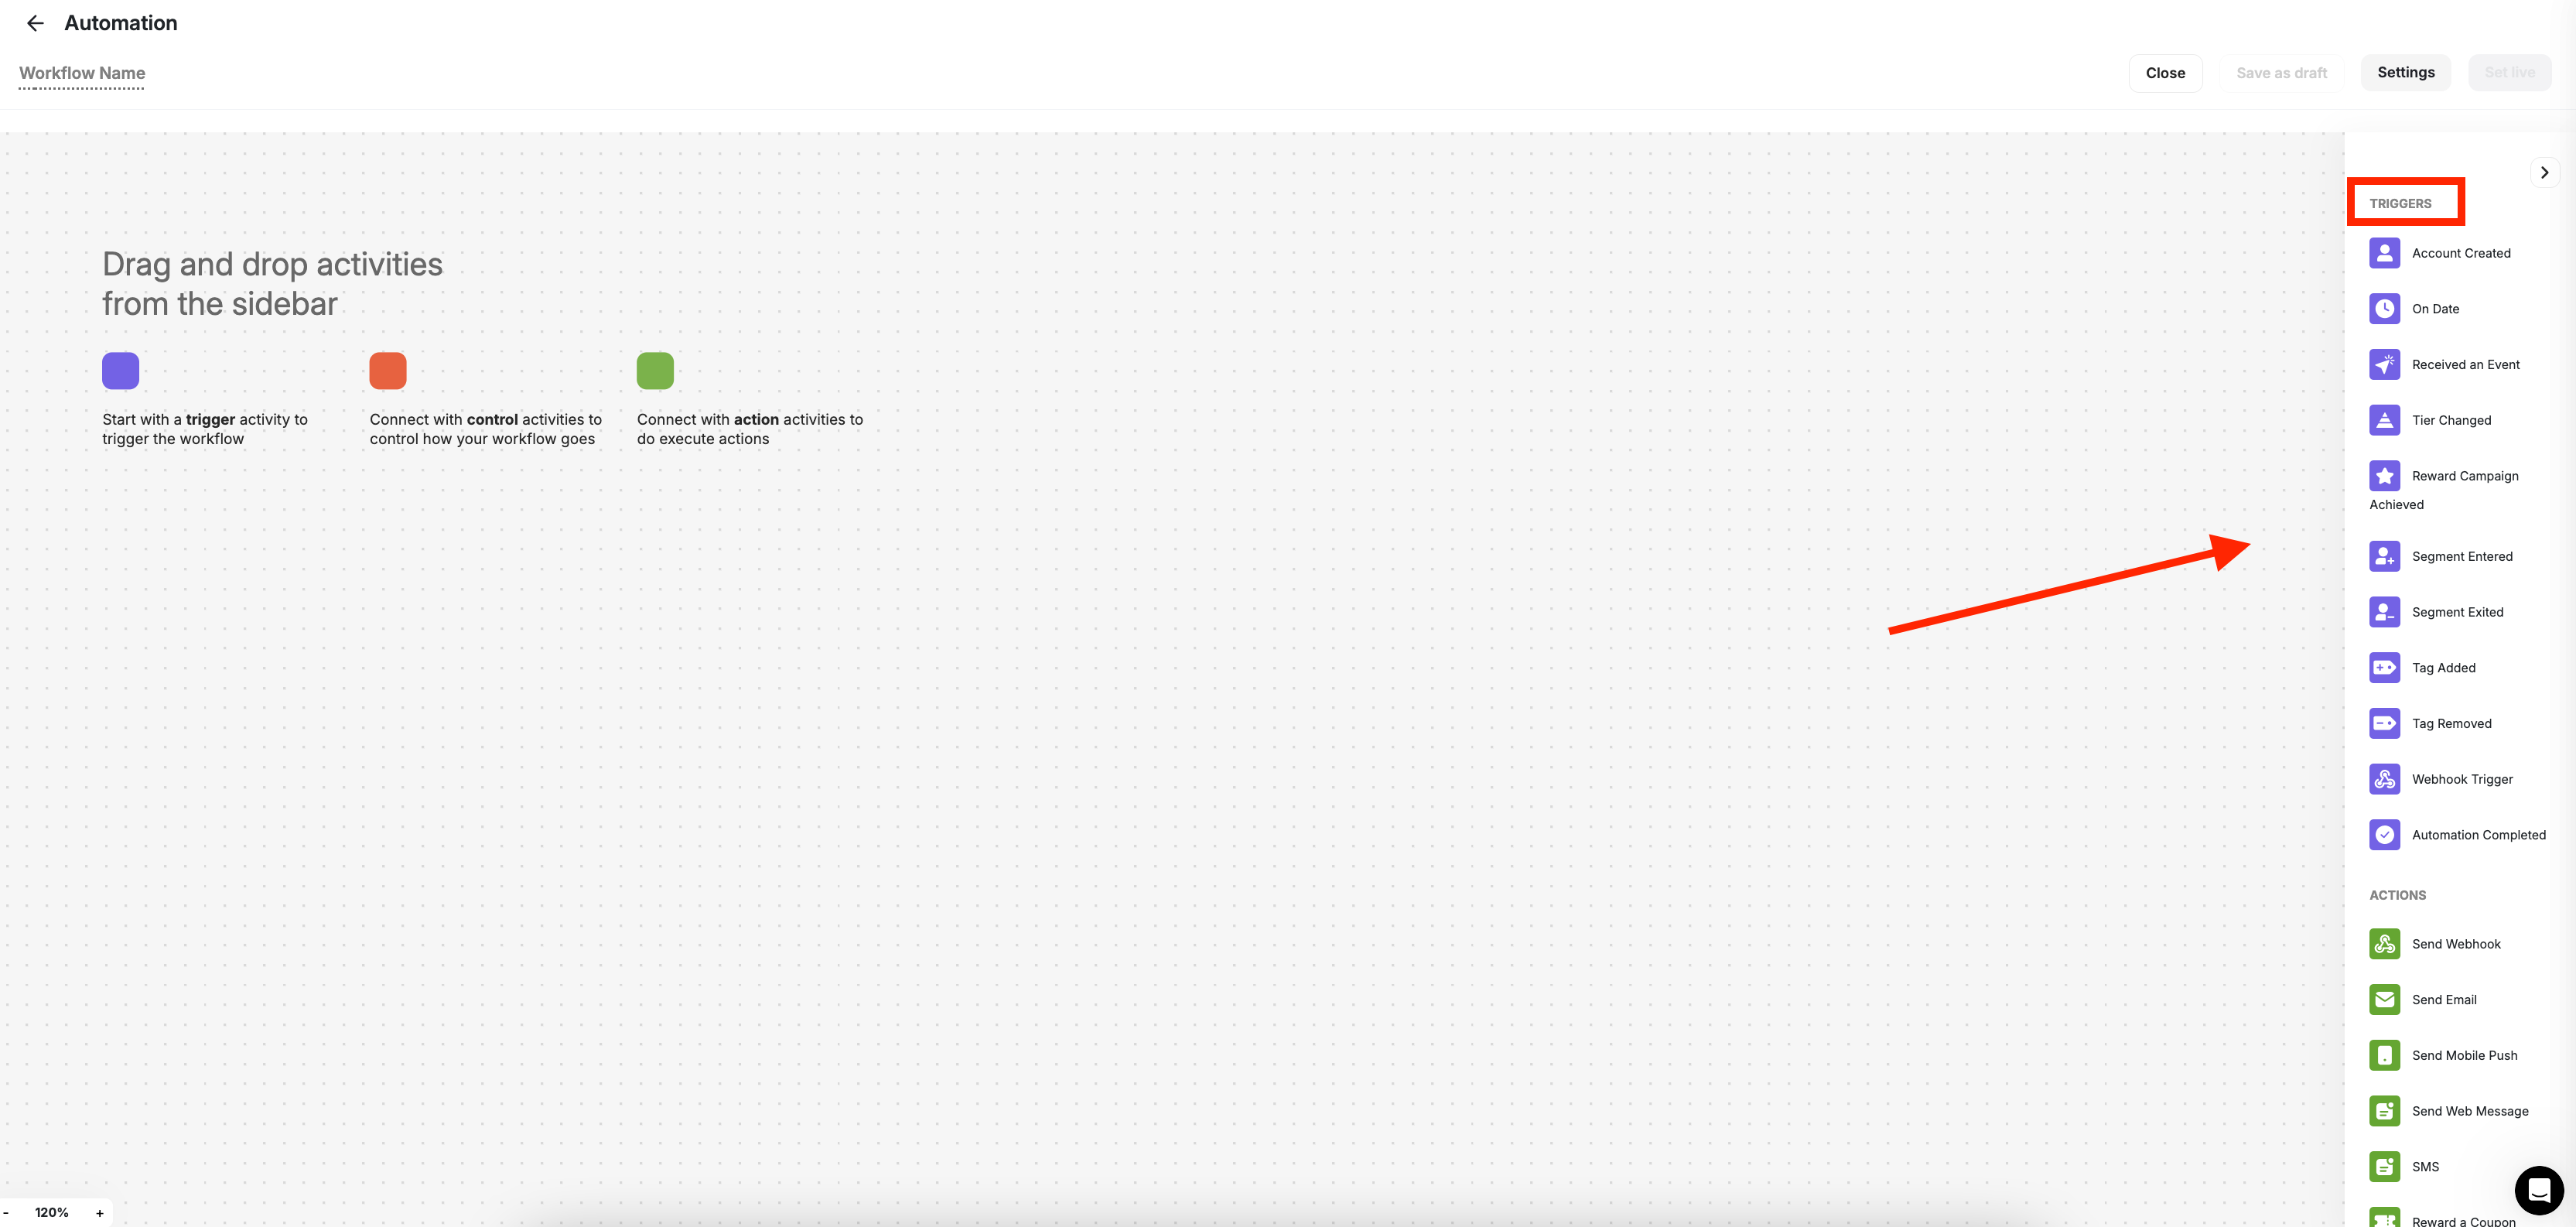 Triggered once a customer creates an account, the Account Created trigger marks the beginning of a user's journey with your business. This trigger presents an opportunity for you to initiate onboarding processes, welcome new users, and provide valuable information or incentives to encourage further engagement.
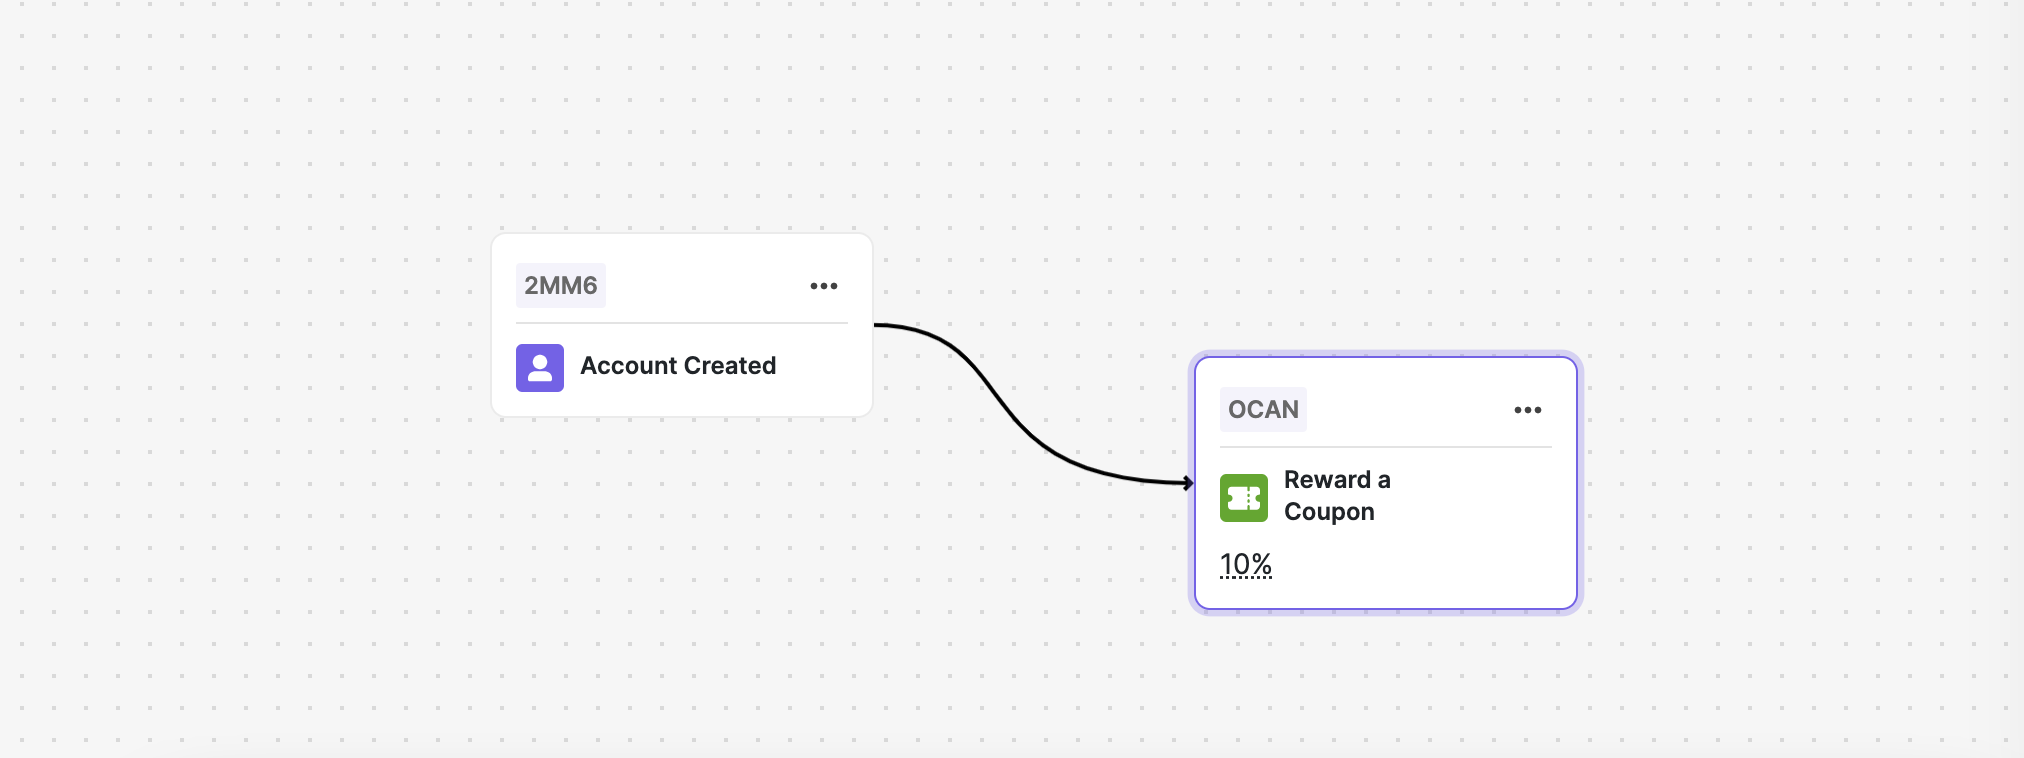 Start automation on a specific date/time with the OnDate Trigger. This feature allows businesses to schedule automation campaigns in advance, ensuring the timely execution of tasks and communications. For example, Black Friday, flash sale, brand anniversary, etc.
### How to set up the On Date trigger
Click on **Set Date** on the card.
From the side pop-up, **Select an Option (Birthday, Join Date, or Custom)**.
If you chose custom, then select the **Date/Time**.
Press **Save**.
Start automation on a specific date/time with the OnDate Trigger. This feature allows businesses to schedule automation campaigns in advance, ensuring the timely execution of tasks and communications. For example, Black Friday, flash sale, brand anniversary, etc.
### How to set up the On Date trigger
Click on **Set Date** on the card.
From the side pop-up, **Select an Option (Birthday, Join Date, or Custom)**.
If you chose custom, then select the **Date/Time**.
Press **Save**.
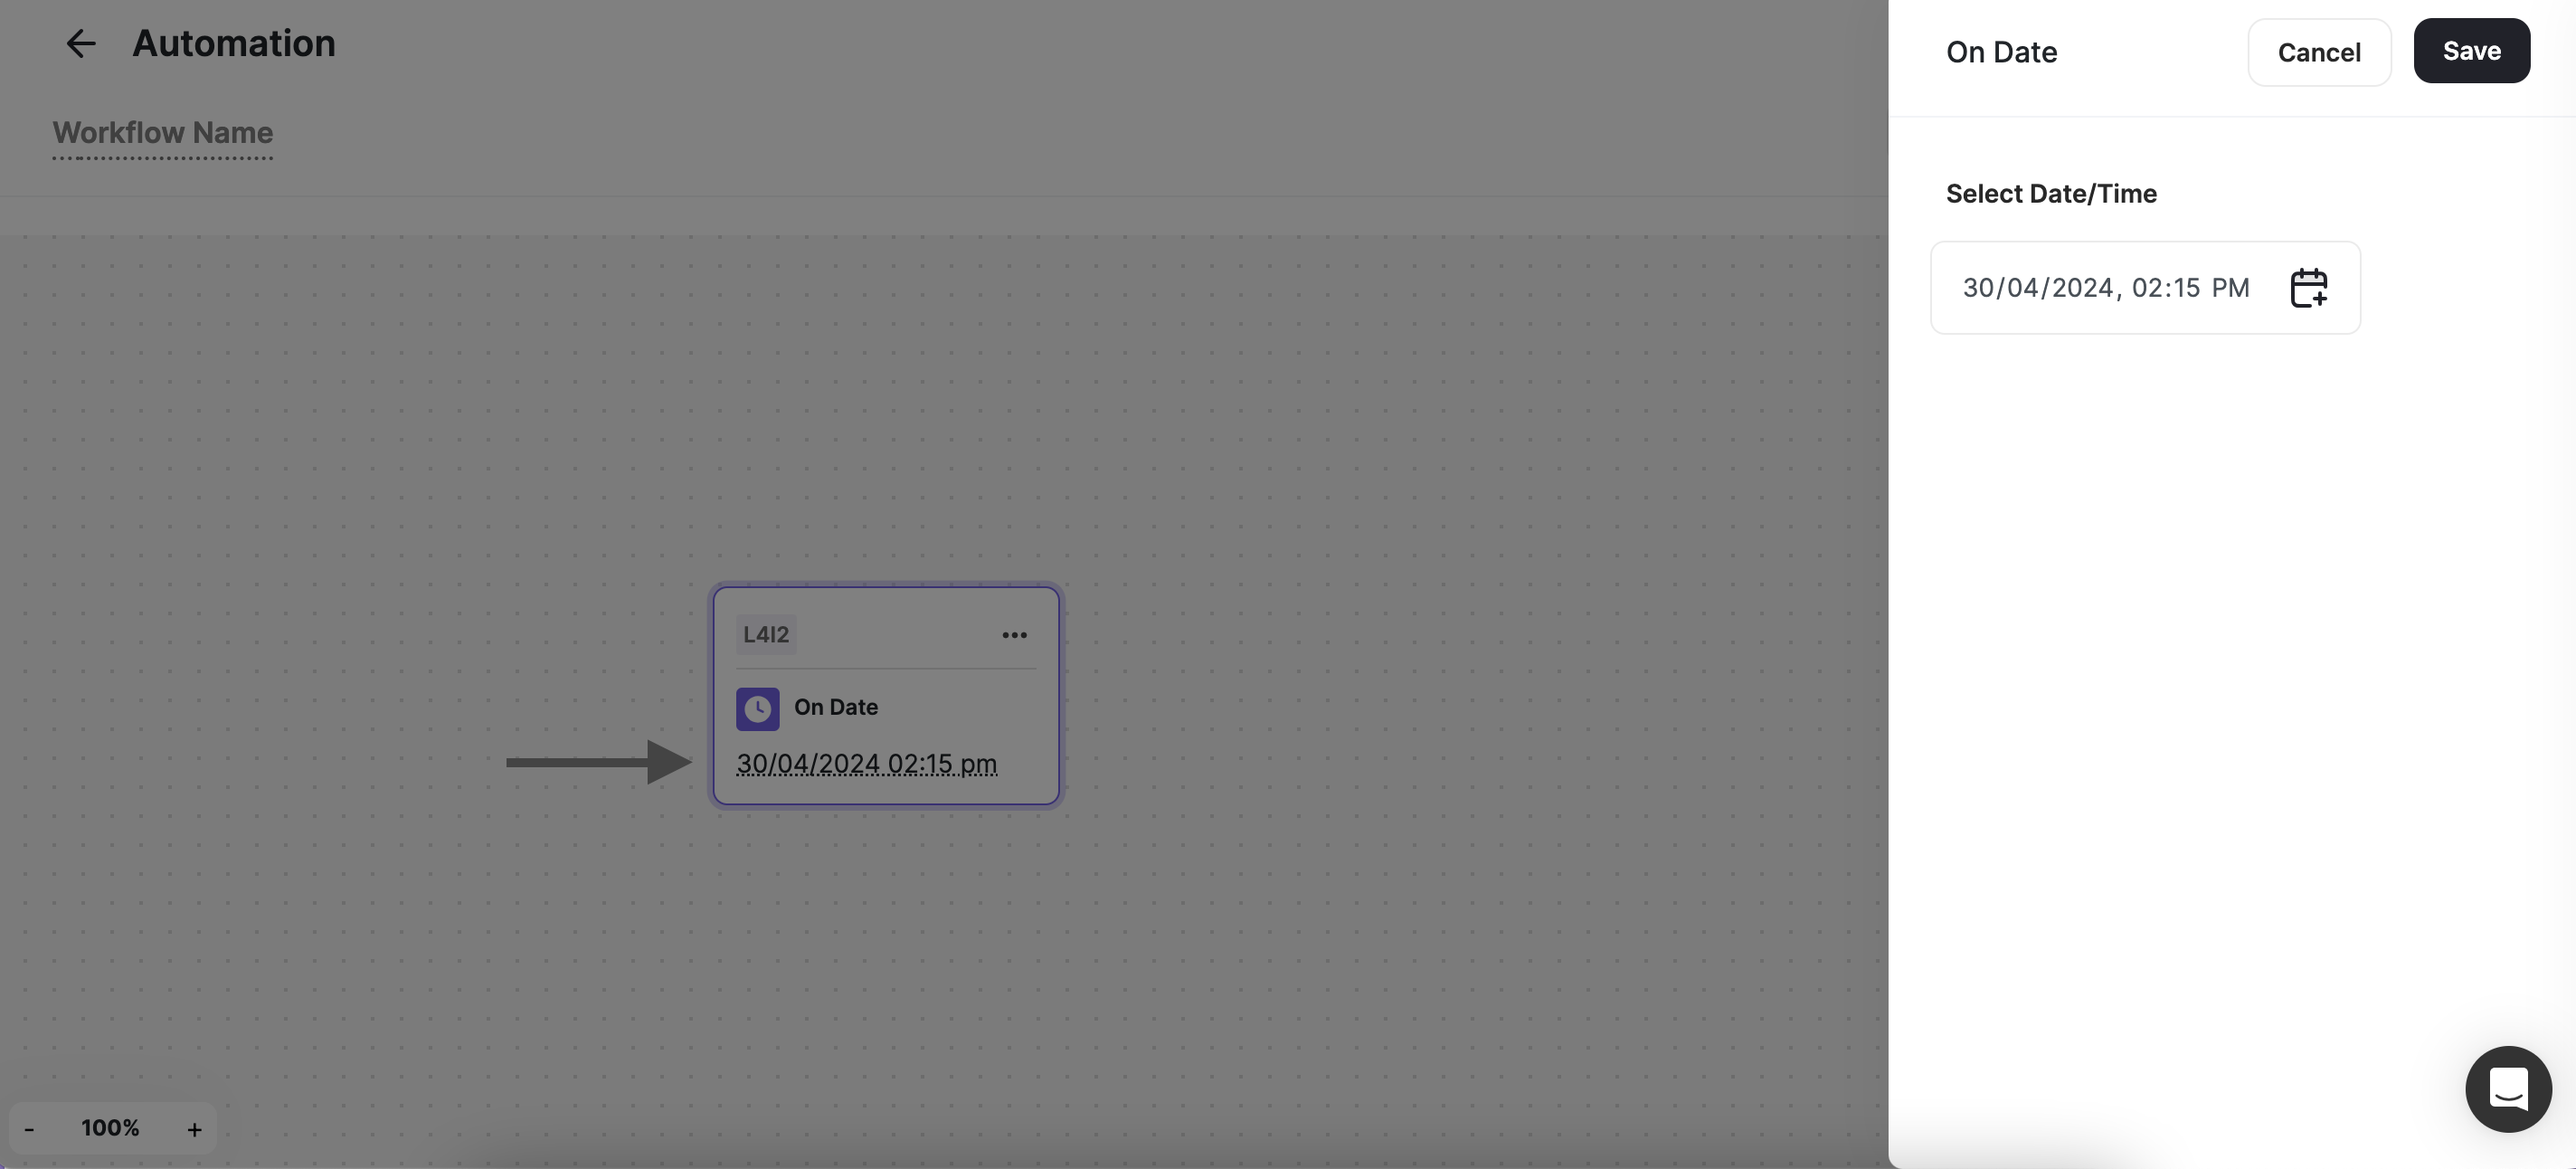 This trigger is activated when a customer completes a specific action on the platform. Whether it's making a purchase, writing a review, filling out a survey, viewing a product, or engaging with content, the Receive Event trigger allows you to respond promptly to user interactions.
### How to set up the Received an Event trigger
Click on **Add Event** on the card.
From the side pop-up, **Choose Event**.
**Apply** the **Filters** you need.
Press **Save**.
This trigger is activated when a customer completes a specific action on the platform. Whether it's making a purchase, writing a review, filling out a survey, viewing a product, or engaging with content, the Receive Event trigger allows you to respond promptly to user interactions.
### How to set up the Received an Event trigger
Click on **Add Event** on the card.
From the side pop-up, **Choose Event**.
**Apply** the **Filters** you need.
Press **Save**.
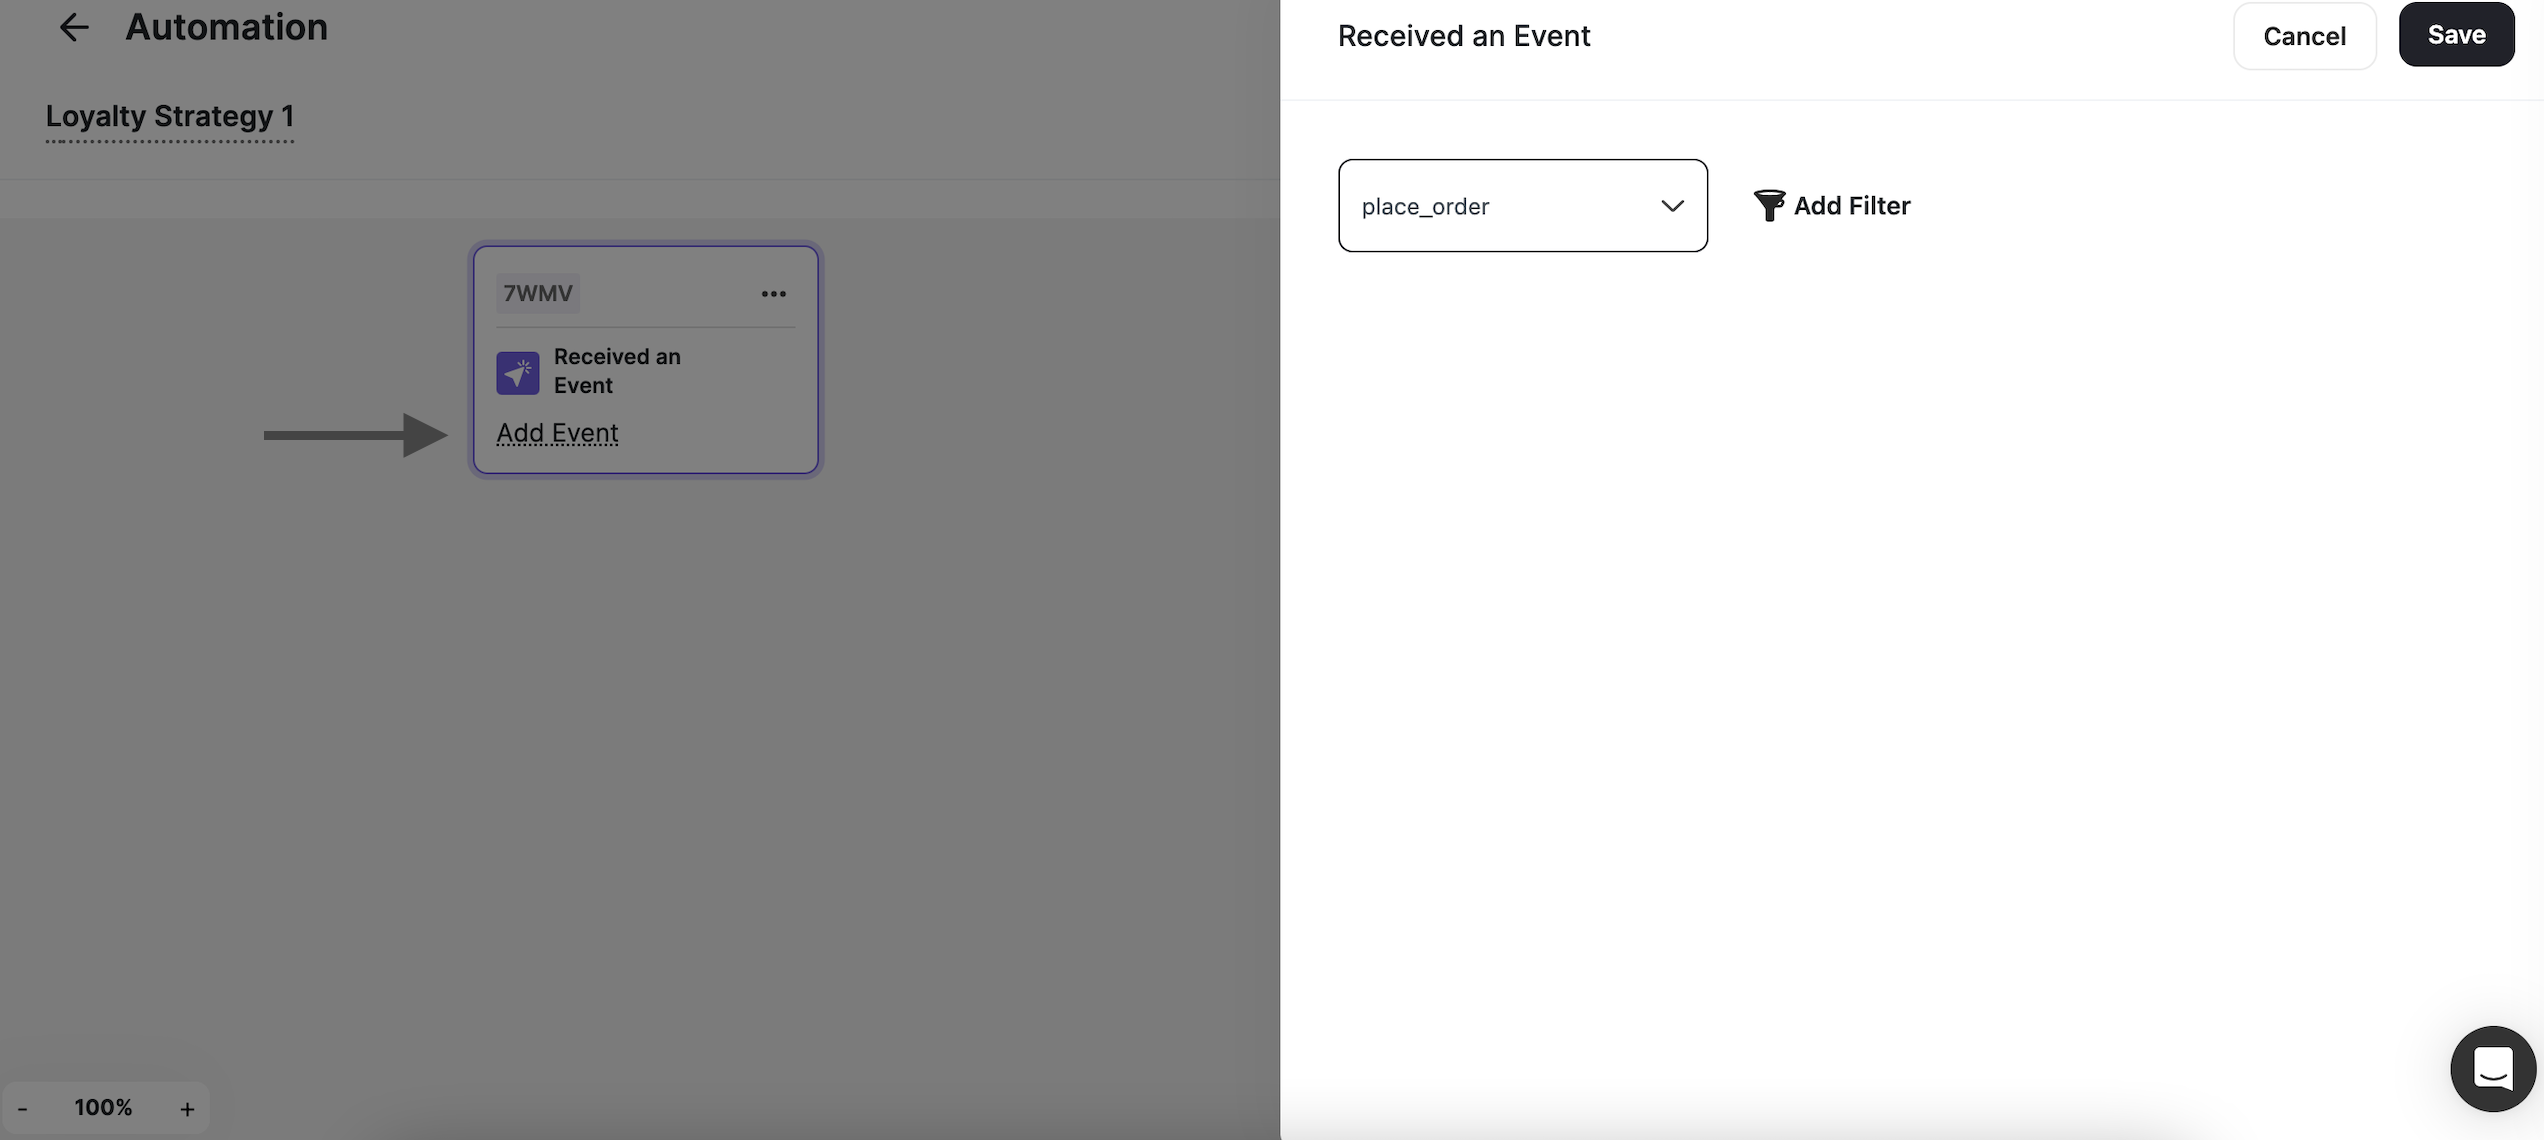 When selecting "Receive Event," you'll need to pick the exact event criteria using the Event Engine.
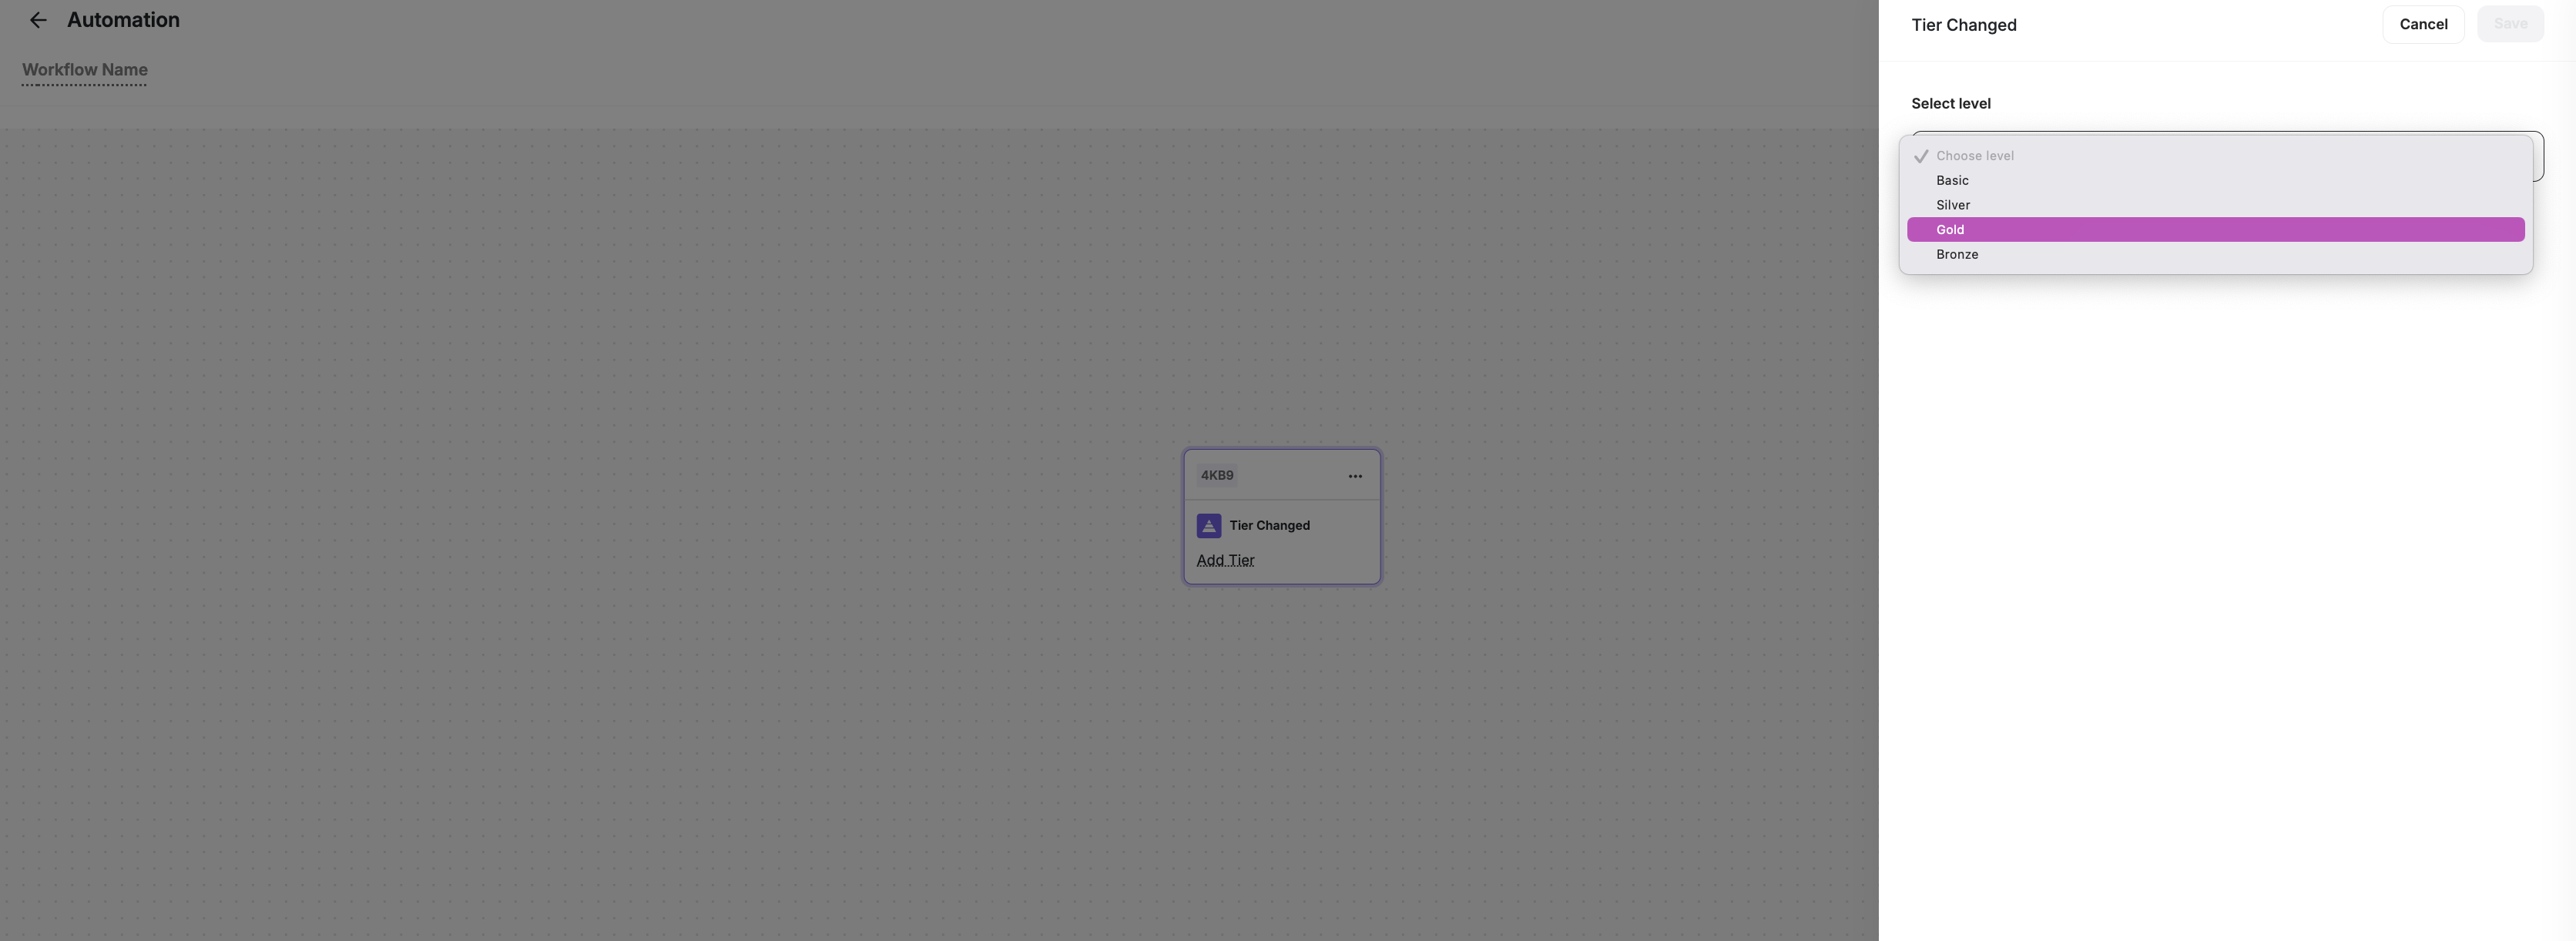
Activated when a customer tiers up or down, the Tier Changed trigger enables businesses to tailor experiences based on a customer's progression within a game or application. This trigger is invaluable for delivering personalized messages or rewards to users as they advance through different tiers.
### How to set up the Tier Changed trigger
Click on **Add Tier** on the card.
From the side pop-up, **Choose Tier**.
Press **Save**.
When selecting "Receive Event," you'll need to pick the exact event criteria using the Event Engine.
Activated when a customer tiers up or down, the Tier Changed trigger enables businesses to tailor experiences based on a customer's progression within a game or application. This trigger is invaluable for delivering personalized messages or rewards to users as they advance through different tiers.
### How to set up the Tier Changed trigger
Click on **Add Tier** on the card.
From the side pop-up, **Choose Tier**.
Press **Save**.
 Initiated upon the completion of a designated reward campaign. This trigger empowers businesses to recognize and reward customers accomplishments effectively. Whether it's conquering a difficult task or achieving a milestone, this trigger allows for timely acknowledgment and incentivization.
### How to set up the Reward Campaign Achieved trigger
Click on **Choose Badge** on the card.
From the side pop-up, **Choose the badge**.
Press **Save**.
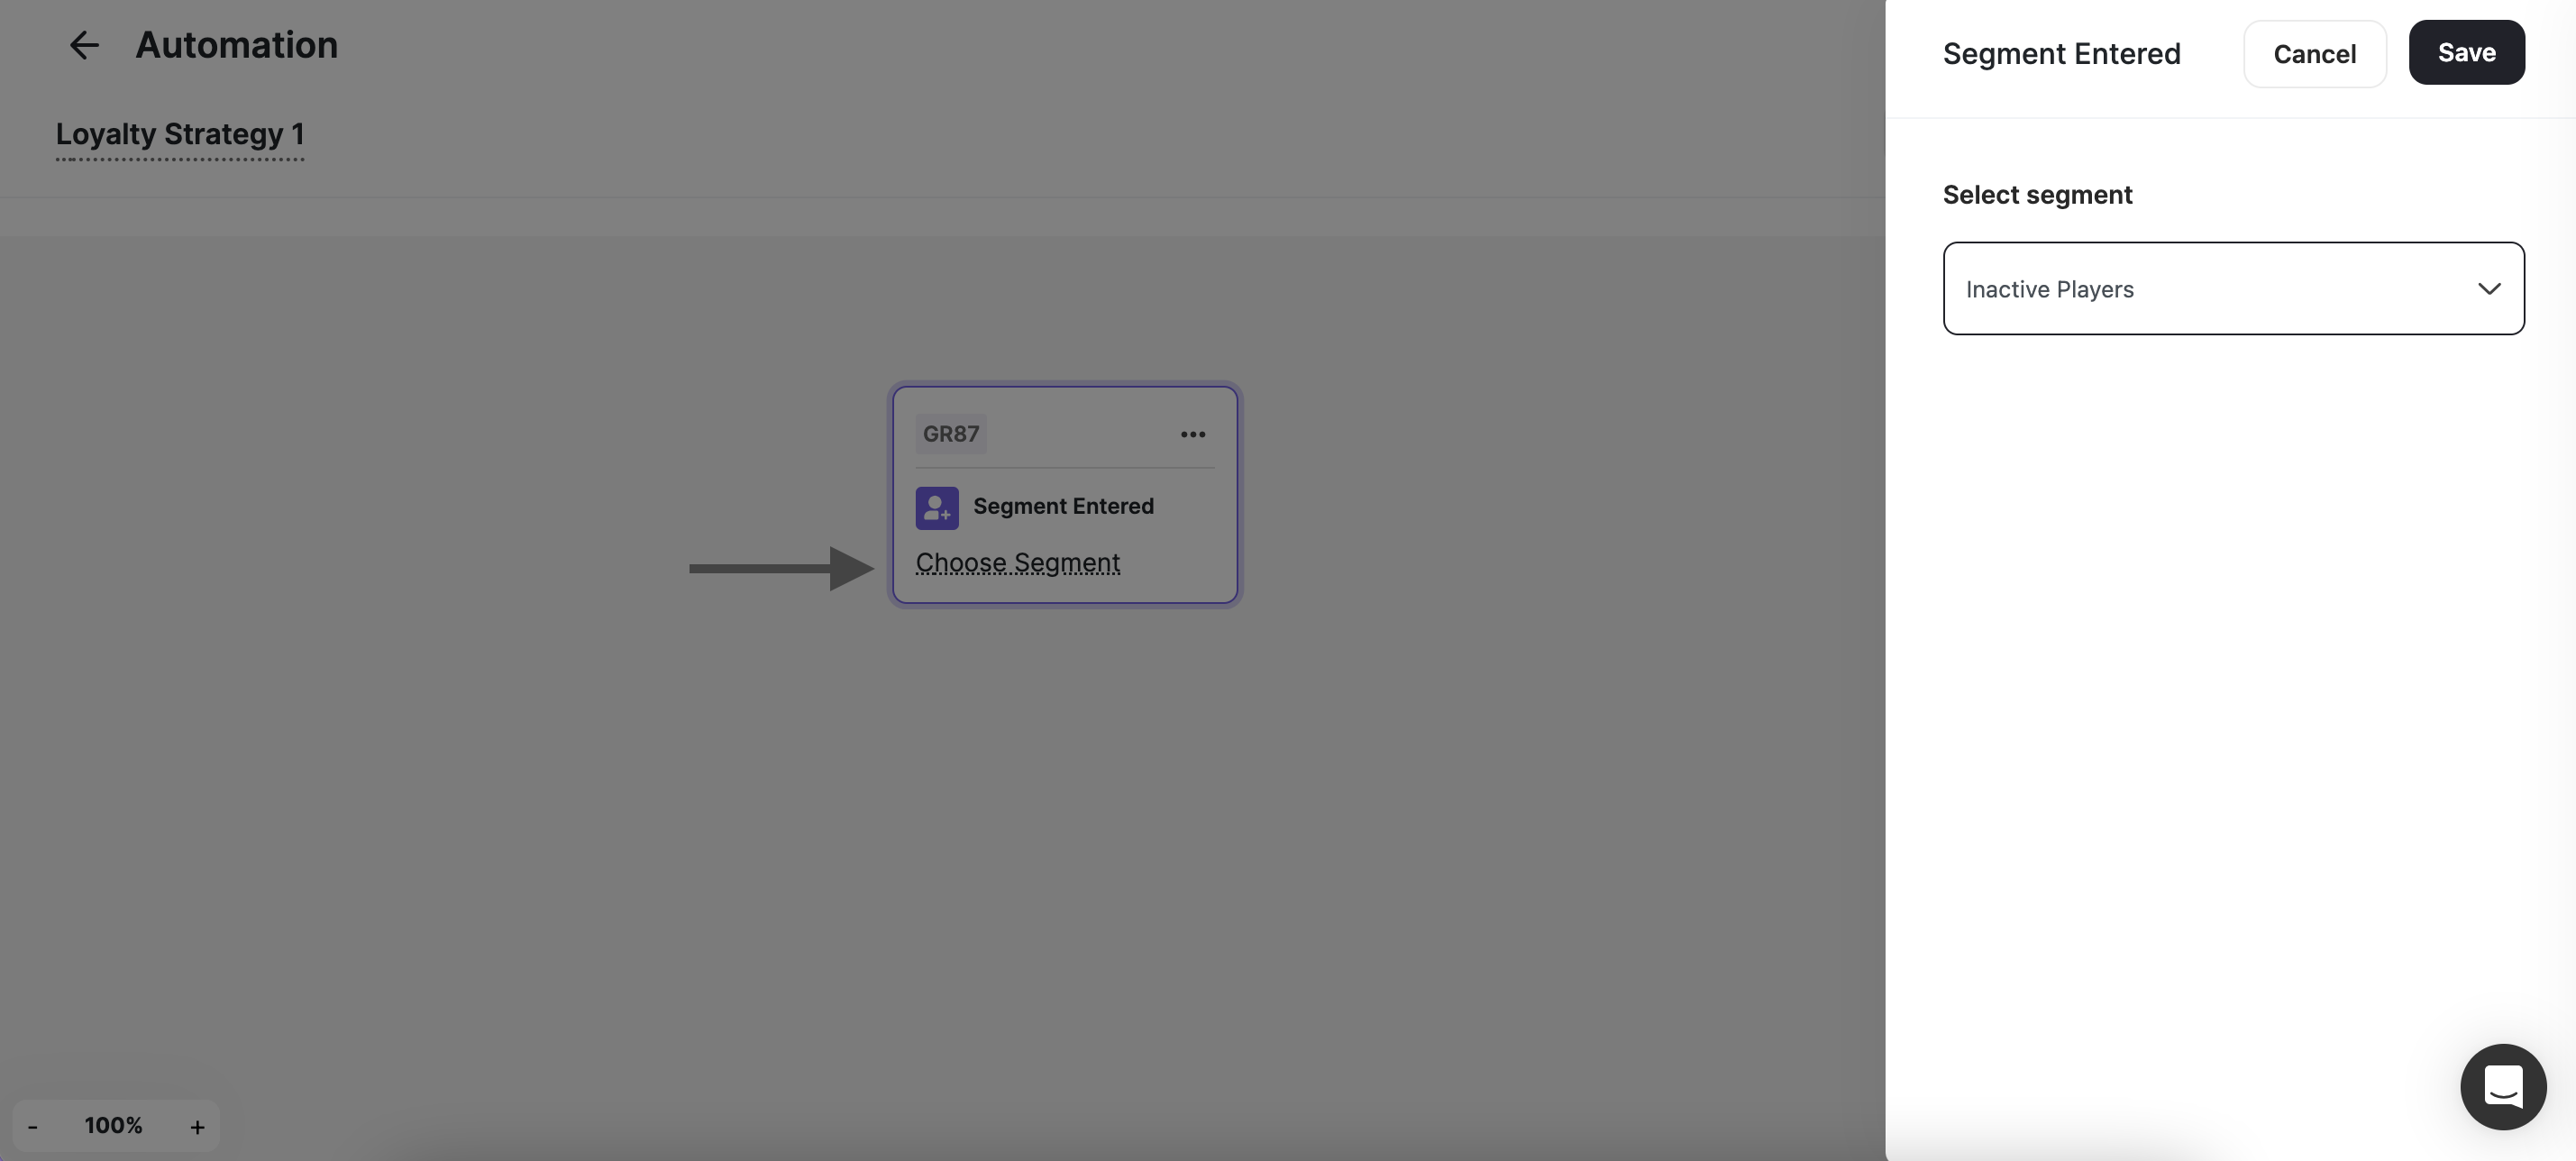
Triggered when a customer joins a specific segment, the Segment Entered trigger enables businesses to target users based on their characteristics or behaviors. This trigger facilitates targeted communication and engagement strategies.
### How to set up the Segment Entered trigger
Click on **Choose Segment** on the card.
From the side pop-up, **select the Segment**.
Press **Save**.
Initiated upon the completion of a designated reward campaign. This trigger empowers businesses to recognize and reward customers accomplishments effectively. Whether it's conquering a difficult task or achieving a milestone, this trigger allows for timely acknowledgment and incentivization.
### How to set up the Reward Campaign Achieved trigger
Click on **Choose Badge** on the card.
From the side pop-up, **Choose the badge**.
Press **Save**.
Triggered when a customer joins a specific segment, the Segment Entered trigger enables businesses to target users based on their characteristics or behaviors. This trigger facilitates targeted communication and engagement strategies.
### How to set up the Segment Entered trigger
Click on **Choose Segment** on the card.
From the side pop-up, **select the Segment**.
Press **Save**.
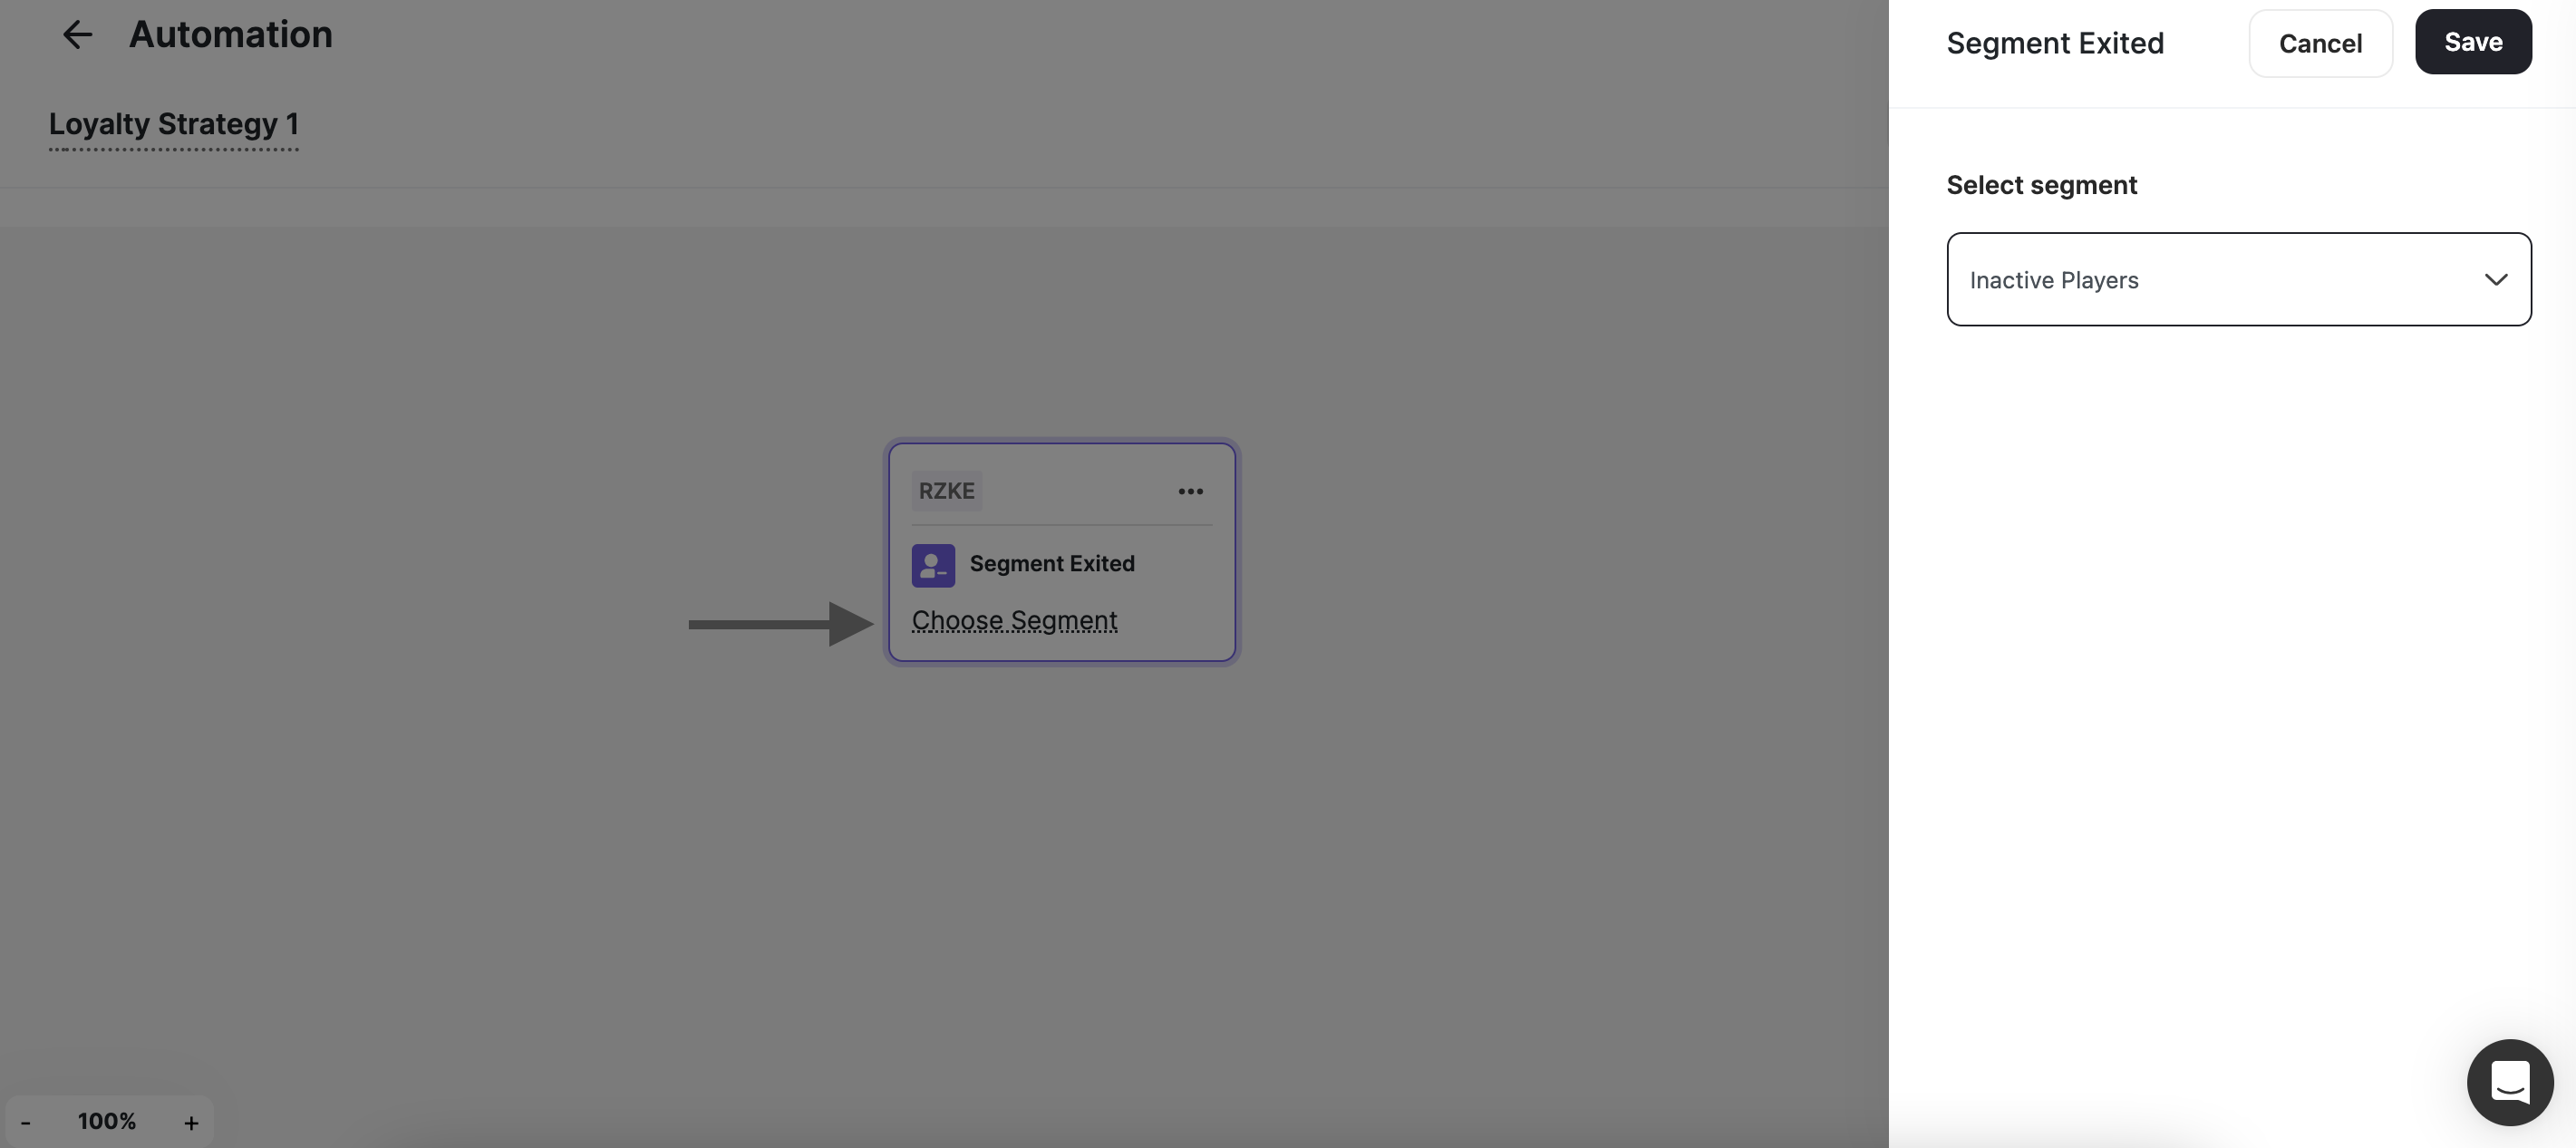
 Triggered when a customer leaves a specific segment, the Segment Exited trigger enables businesses to re-engage dormant customers; this trigger also facilitates targeted communication and engagement strategies.
### How to set up the Segment Exited trigger
Click on **Choose Segment** on the card.
From the side pop-up, **Select the Segment**.
Press **Save**.
Triggered when a customer leaves a specific segment, the Segment Exited trigger enables businesses to re-engage dormant customers; this trigger also facilitates targeted communication and engagement strategies.
### How to set up the Segment Exited trigger
Click on **Choose Segment** on the card.
From the side pop-up, **Select the Segment**.
Press **Save**.
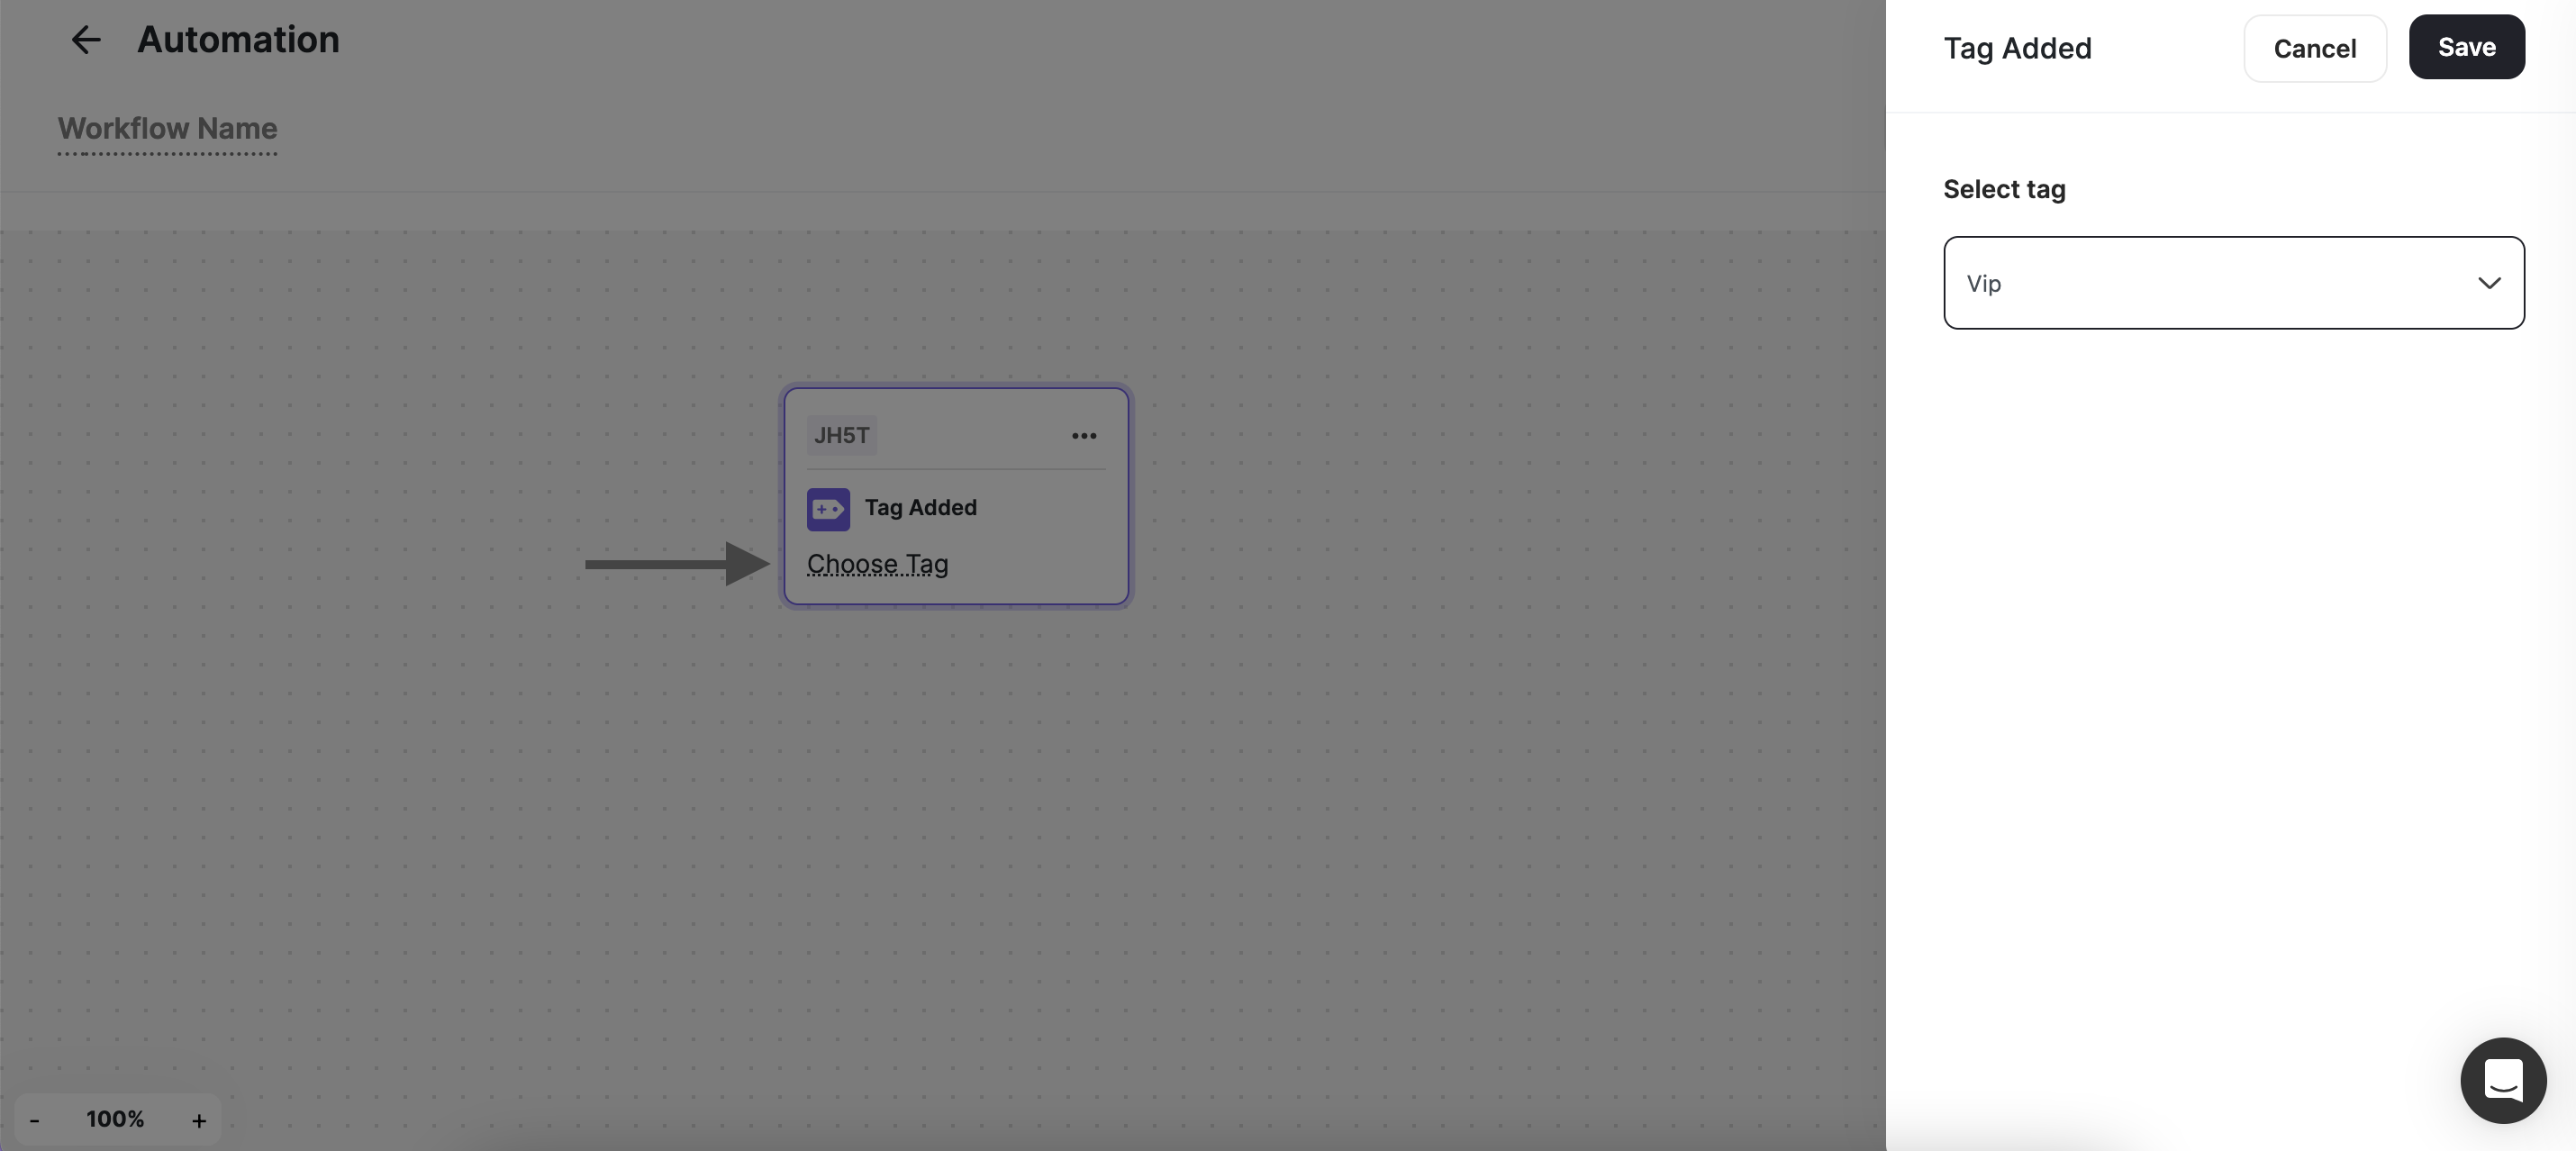
 Activated when a specific tag is applied to a customer, the Tag Added trigger allows businesses to categorize and track users based on predefined criteria. This trigger is invaluable for implementing targeted marketing campaigns or segmenting users for personalized experiences.
### How to set up the Tag Added trigger
Click on **Choose Tag** on the card.
From the side pop-up, **Select the Tag**.
Press **Save**.
Activated when a specific tag is applied to a customer, the Tag Added trigger allows businesses to categorize and track users based on predefined criteria. This trigger is invaluable for implementing targeted marketing campaigns or segmenting users for personalized experiences.
### How to set up the Tag Added trigger
Click on **Choose Tag** on the card.
From the side pop-up, **Select the Tag**.
Press **Save**.
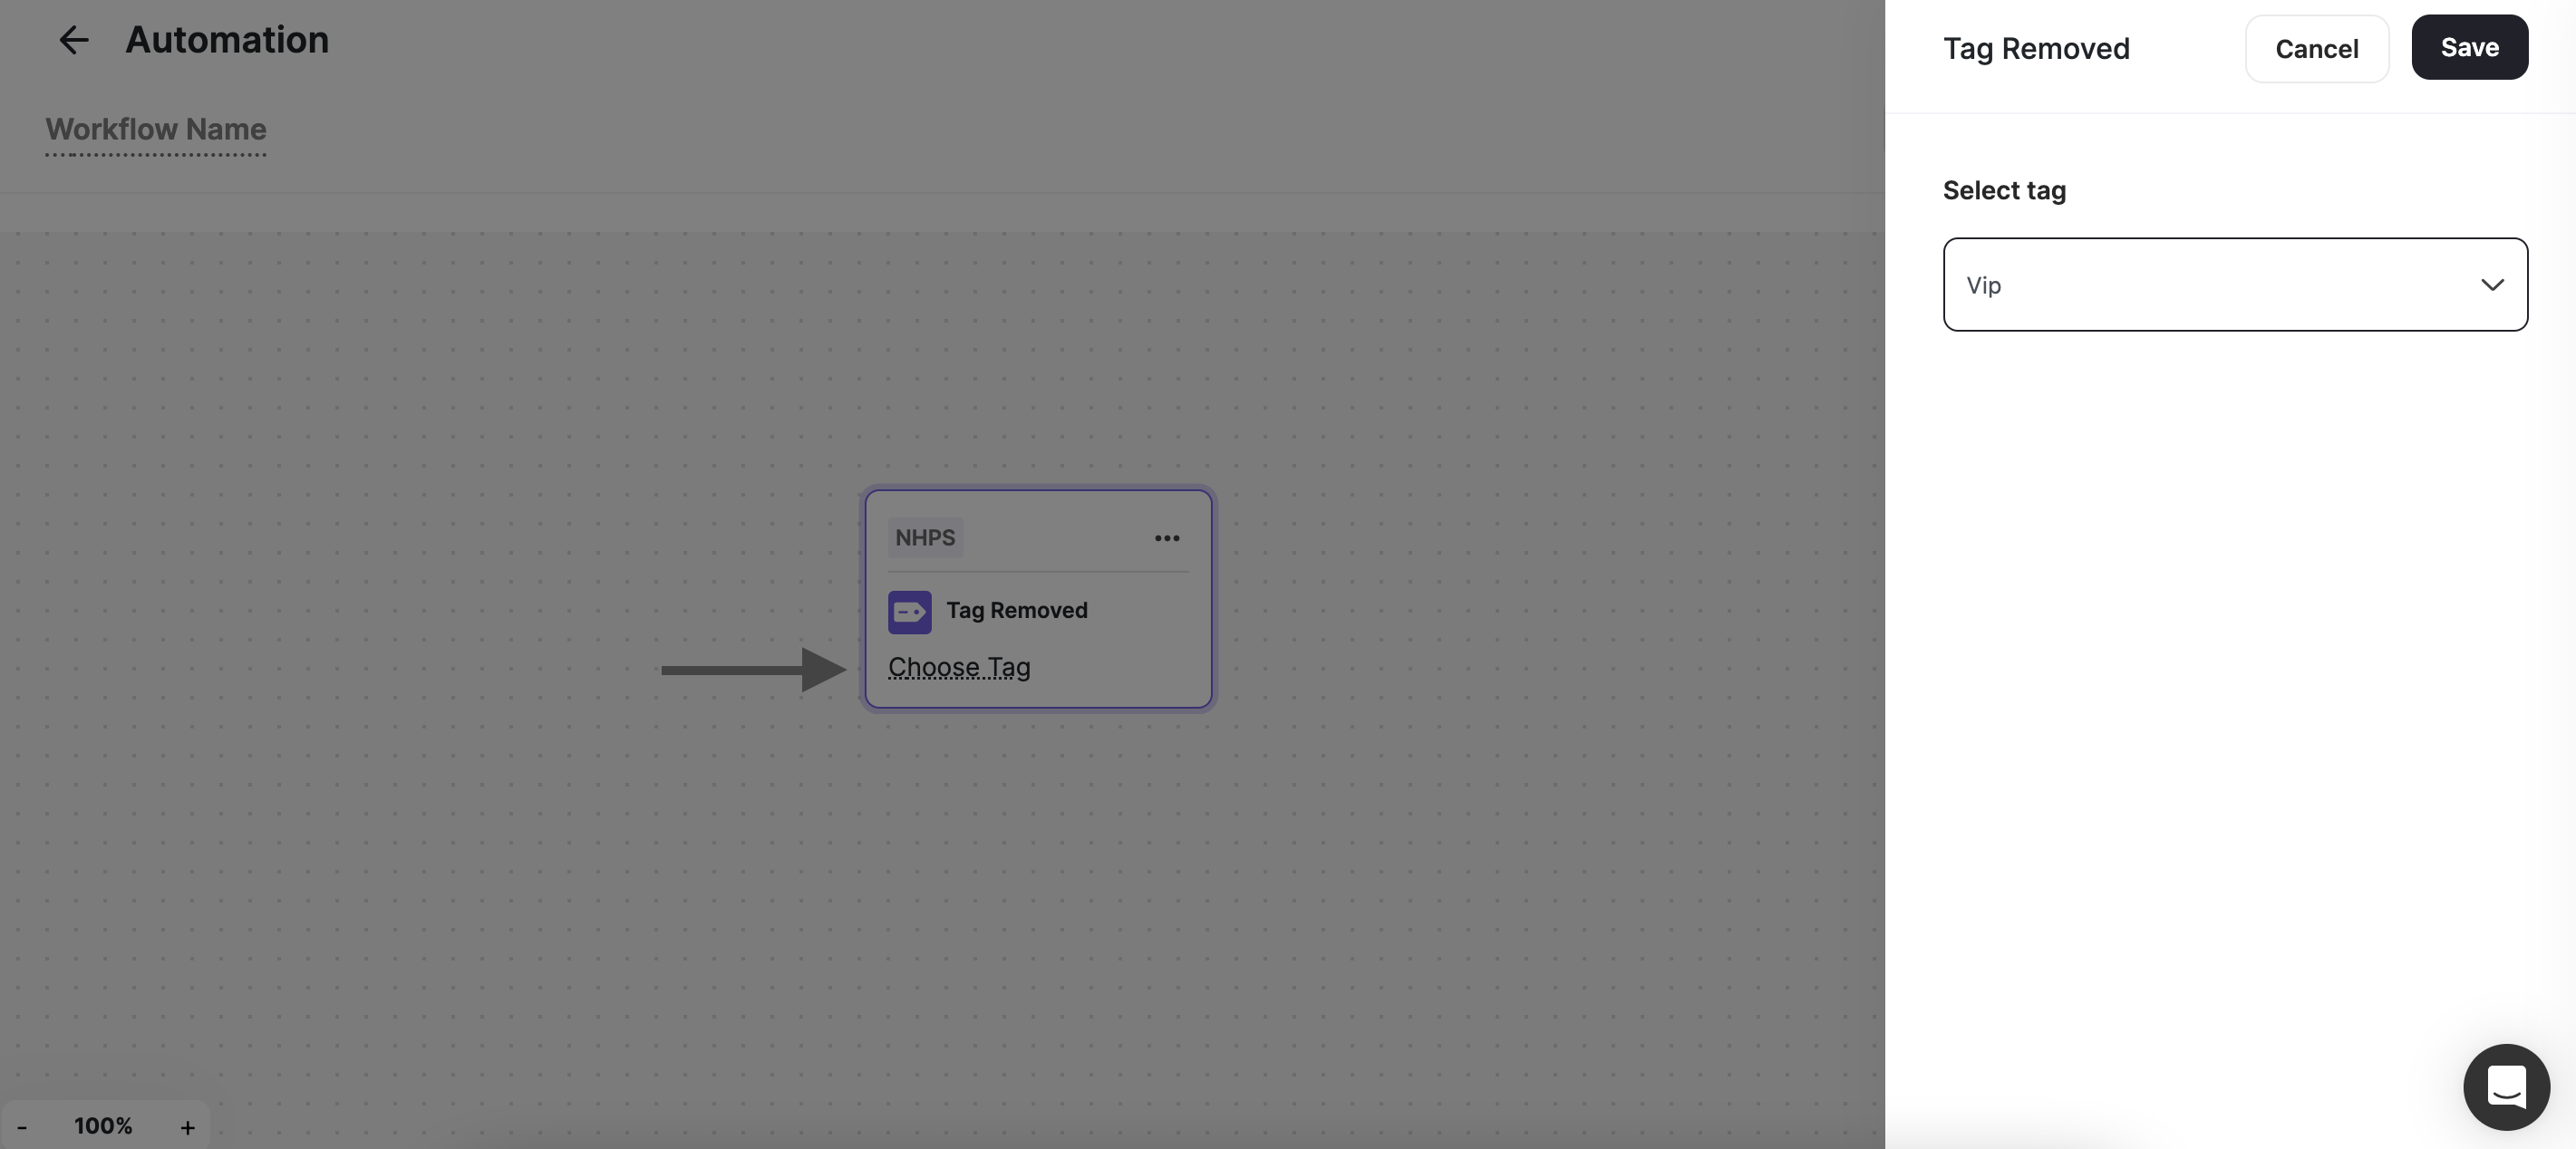
 Activated when a specific tag is removed from a customer, the Tag Removed trigger allows businesses to categorize and track users based on predefined criteria. This trigger is also invaluable for implementing targeted marketing campaigns or segmenting users for personalized experiences.
### How to set up the Tag Removed trigger
Click on **Choose Tag** on the card.
From the side pop-up, **Select the Tag**.
Press **Save**.
Activated when a specific tag is removed from a customer, the Tag Removed trigger allows businesses to categorize and track users based on predefined criteria. This trigger is also invaluable for implementing targeted marketing campaigns or segmenting users for personalized experiences.
### How to set up the Tag Removed trigger
Click on **Choose Tag** on the card.
From the side pop-up, **Select the Tag**.
Press **Save**.
 Initiated by an external app via webhook, the Webhook Trigger enables seamless integration with third-party platforms and services. This trigger opens up a world of possibilities for automating workflows across different systems, enhancing efficiency and connectivity. [Learn how to set up the Webhook Trigger](/product-documentation/automation-campaigns/webhooks-in-automation).
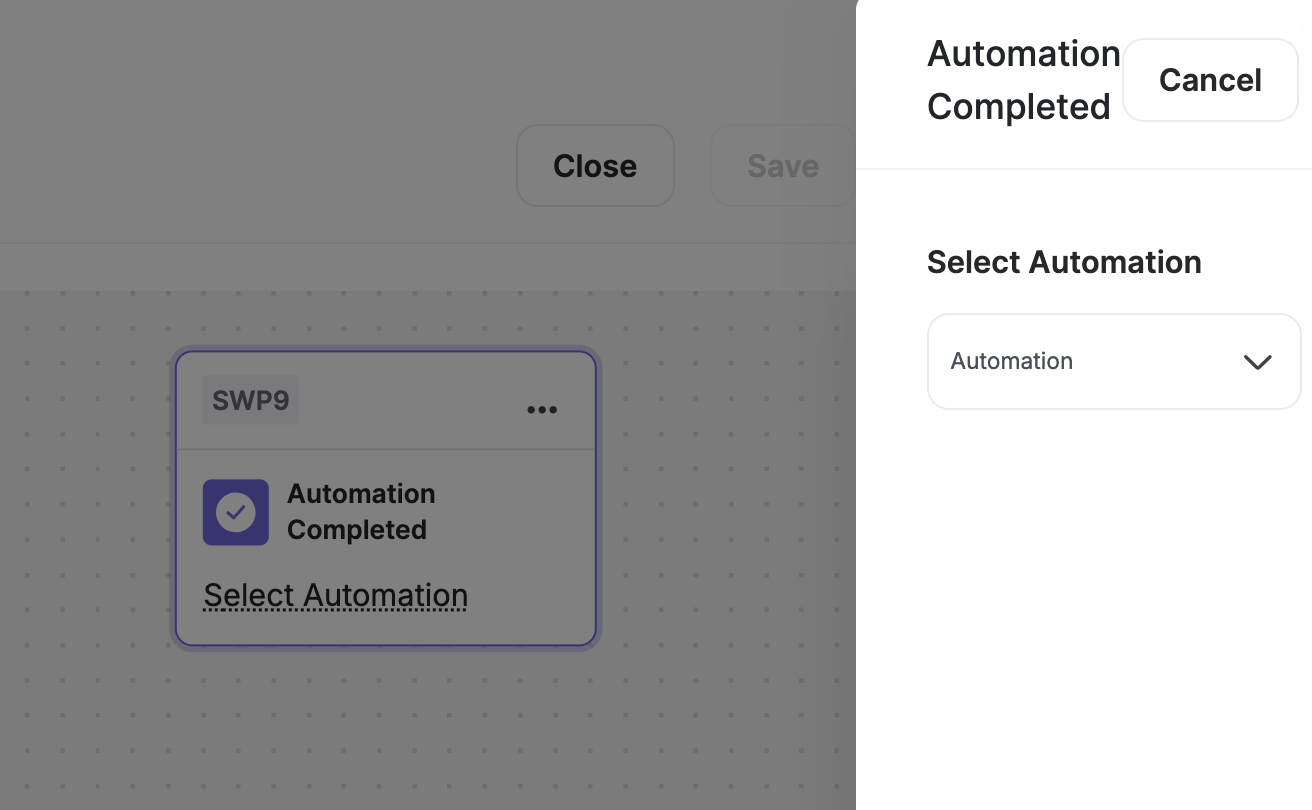
The **Automation Completed** trigger helps you to seamlessly link multiple automations, ensuring a smooth transition from one workflow to the next. When a customer completes an automation, you can **automatically trigger the next one**, eliminating manual intervention and enhancing engagement, ensuring a fluid, connected customer journey, allowing you to build dynamic, multi-stage automation workflows that drive engagement and retention.
### How to set up the Automation Completed trigger
Click on **Completed Automation** on the card.
From the side pop-up, **Select the automation**.
Press **Save**.
Initiated by an external app via webhook, the Webhook Trigger enables seamless integration with third-party platforms and services. This trigger opens up a world of possibilities for automating workflows across different systems, enhancing efficiency and connectivity. [Learn how to set up the Webhook Trigger](/product-documentation/automation-campaigns/webhooks-in-automation).
The **Automation Completed** trigger helps you to seamlessly link multiple automations, ensuring a smooth transition from one workflow to the next. When a customer completes an automation, you can **automatically trigger the next one**, eliminating manual intervention and enhancing engagement, ensuring a fluid, connected customer journey, allowing you to build dynamic, multi-stage automation workflows that drive engagement and retention.
### How to set up the Automation Completed trigger
Click on **Completed Automation** on the card.
From the side pop-up, **Select the automation**.
Press **Save**.
 ### Use Cases
Guide new users through a structured onboarding experience by triggering the next step upon completion of the previous one. For example, once a customer completes their profile setup, they can be automatically enrolled in a tutorial about earning rewards.
Encourage deeper engagement by unlocking exclusive benefits as customers progress. After a customer completes a milestone (e.g., making their first purchase), they can be automatically added to a VIP automation that grants them bonus rewards.
Keep customers engaged with a multi-step retention strategy. If a customer completes a re-engagement campaign, they can be seamlessly transitioned into a follow-up automation that offers a personalized discount or gamified challenge.
With Gameball's comprehensive suite of automation triggers, you can embark on a journey towards automation excellence, driving growth and success in the digital landscape.
***
### Related Articles
Step-by-step guide to building your first automation campaign.
Explore all actions you can execute when automation conditions are met.
Learn about conditions and branching logic available in automations.
### Use Cases
Guide new users through a structured onboarding experience by triggering the next step upon completion of the previous one. For example, once a customer completes their profile setup, they can be automatically enrolled in a tutorial about earning rewards.
Encourage deeper engagement by unlocking exclusive benefits as customers progress. After a customer completes a milestone (e.g., making their first purchase), they can be automatically added to a VIP automation that grants them bonus rewards.
Keep customers engaged with a multi-step retention strategy. If a customer completes a re-engagement campaign, they can be seamlessly transitioned into a follow-up automation that offers a personalized discount or gamified challenge.
With Gameball's comprehensive suite of automation triggers, you can embark on a journey towards automation excellence, driving growth and success in the digital landscape.
***
### Related Articles
Step-by-step guide to building your first automation campaign.
Explore all actions you can execute when automation conditions are met.
Learn about conditions and branching logic available in automations.