> ## Documentation Index
> Fetch the complete documentation index at: https://docs.gameball.co/llms.txt
> Use this file to discover all available pages before exploring further.
# What Is Webhooks in Automation?
> Use actions that your players do on external apps to build you custom automation.
| Platform | Plan |
| -------------------- | ----------------------------- |
| Shopify | Guru |
| Salla | Guru |
| Non-platform Clients | Included in Automation Add-on |
***
Webhooks in Gameball let you send and receive customer information to and from external applications, all within your automation flows. You can use webhooks as both **triggers** (to start an automation from an external event) and **actions** (to push customer data to another platform). [Learn more about Automated Workflows](/product-documentation/automation-campaigns/how-to-create-an-automation-campaign).
***
## Using Webhooks as a Trigger
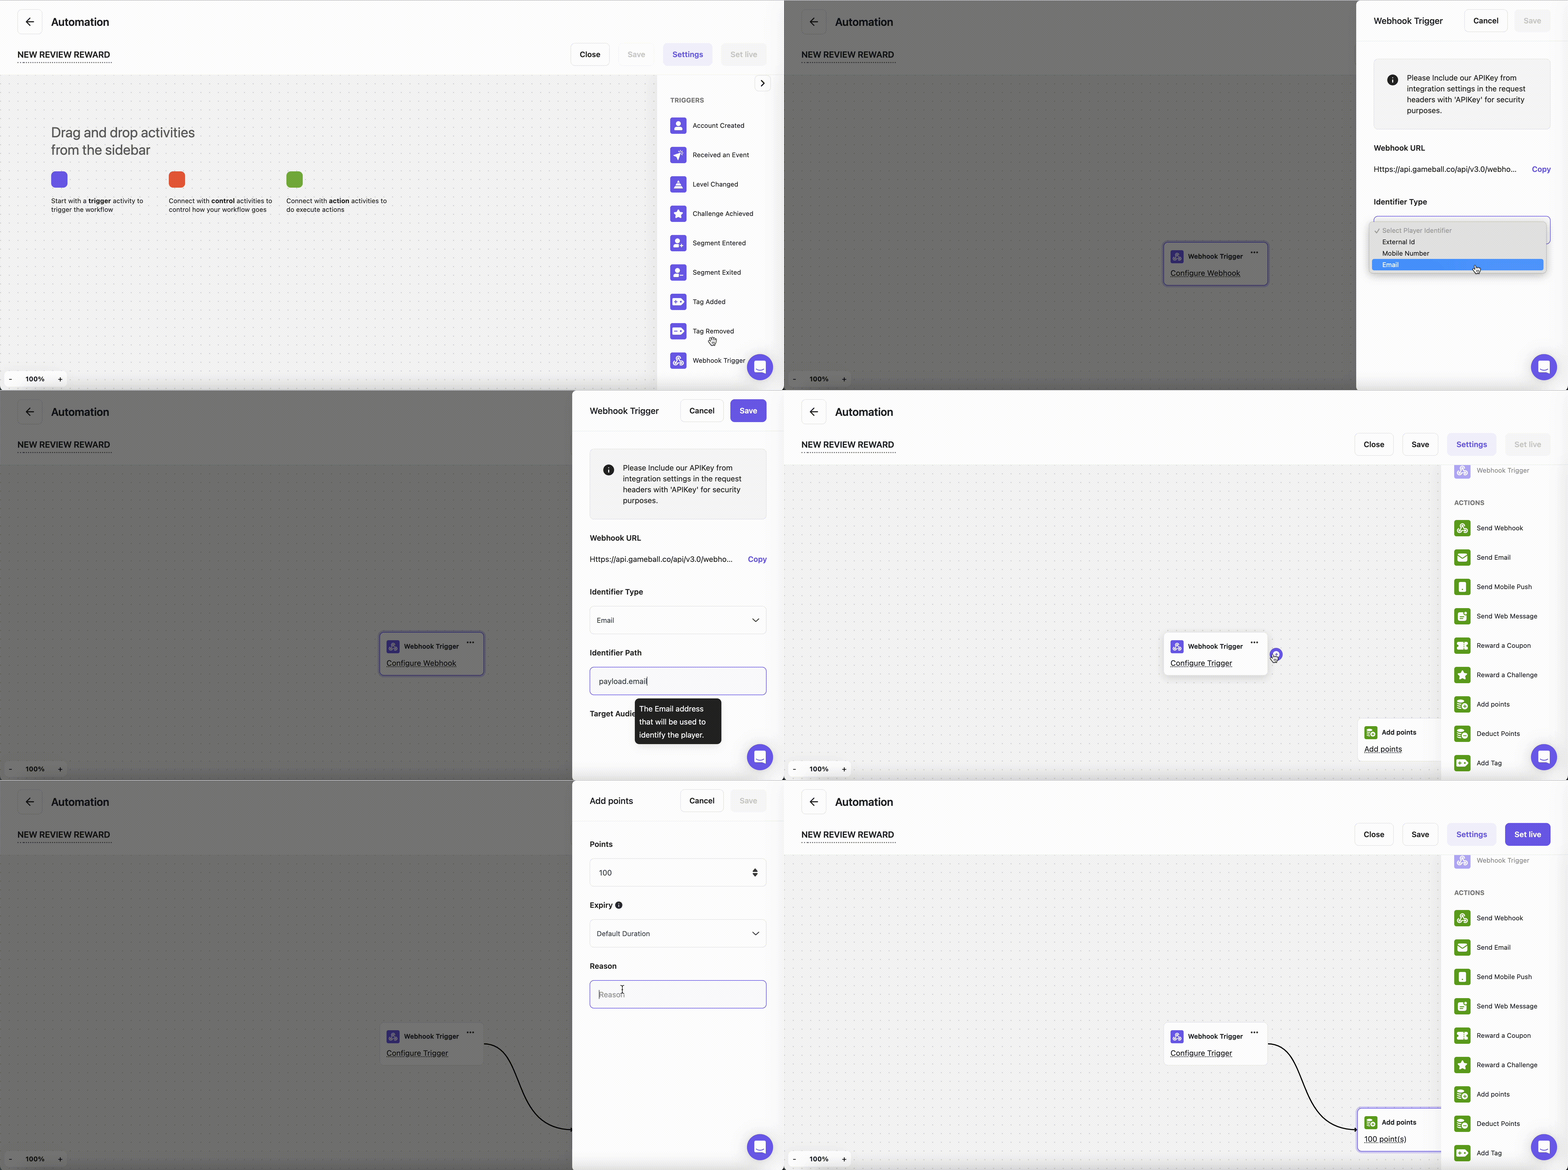
You can create an automation triggered by an action the player initiates on an external app. For example, you want to reward your customers with 100 points for each review they leave on your review app.
From the Triggers panel, drag **Webhook Trigger** and drop it onto the canvas.
Set up the webhook configuration:
* Copy the **Webhook URL** that Gameball provides and paste it into the integration section of your external app, along with your API key for authentication.
* Select how you want to **identify your players** (Email, External Customer ID, or Mobile Number).
* Fill in the **payload** based on the selected identifier to confirm the format (e.g., `{payload.data.email}`).
* Press **Save**.
Connect your trigger to the **Add Points** action:
* Click **Add Points**.
* Fill in the reward information.
* Press **Save**.
Press **Save** to finalize your automation.
 ***
## Using Webhooks as an Action
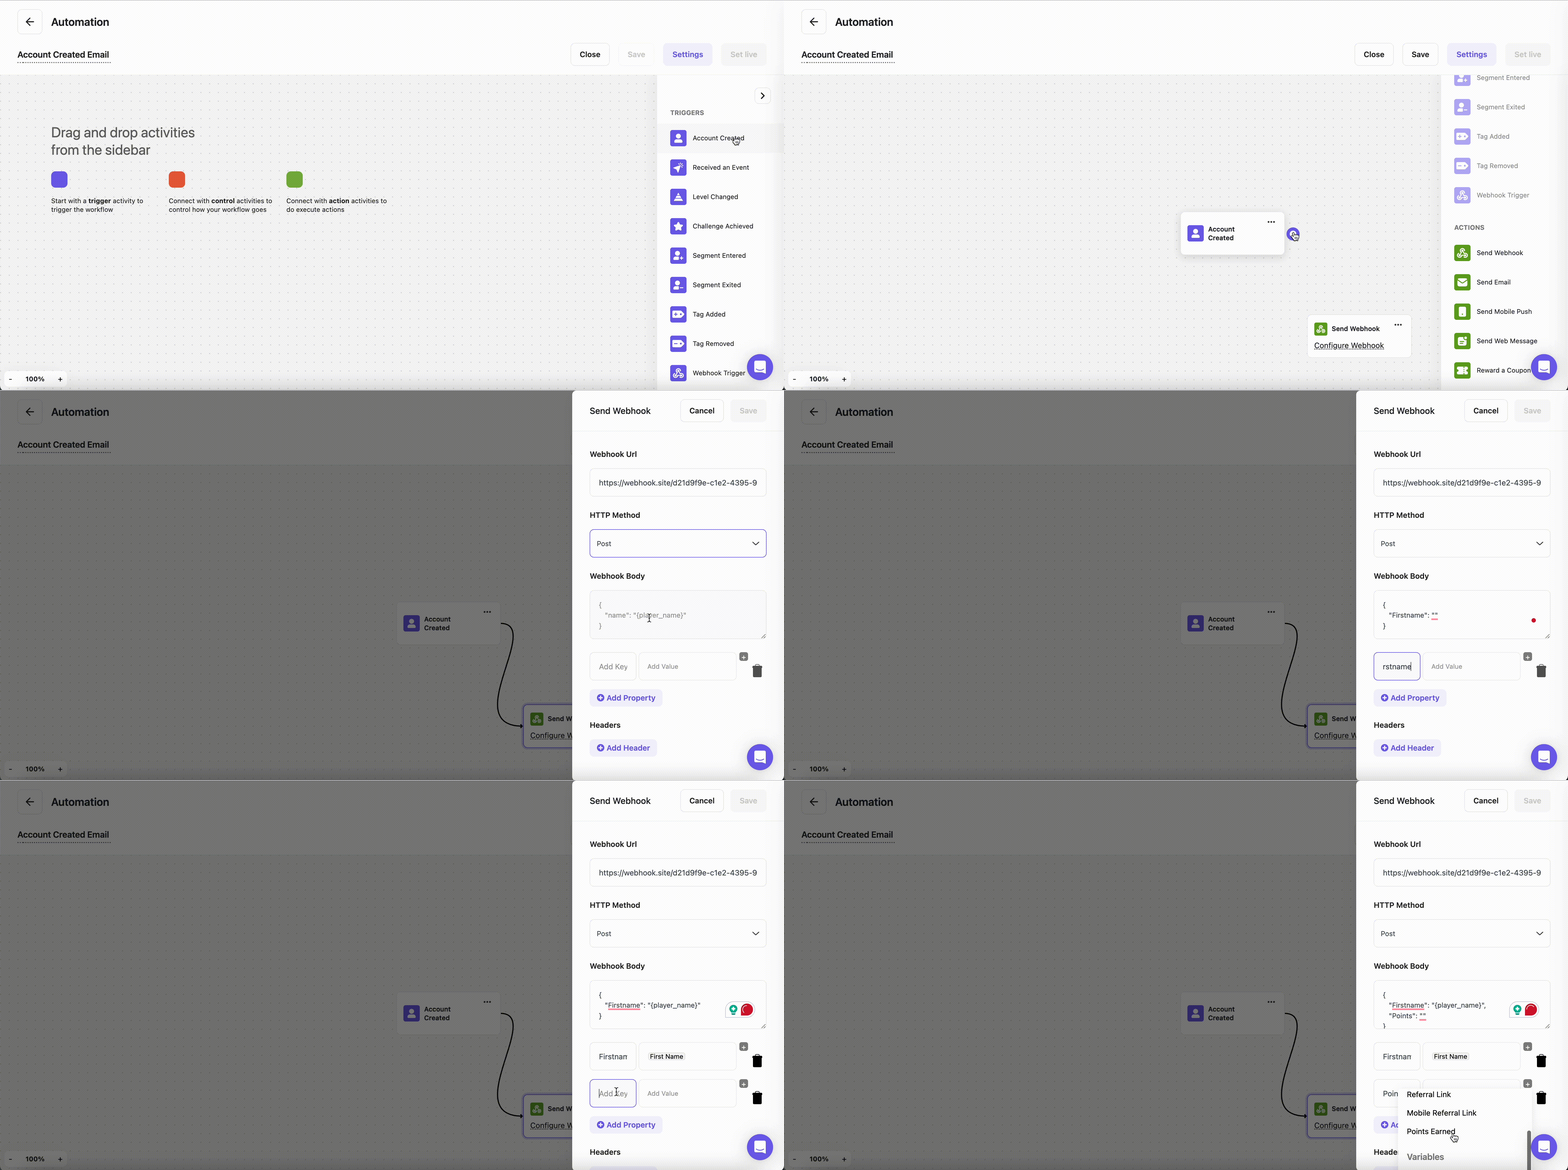
You can use webhooks as an action within your automation to send customer information to an external app. For example, you want to send a welcome email using your external mailing app to a new customer who just created an account.
Drag the **Account Created** trigger onto the canvas.
Connect it to the **Send Webhook** action.
Set up the webhook configuration:
* Paste your external app's webhook URL in the **Webhook URL** field.
* Choose your **HTTP method** (POST, GET, or PUT).
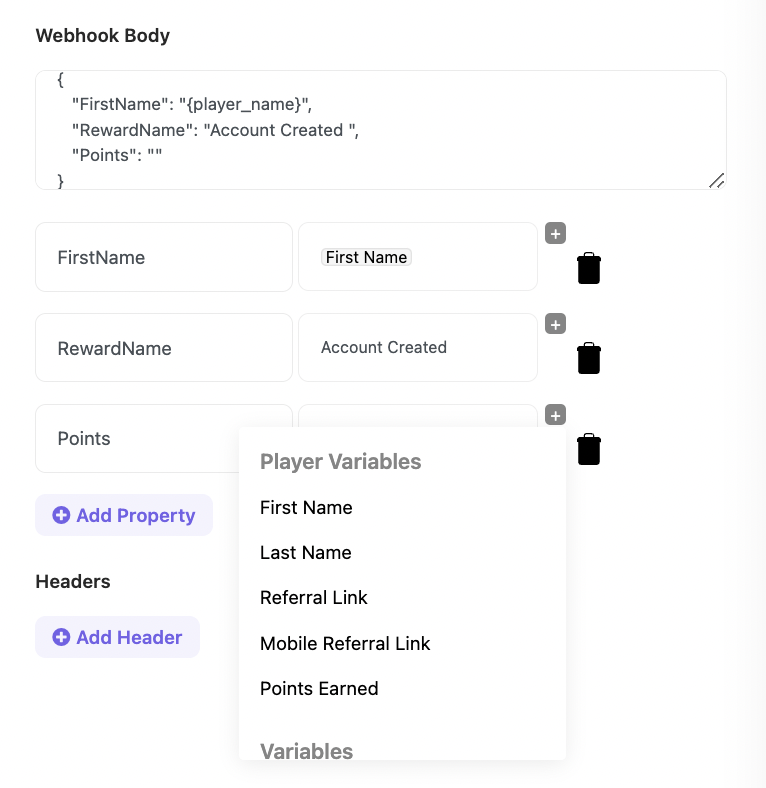
* Add the player information you want to send in the **Webhook body**. You can use JSON format, the visual builder, or select from customer variables.
***
## Using Webhooks as an Action
You can use webhooks as an action within your automation to send customer information to an external app. For example, you want to send a welcome email using your external mailing app to a new customer who just created an account.
Drag the **Account Created** trigger onto the canvas.
Connect it to the **Send Webhook** action.
Set up the webhook configuration:
* Paste your external app's webhook URL in the **Webhook URL** field.
* Choose your **HTTP method** (POST, GET, or PUT).
* Add the player information you want to send in the **Webhook body**. You can use JSON format, the visual builder, or select from customer variables.
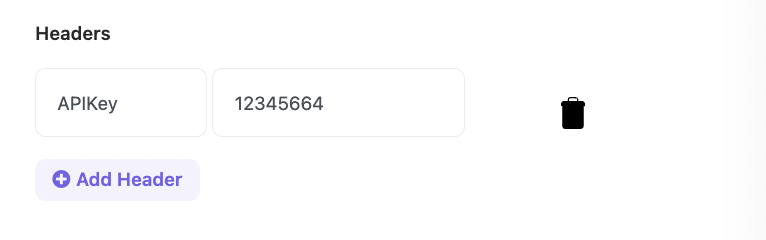
 * Add the required **Headers**.
 * Press **Save**.
Press **Save** to finalize your automation.
* Press **Save**.
Press **Save** to finalize your automation.
 **Payload Configuration:**
* If the action is to send an email within Gameball, add a configuration field to specify the payload part for the customer's email (`{payload.data.email}`).
* If the action is external, add all required details for the webhook link and payload in JSON format.
```json theme={null}
{"email": "email"}
```
***
## Related Articles
Learn the fundamentals of Gameball's automation campaign system.
Step-by-step guide to building and launching automation workflows.
Understand how changes to a live automation affect your customers.
**Payload Configuration:**
* If the action is to send an email within Gameball, add a configuration field to specify the payload part for the customer's email (`{payload.data.email}`).
* If the action is external, add all required details for the webhook link and payload in JSON format.
```json theme={null}
{"email": "email"}
```
***
## Related Articles
Learn the fundamentals of Gameball's automation campaign system.
Step-by-step guide to building and launching automation workflows.
Understand how changes to a live automation affect your customers.