> ## Documentation Index
> Fetch the complete documentation index at: https://docs.gameball.co/llms.txt
> Use this file to discover all available pages before exploring further.
# How Do I Configure Customer Widget Language on My Platform?
> Learn about languages supported by Gameball customer widget and how to enable them.
Gameball allows you to display the customer widget in different languages based on the active language of your platform.
Currently, Gameball supports the following languages:
ar
da-DK
nl
en
fr
de
hu
it
pl
pt
es
sv
zh-TW
***
## What If Your Language Is Not Listed?
Only the languages above are officially supported. If your preferred language is not available, you can repurpose an existing language slot as a workaround: select any language from the supported list, then manually replace every text field throughout the system with translations in your desired language.
This workaround requires you to update every translatable text field individually. See [What Fields Will Be Affected](#what-fields-will-be-affected-once-you-add-a-new-language) for the full list.
***
## How to Choose the Default Language
Log in to the **Gameball dashboard**.
From the side menu, go to **Widget**, then select the **General** tab.
Navigate to the **Languages** section and choose your **Default Language** from the available options.
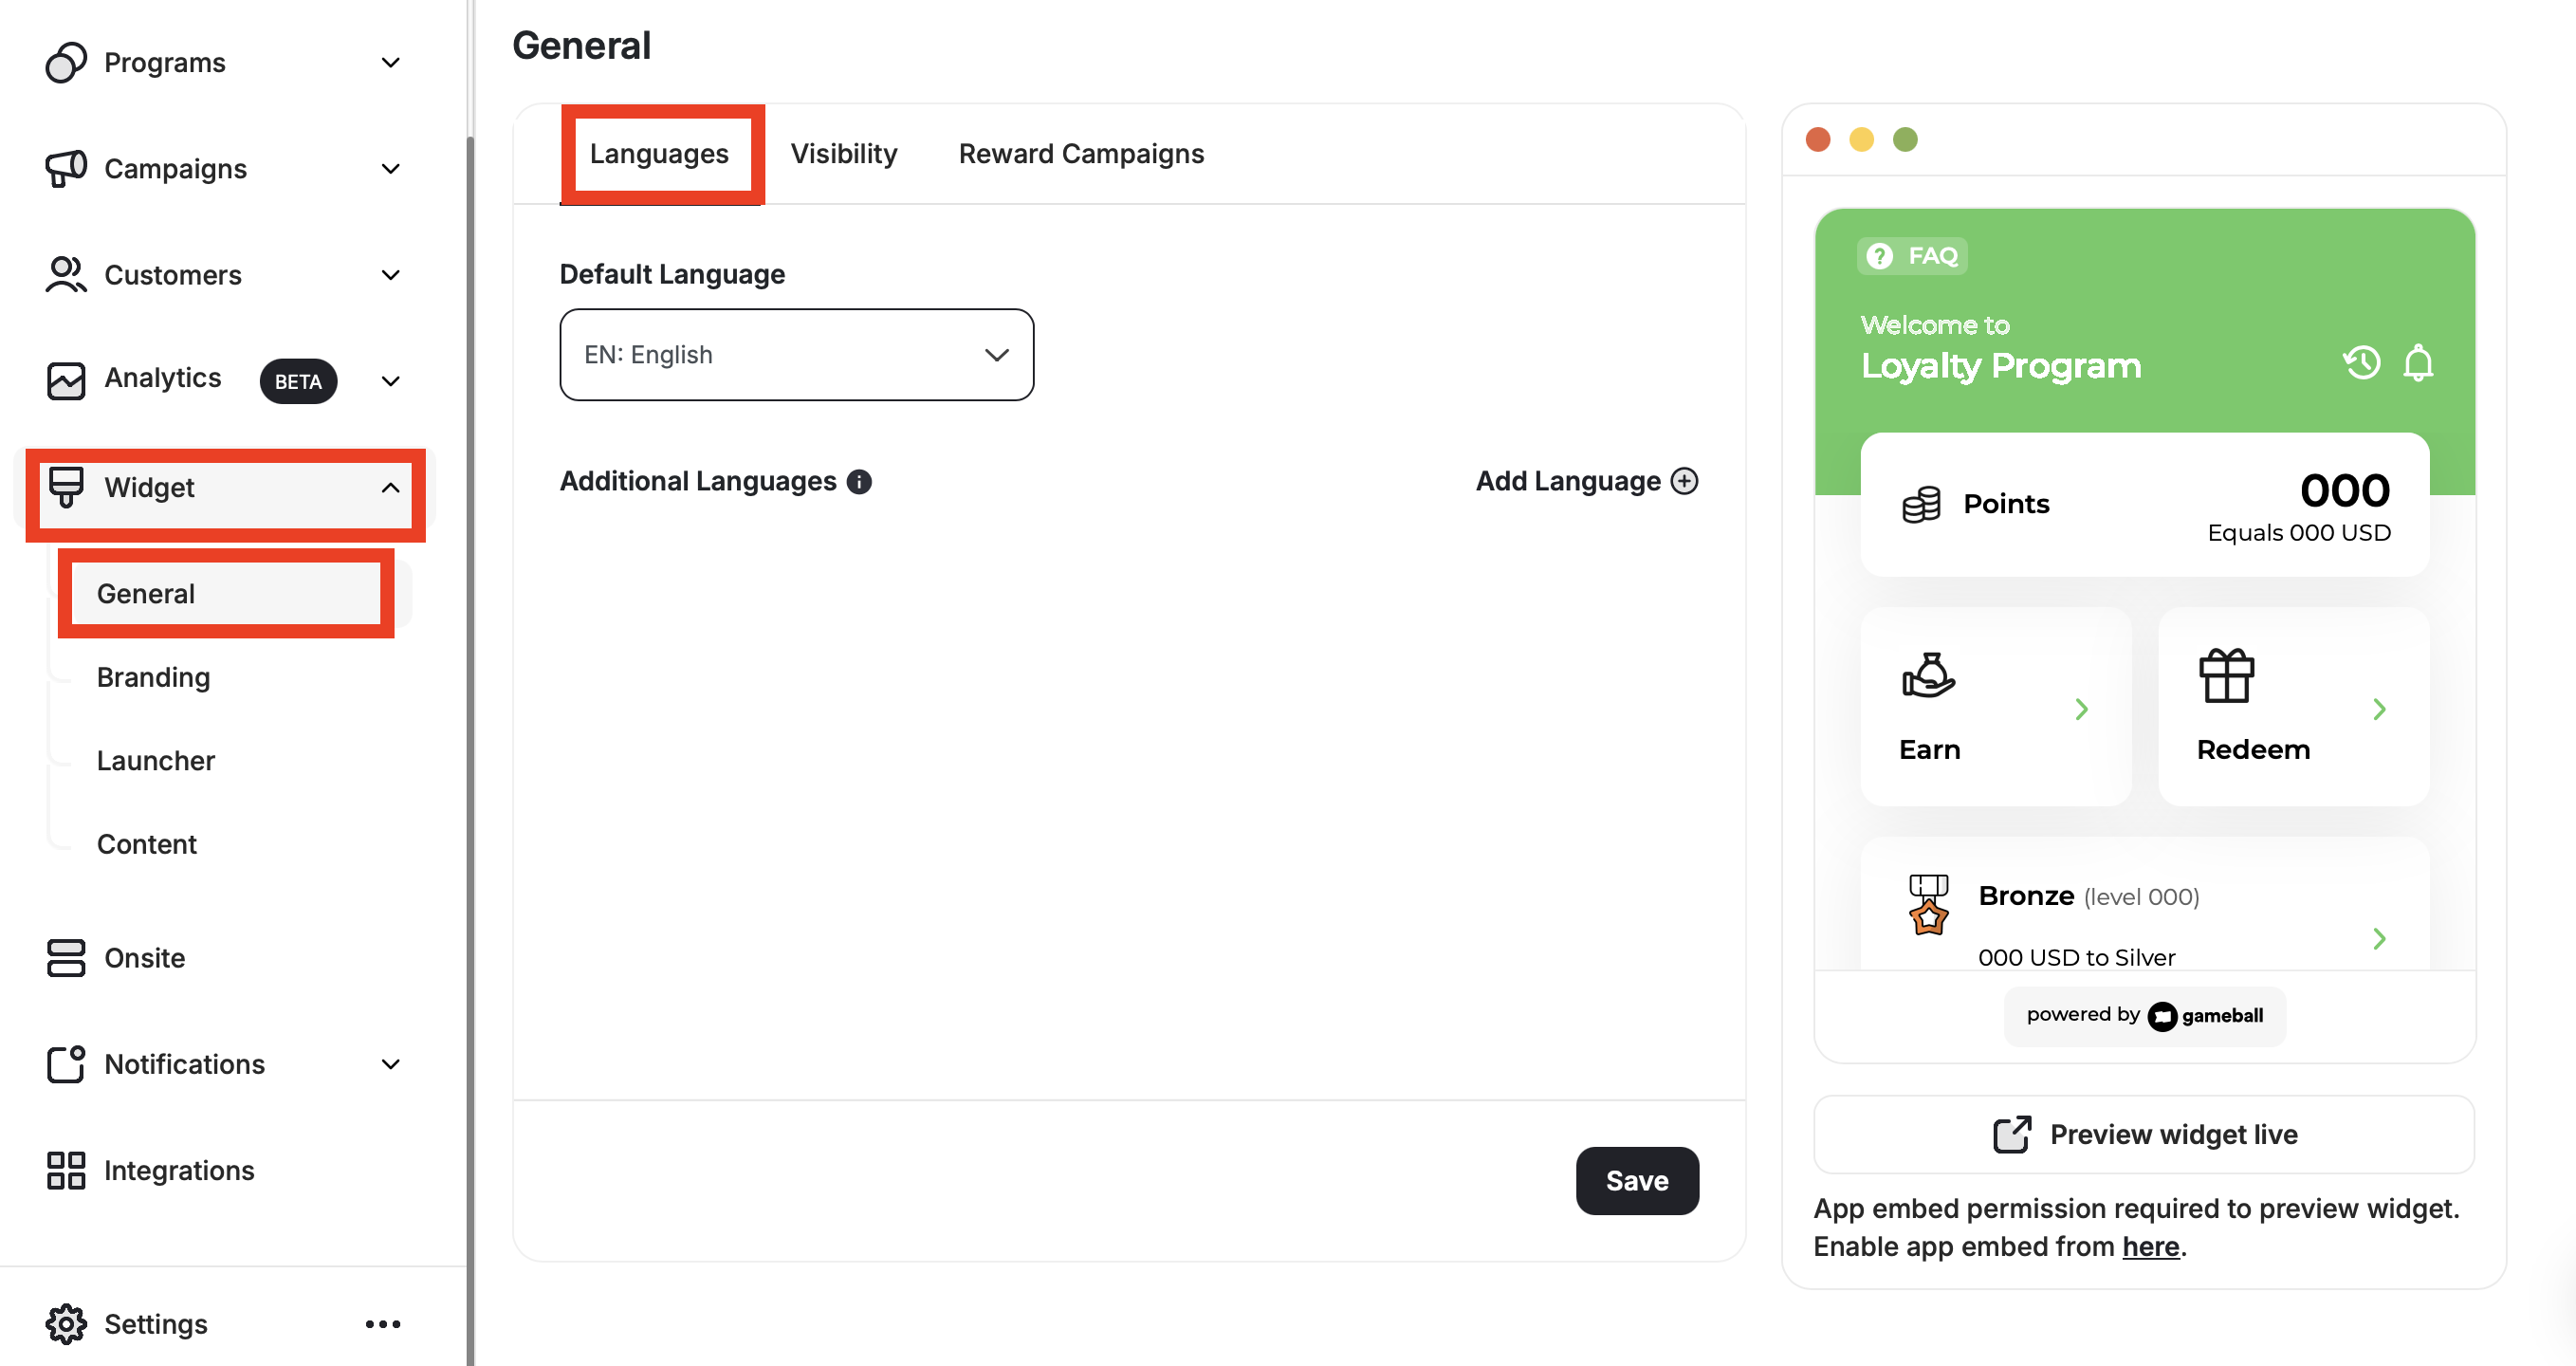 Your account must have a default language. The data under this default language will be displayed to your **customers** whenever any additional active language has missing data.
However, you can still add and activate **more than one language** on your account.
***
## How to Add an Extra Language
Click on **Add Language** next to "Additional Languages."
Choose the second language and click **Add**.
Your account must have a default language. The data under this default language will be displayed to your **customers** whenever any additional active language has missing data.
However, you can still add and activate **more than one language** on your account.
***
## How to Add an Extra Language
Click on **Add Language** next to "Additional Languages."
Choose the second language and click **Add**.
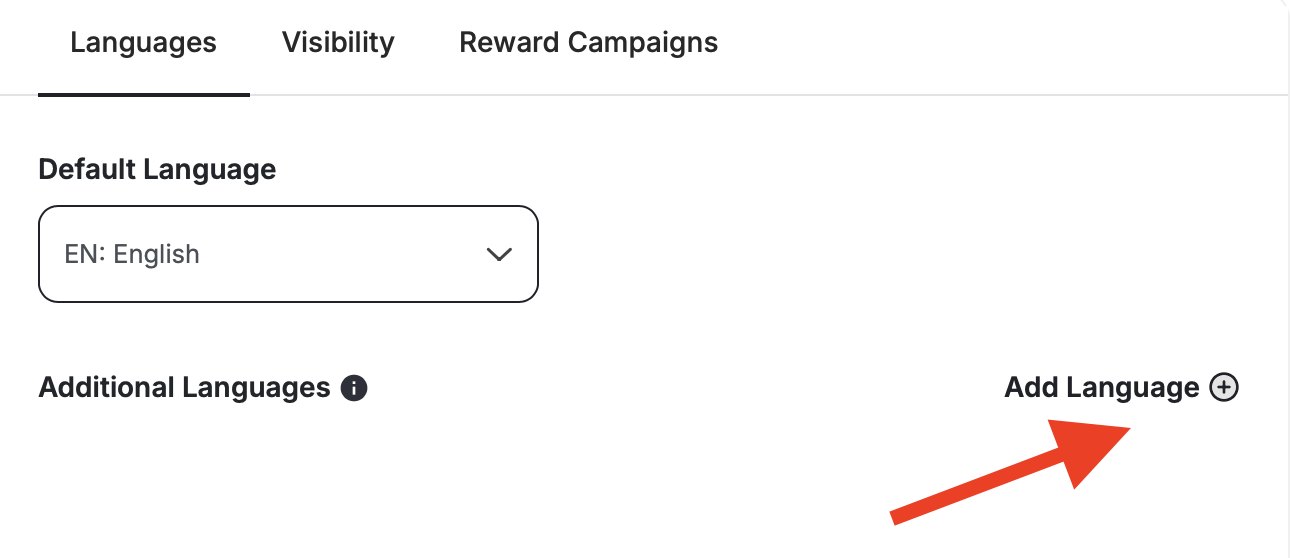 Make sure to click **Save** to apply your changes.
***
## What Happens After Adding an Additional Language?
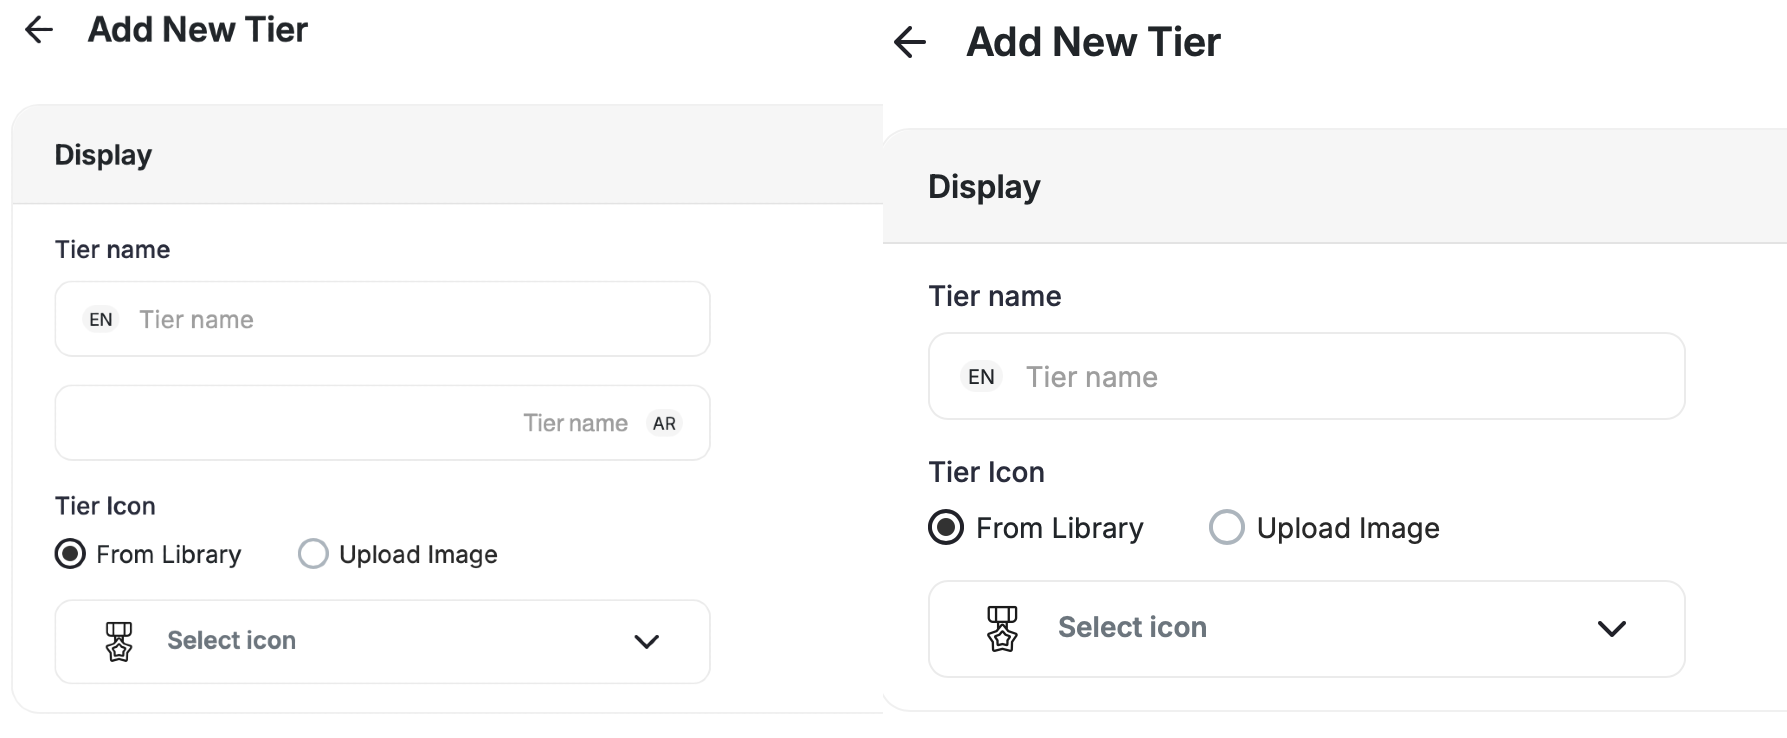
Once you add a new supported language to your Gameball account in addition to the default one, all fields across the system that are shown to your customers through the widget will display an additional input field for the newly added language.
See the example below for how the level name field appears when two languages are active (left) versus when only one language is active (right):
Make sure to click **Save** to apply your changes.
***
## What Happens After Adding an Additional Language?
Once you add a new supported language to your Gameball account in addition to the default one, all fields across the system that are shown to your customers through the widget will display an additional input field for the newly added language.
See the example below for how the level name field appears when two languages are active (left) versus when only one language is active (right):
 ***
## What Fields Will Be Affected Once You Add a New Language?
Once you add a new supported language to your Gameball account in addition to the default one, the following fields will require corresponding data in the newly added language:
* **Score name**, if you are using Score as the leveling-up method
* **Points name**
* **Level name**
* **Challenge name and description**
* **Guest view intro and button text**
* **Referral tab title and description**
* **Message title, body, and button text**
* **All system notifications**
In case you are adding a new language after finishing the experience design and configurations, you will need to update all the above fields one by one to add the corresponding data for every field.
***
## What's Next?
Adjust colors, fonts, icons, and identity to align the widget with your platform's look and feel.
Control which tabs appear in your widget and in what order they are displayed.
Configure the guest experience, including images, sign-up URLs, and login redirects.
Control the shape, position, icon, and visibility of your loyalty launcher button.
***
## What Fields Will Be Affected Once You Add a New Language?
Once you add a new supported language to your Gameball account in addition to the default one, the following fields will require corresponding data in the newly added language:
* **Score name**, if you are using Score as the leveling-up method
* **Points name**
* **Level name**
* **Challenge name and description**
* **Guest view intro and button text**
* **Referral tab title and description**
* **Message title, body, and button text**
* **All system notifications**
In case you are adding a new language after finishing the experience design and configurations, you will need to update all the above fields one by one to add the corresponding data for every field.
***
## What's Next?
Adjust colors, fonts, icons, and identity to align the widget with your platform's look and feel.
Control which tabs appear in your widget and in what order they are displayed.
Configure the guest experience, including images, sign-up URLs, and login redirects.
Control the shape, position, icon, and visibility of your loyalty launcher button.