> ## Documentation Index
> Fetch the complete documentation index at: https://docs.gameball.co/llms.txt
> Use this file to discover all available pages before exploring further.
# What Is Guest Widget Configuration for Web?
> Encourage your guests to create an account on your website or login using their current account.
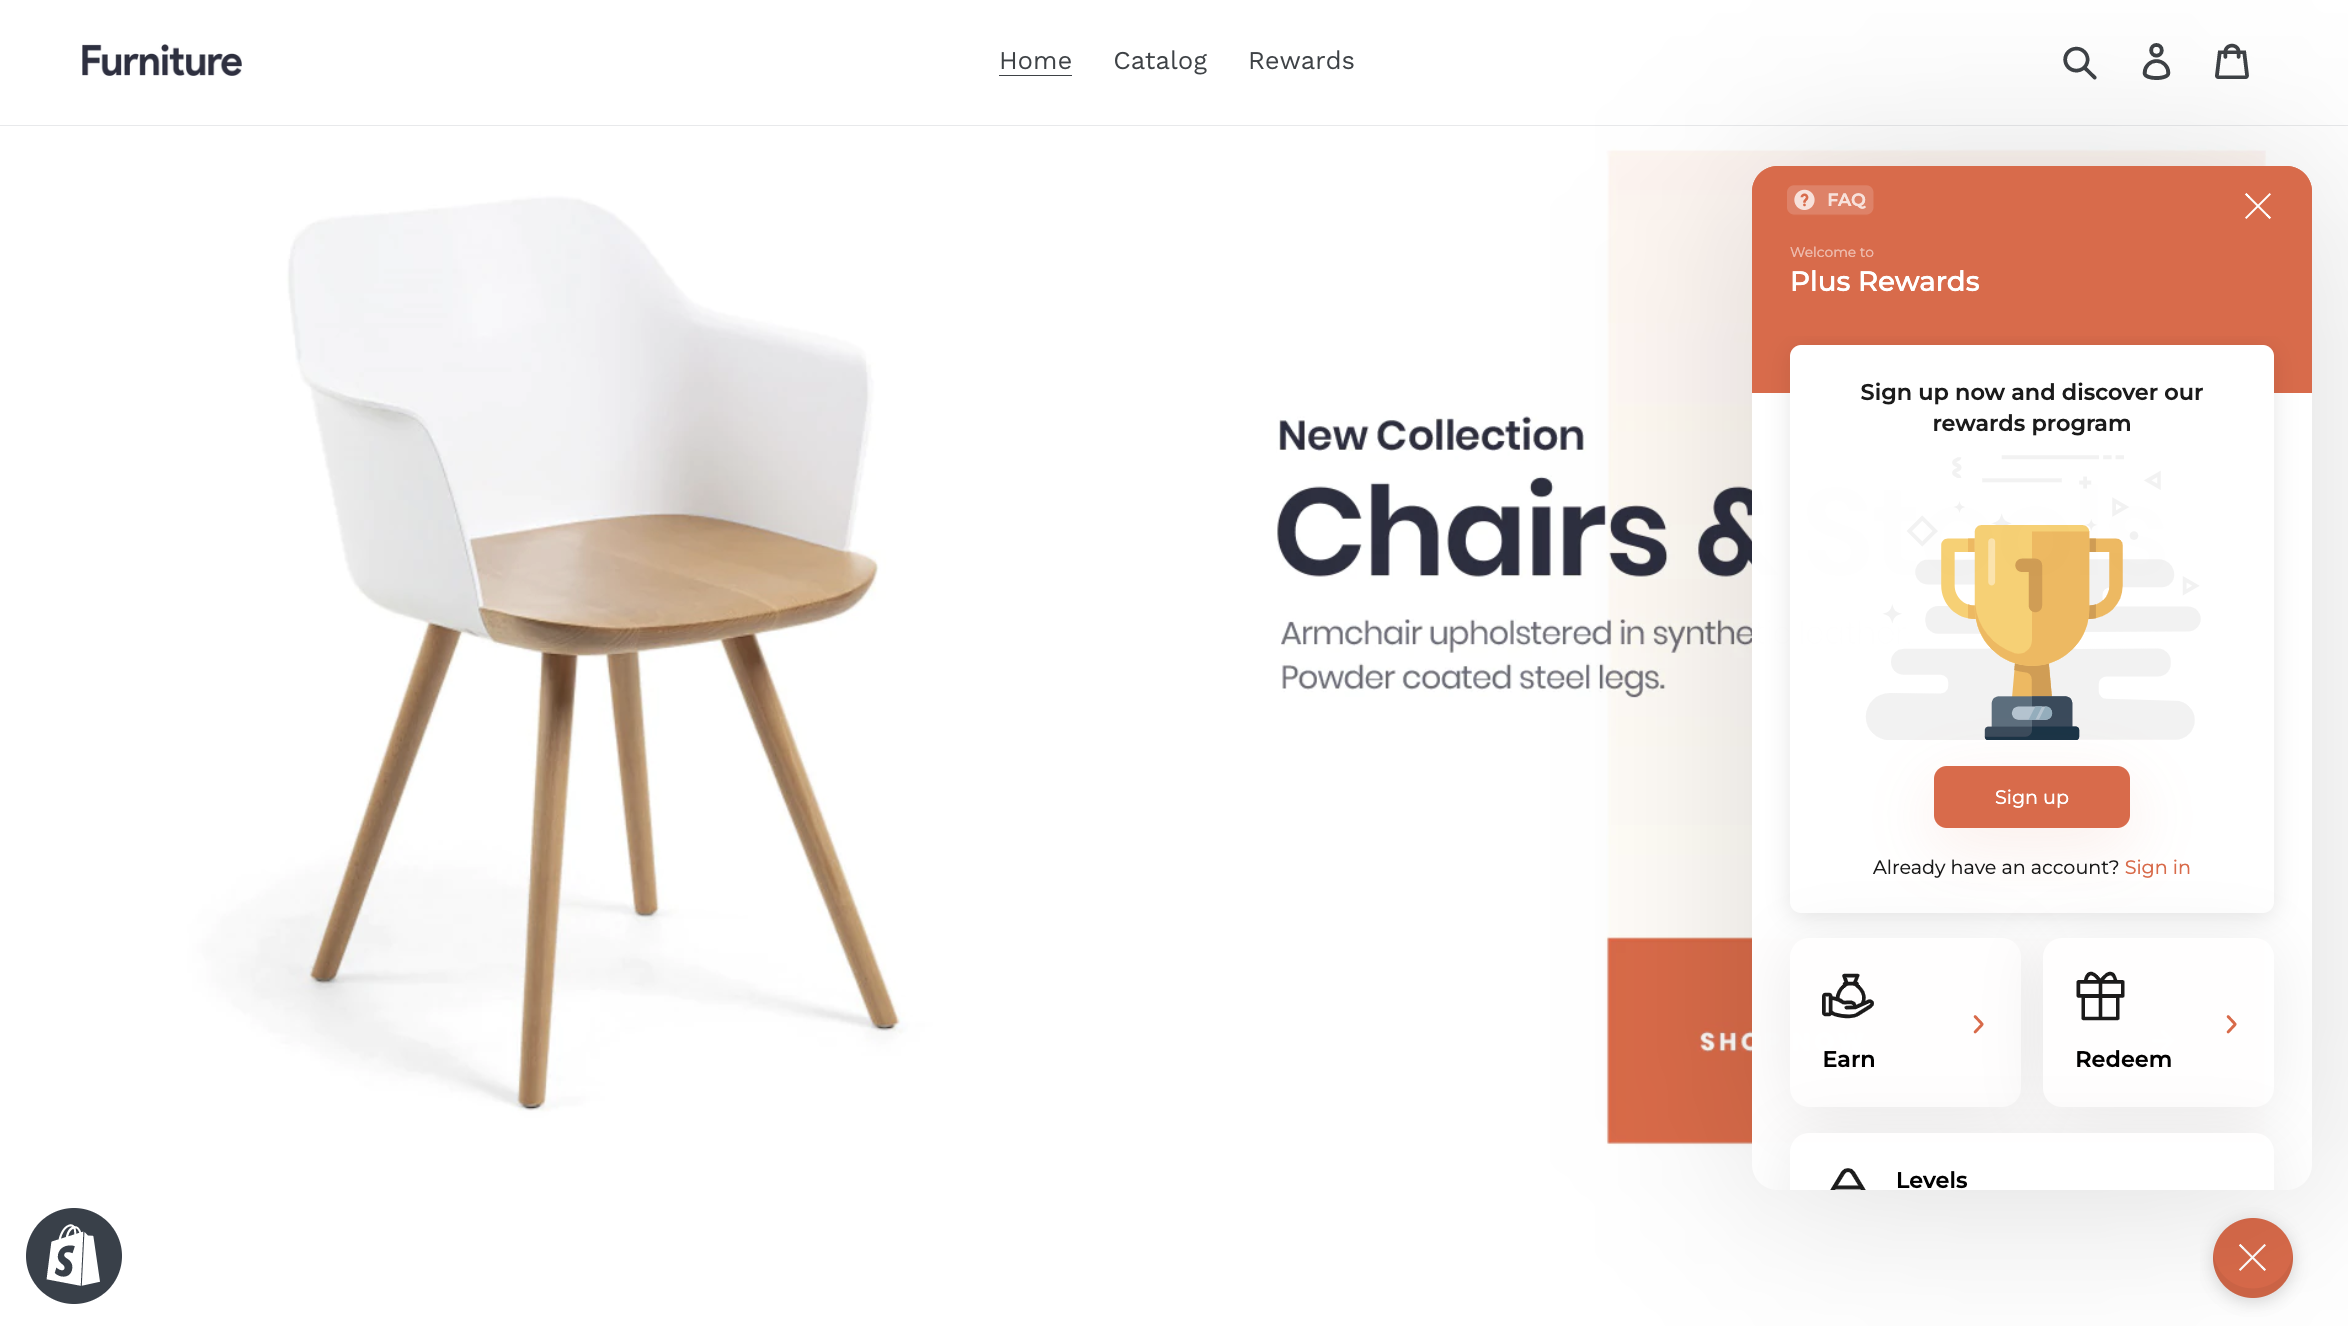
For **Web only**, when you have a guest visitor, Gameball does not create a profile for the customer until guests signup on your platform. Once your guest logs in or creates an account, Gameball creates a profile for them and they start getting enrolled in the Gameball rewards experience through the widget.
Below is an example of how the guest view widget looks for your guest visitors:
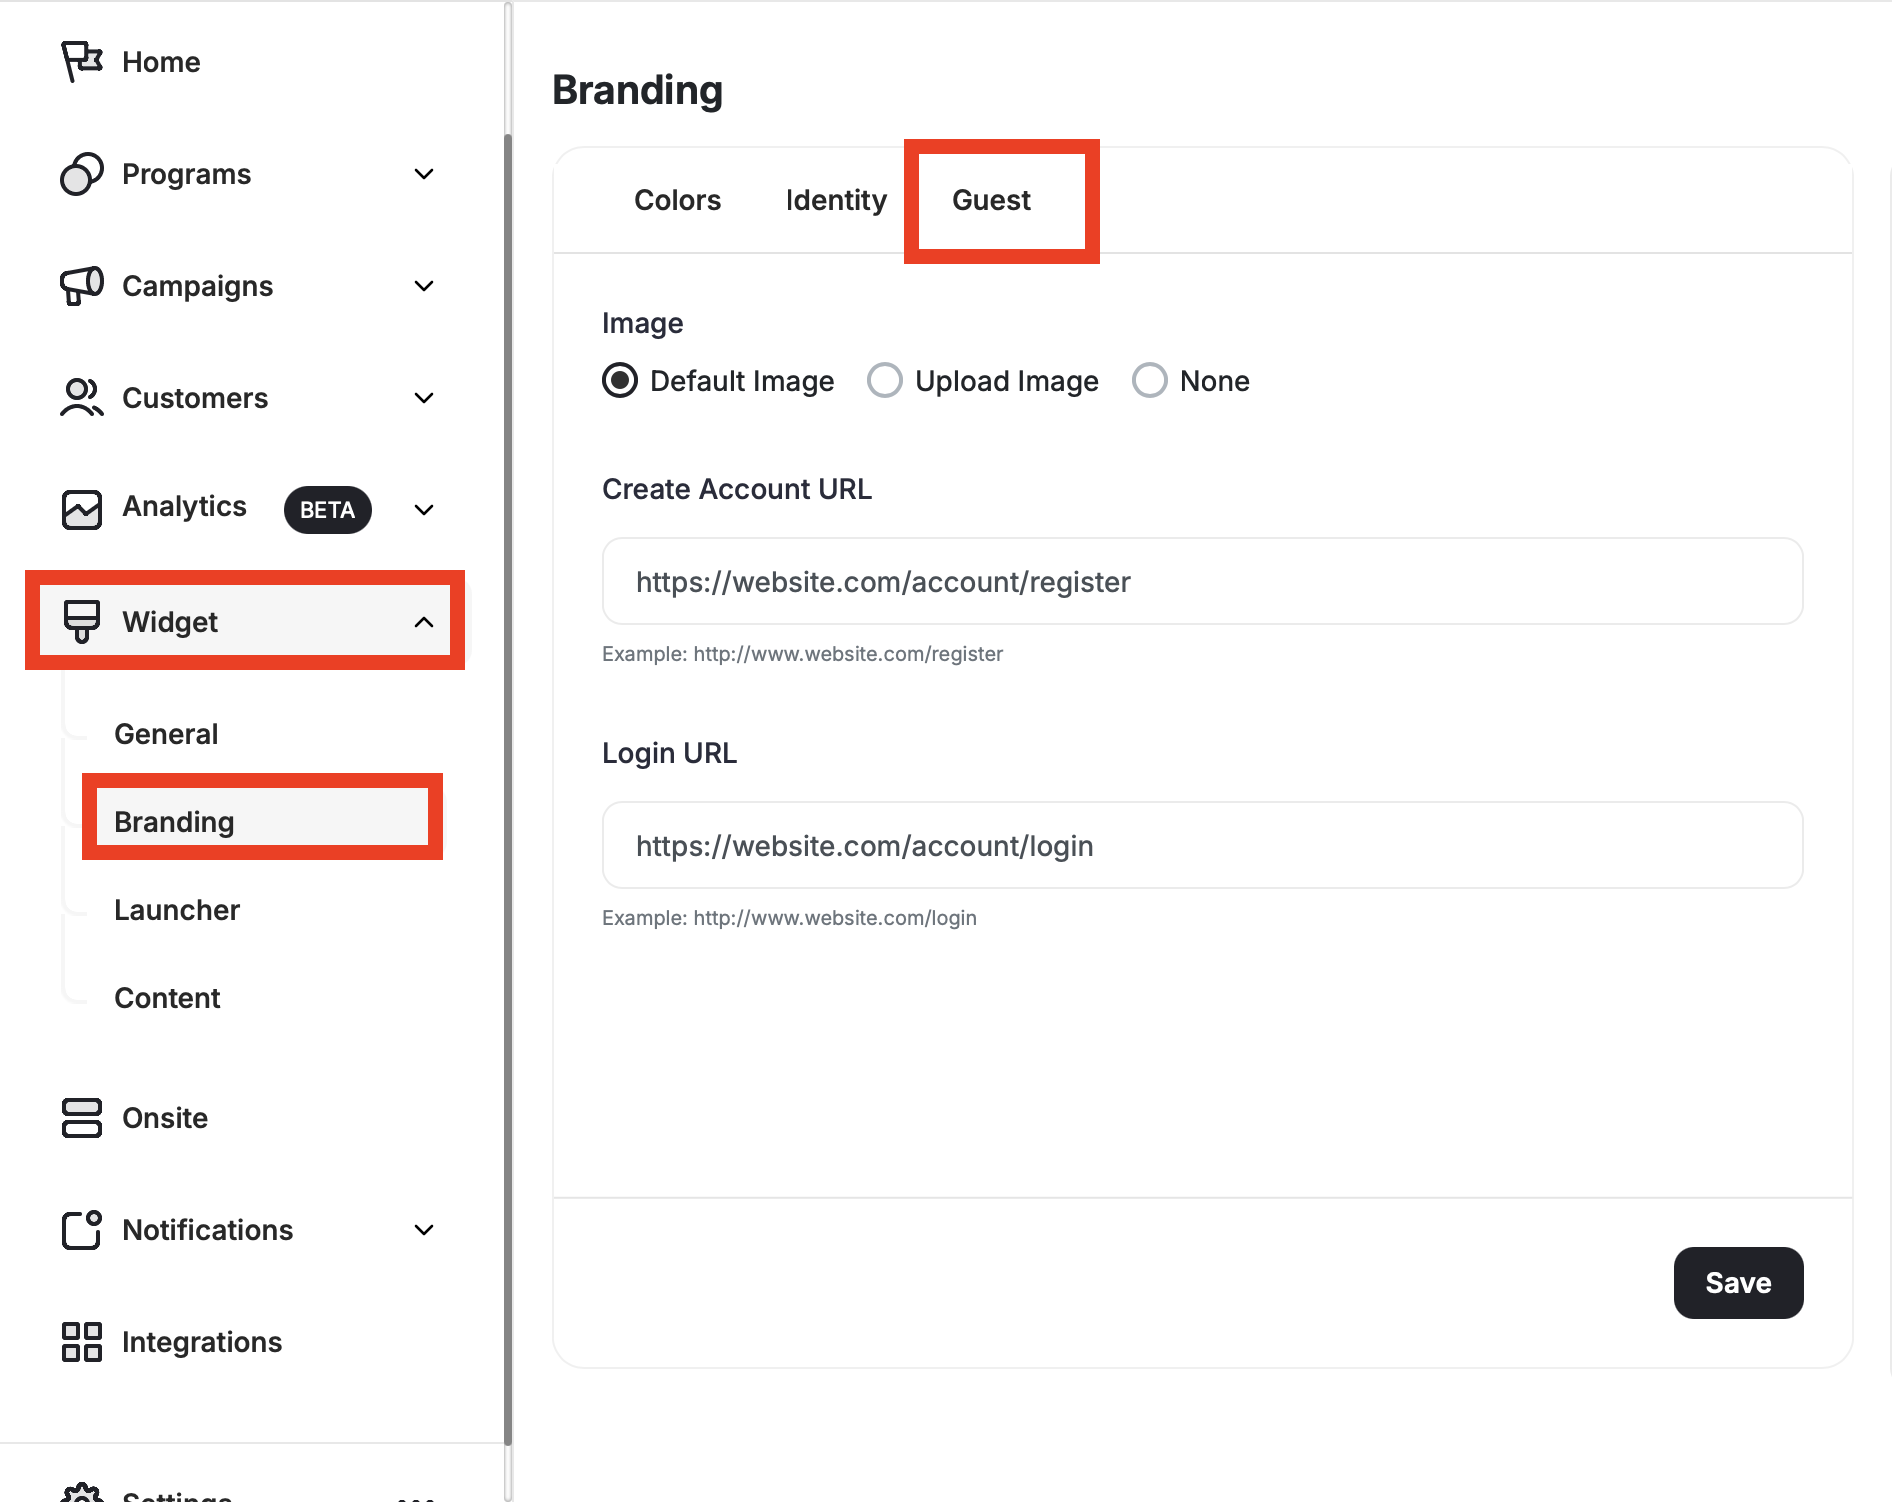
 You can access the guest view configurations in **Gameball Admin Dashboard** through **Widget > Branding: Guest**.
 ***
## Configuring the Guest Widget
By default, Gameball has an image of a trophy set right above the sign-up button. Choose one of the following options:
* **Default Image:** Leave the trophy image as-is.
* **Upload Image:** Choose an image that goes with your brand.
* **None:** Remove the image entirely.
Uploading a custom guest image is available on:
| Platform | Plan |
| -------------------- | ------------------ |
| Shopify | Pro, Guru |
| Salla | Pro, Guru |
| Non-platform clients | Growth, Enterprise |
Insert the URL of the registration/signup page on your platform. Guests will be directed here when they click the sign-up call-to-action.
For guests who have previously signed up but only need to log in, insert the URL of the page you want your player to get redirected to in order to sign back in.
Click **Save** to apply all your guest widget configurations.
***
## What's Next?
Customize the text displayed to guests in the widget, including sign-up prompts and FAQ content.
Control which tabs appear in your widget and in what order they are displayed.
Adjust colors, fonts, icons, and identity to align the widget with your platform's look and feel.
Set a default language and add additional languages to serve a multilingual audience.
***
## Configuring the Guest Widget
By default, Gameball has an image of a trophy set right above the sign-up button. Choose one of the following options:
* **Default Image:** Leave the trophy image as-is.
* **Upload Image:** Choose an image that goes with your brand.
* **None:** Remove the image entirely.
Uploading a custom guest image is available on:
| Platform | Plan |
| -------------------- | ------------------ |
| Shopify | Pro, Guru |
| Salla | Pro, Guru |
| Non-platform clients | Growth, Enterprise |
Insert the URL of the registration/signup page on your platform. Guests will be directed here when they click the sign-up call-to-action.
For guests who have previously signed up but only need to log in, insert the URL of the page you want your player to get redirected to in order to sign back in.
Click **Save** to apply all your guest widget configurations.
***
## What's Next?
Customize the text displayed to guests in the widget, including sign-up prompts and FAQ content.
Control which tabs appear in your widget and in what order they are displayed.
Adjust colors, fonts, icons, and identity to align the widget with your platform's look and feel.
Set a default language and add additional languages to serve a multilingual audience.