> ## Documentation Index
> Fetch the complete documentation index at: https://docs.gameball.co/llms.txt
> Use this file to discover all available pages before exploring further.
# How Do I Import My Customers From Other Loyalty Programs to Gameball Using a CSV File?
> Your existing customers deserve to be on the Gameball loyalty program too! Import your registered customers' data with a few clicks.
After integrating Gameball with your platform, you can import the data of the previously existing customers to Gameball in a few easy steps.
***
## Step 1: Export Old Rewards Program Data
All you need to do is head to your current rewards program and ask for your customers' export files.
It is preferable that you collect the following information for every customer:
| Field | Required |
| -------------------------- | --------- |
| Customer Email | Mandatory |
| Birthday | Optional |
| Customer Points | Optional |
| Required Tier Name (Level) | Optional |
| Field | Required |
| ------------------------------------ | --------- |
| Customer ID (could be email address) | Mandatory |
| Customer Email | Optional |
| Birthday | Optional |
| Mobile Number | Optional |
| Customer Points | Optional |
| Required Tier Name (Level) | Optional |
Pause your current loyalty program on the old platform, and follow the next step to complete the migration process.
***
## Step 2: Migrate to Gameball
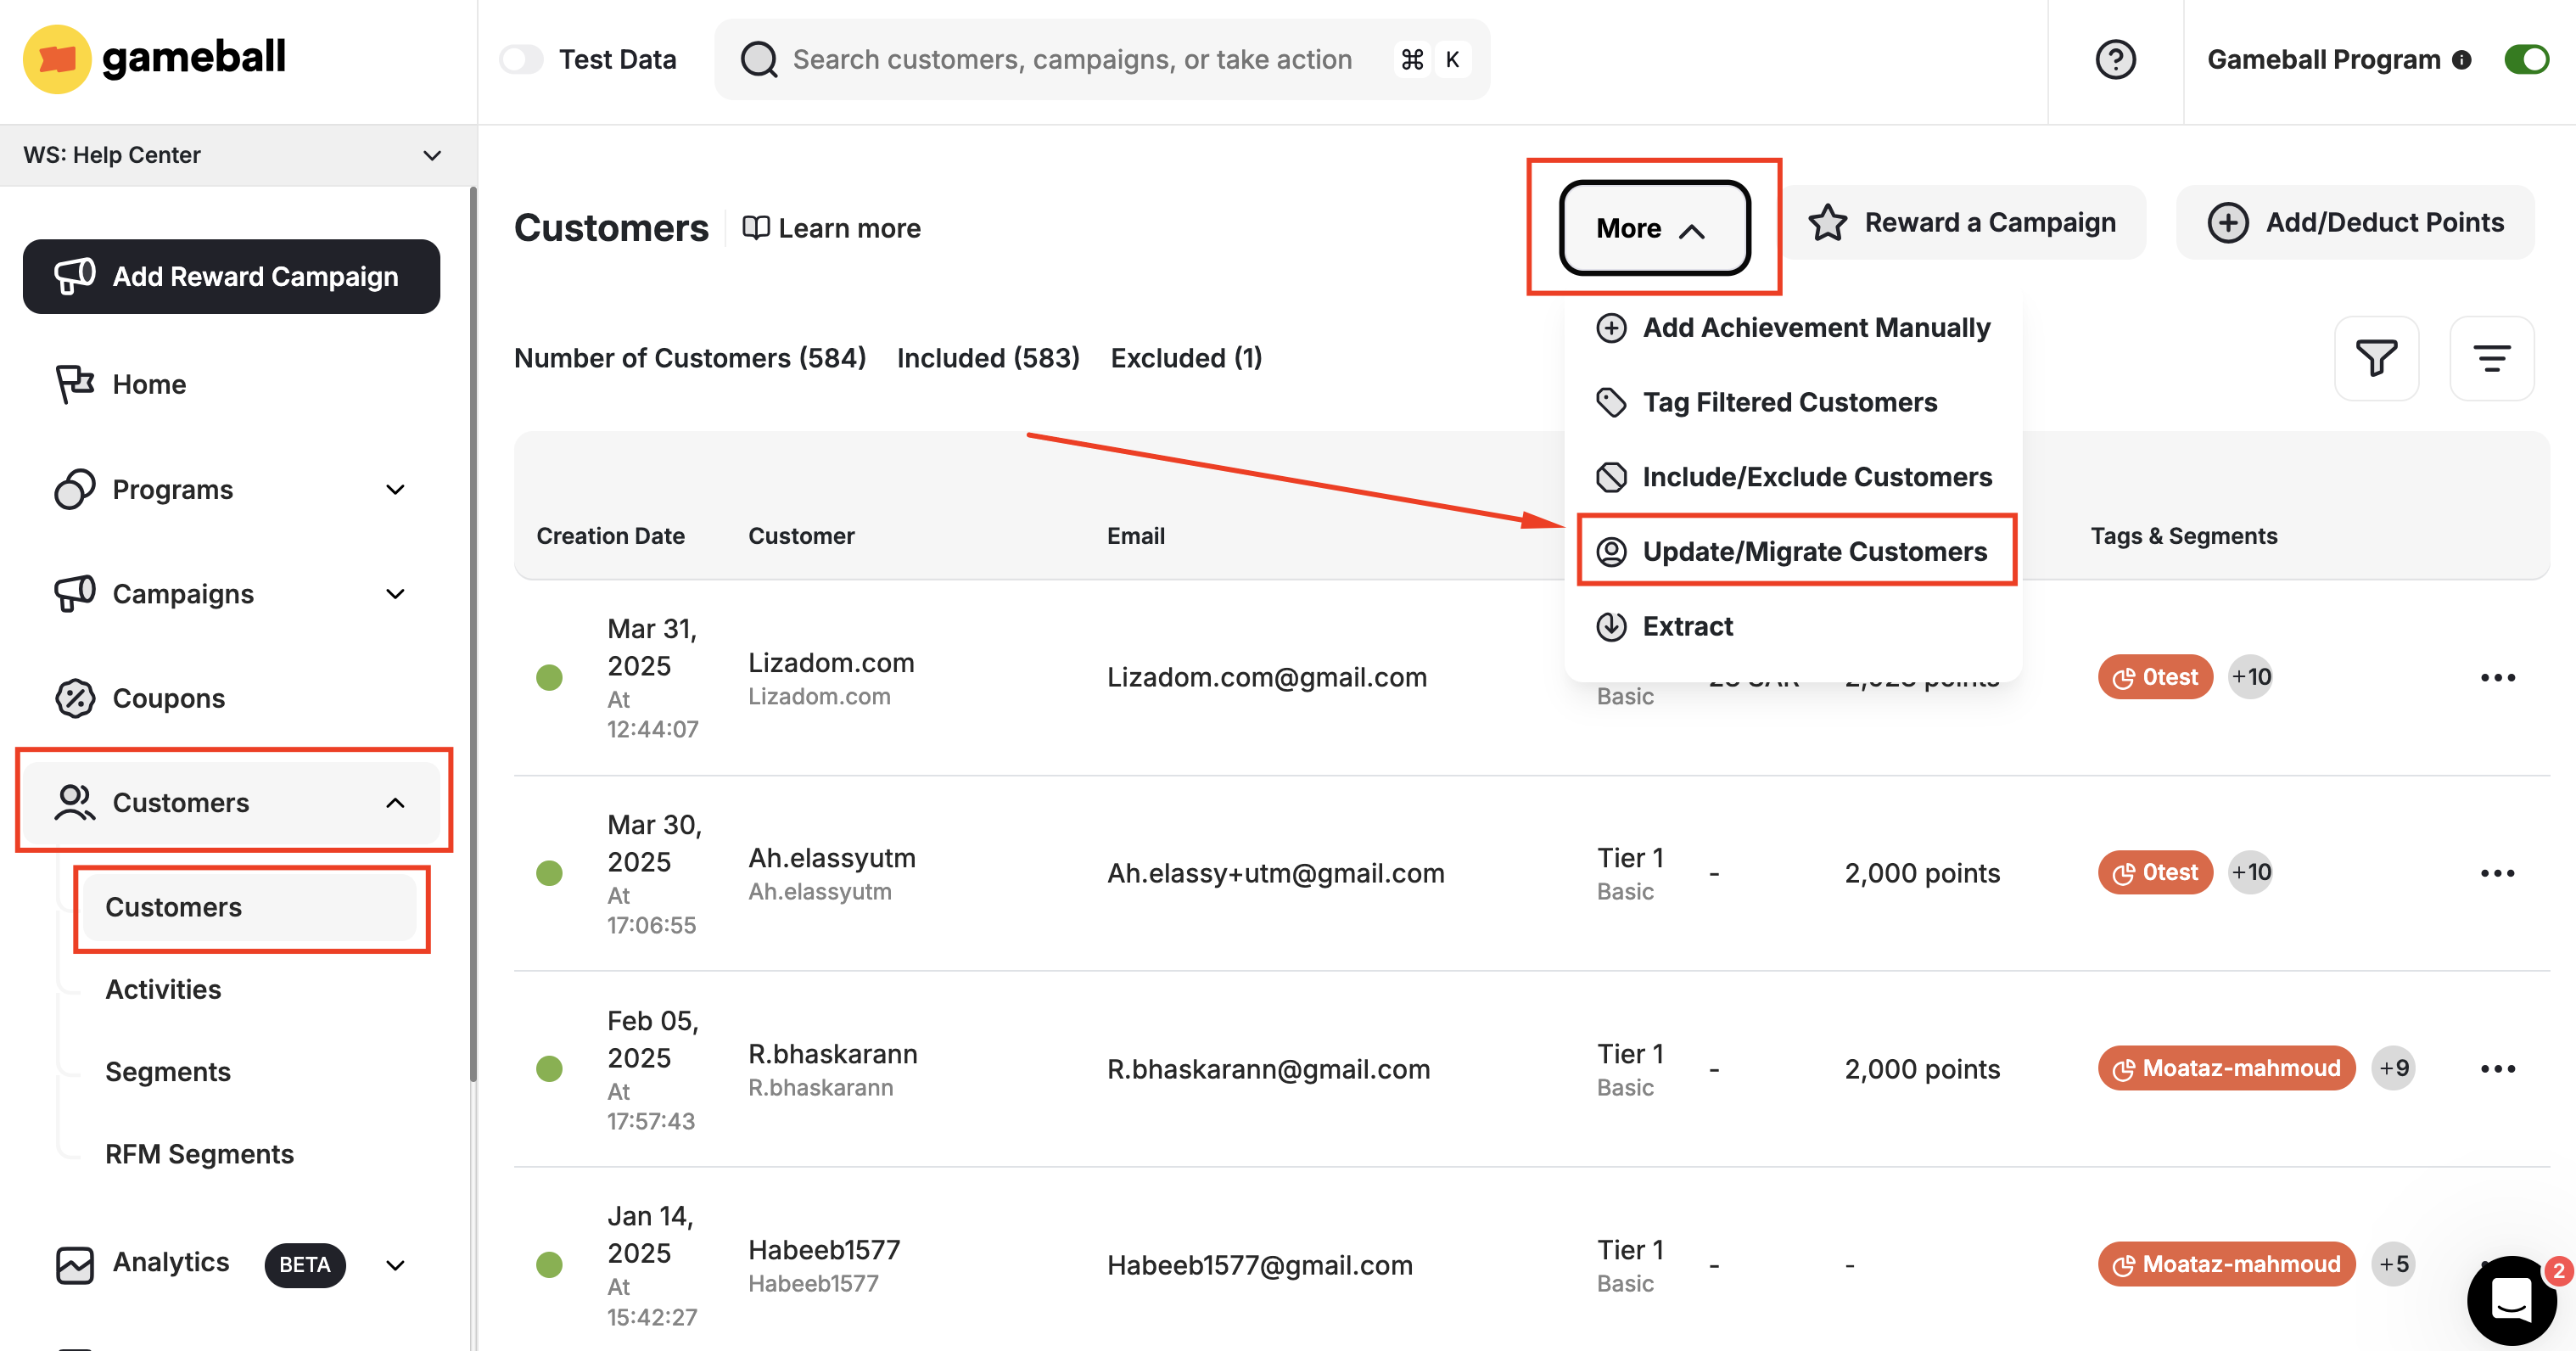
From **Gameball Admin Dashboard**, go to **Customers > Customers Tab > More > Update/Migrate Customers**.
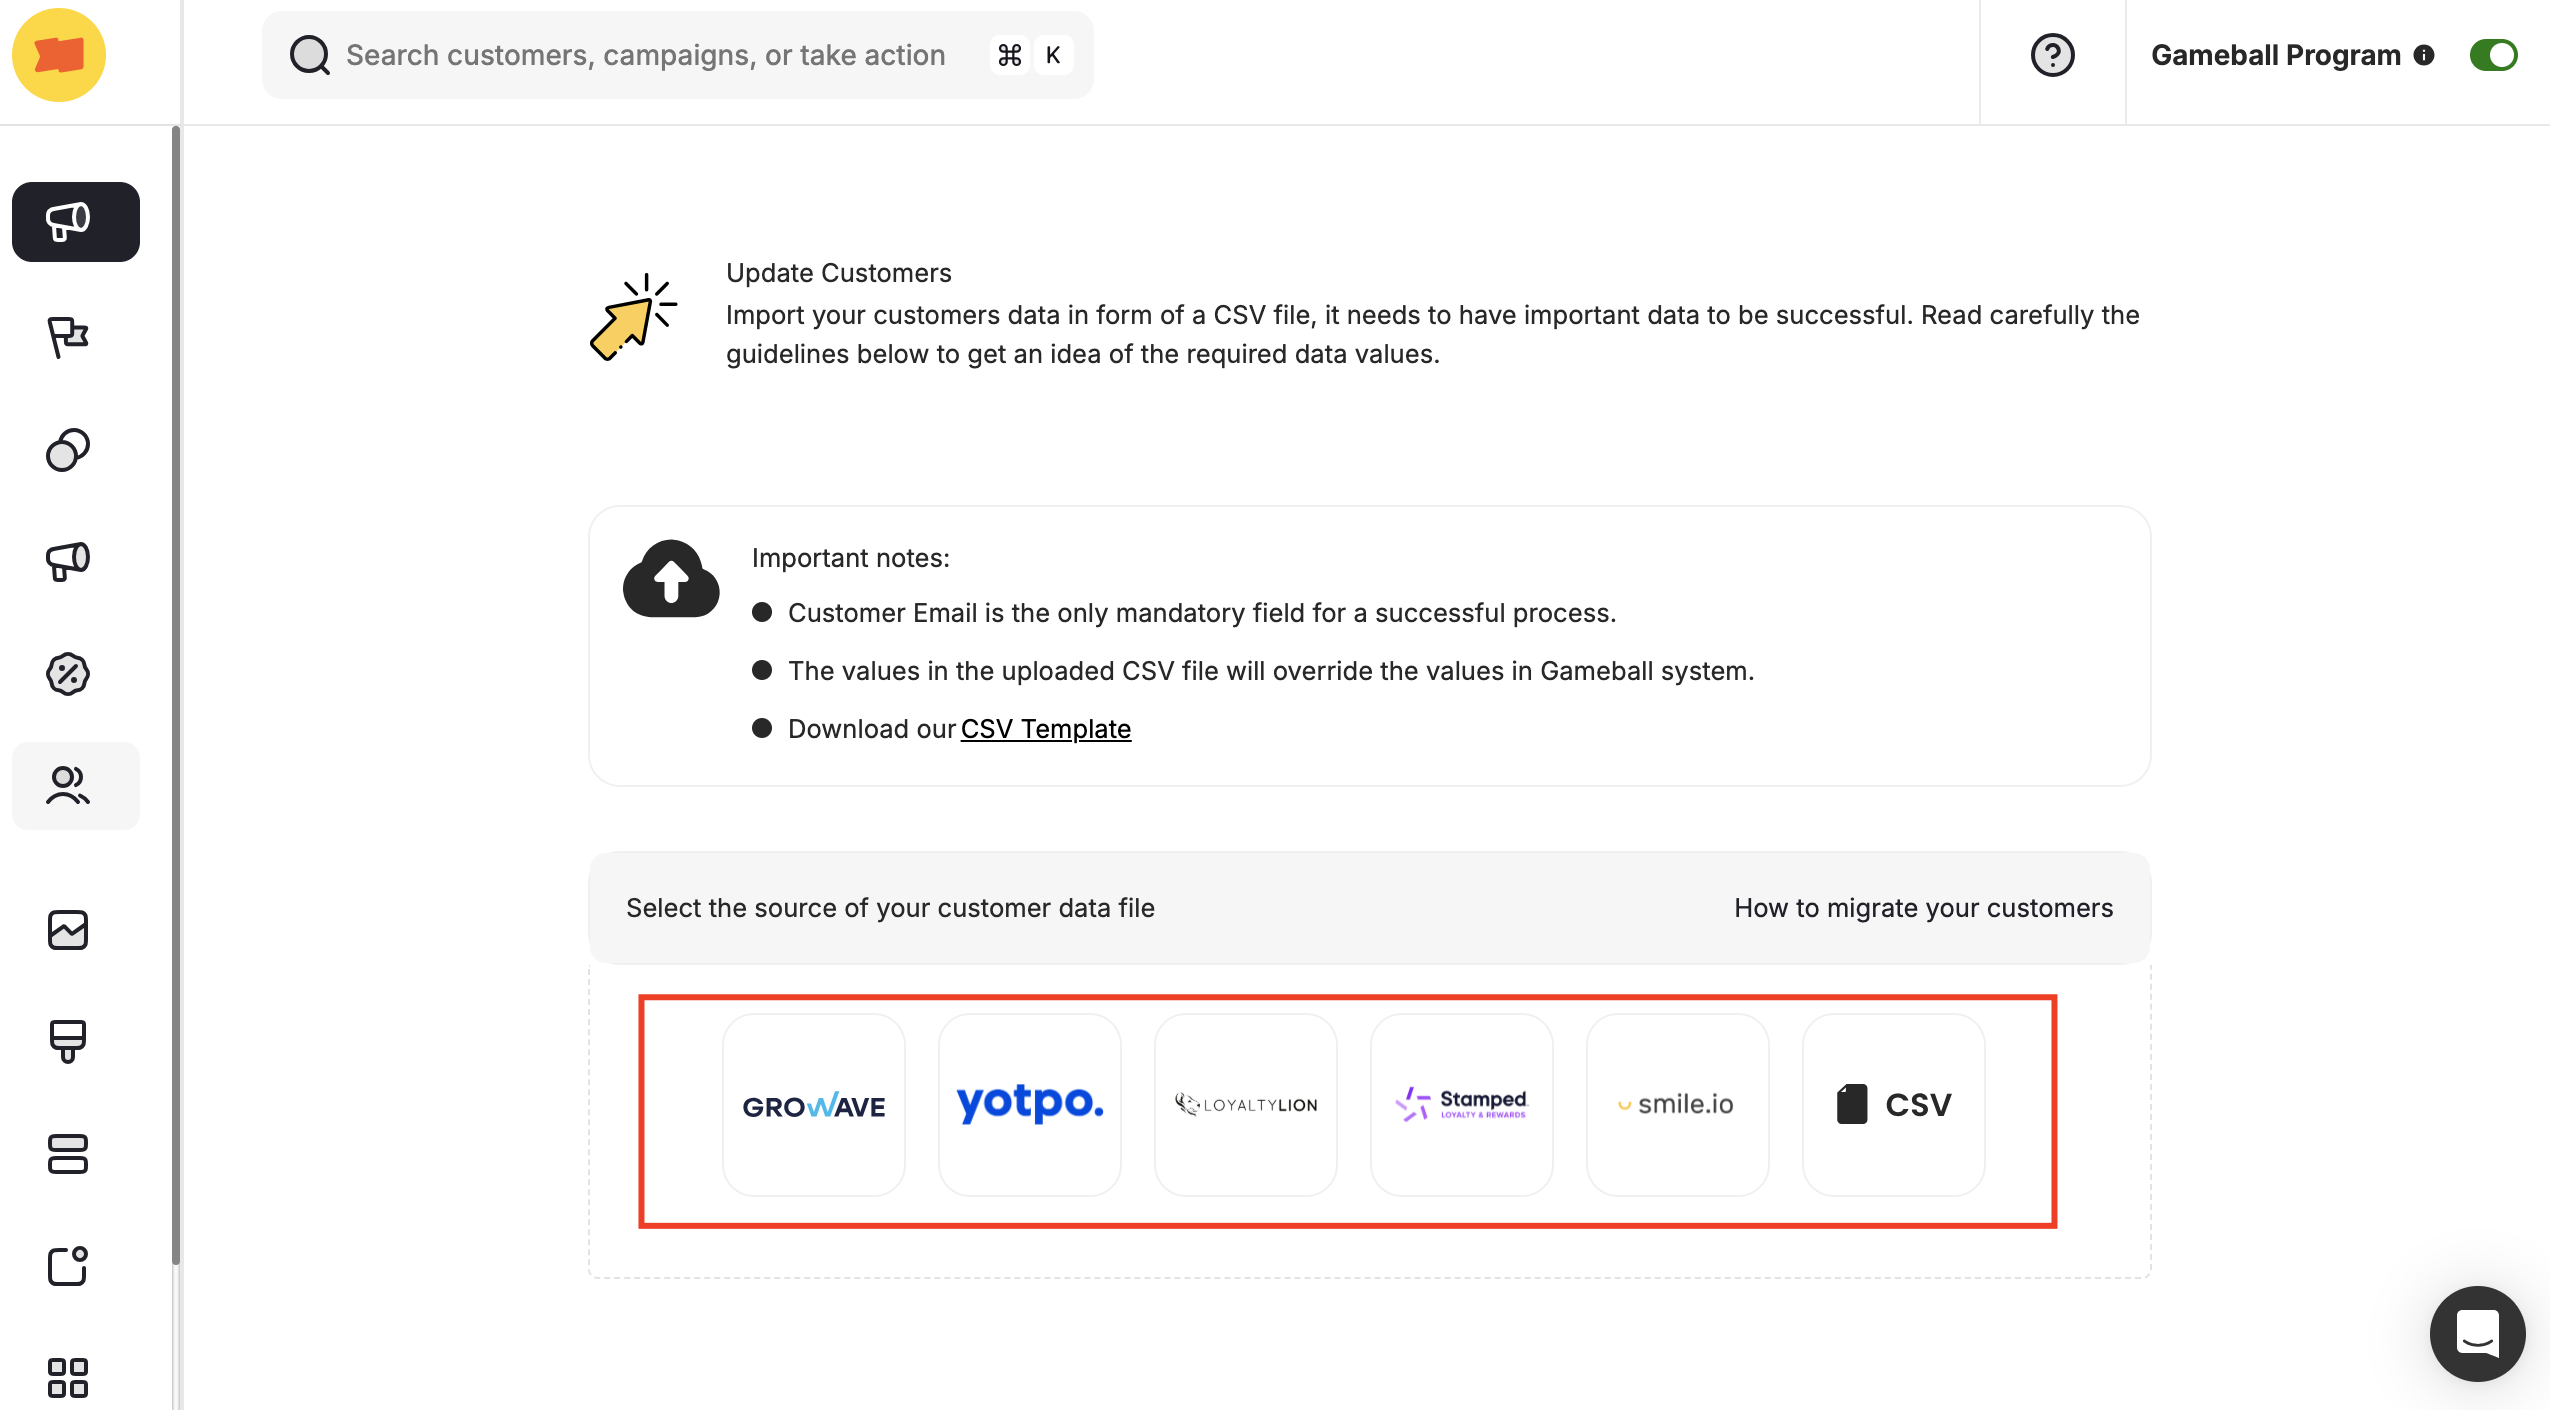
 Choose **CSV** as data source.
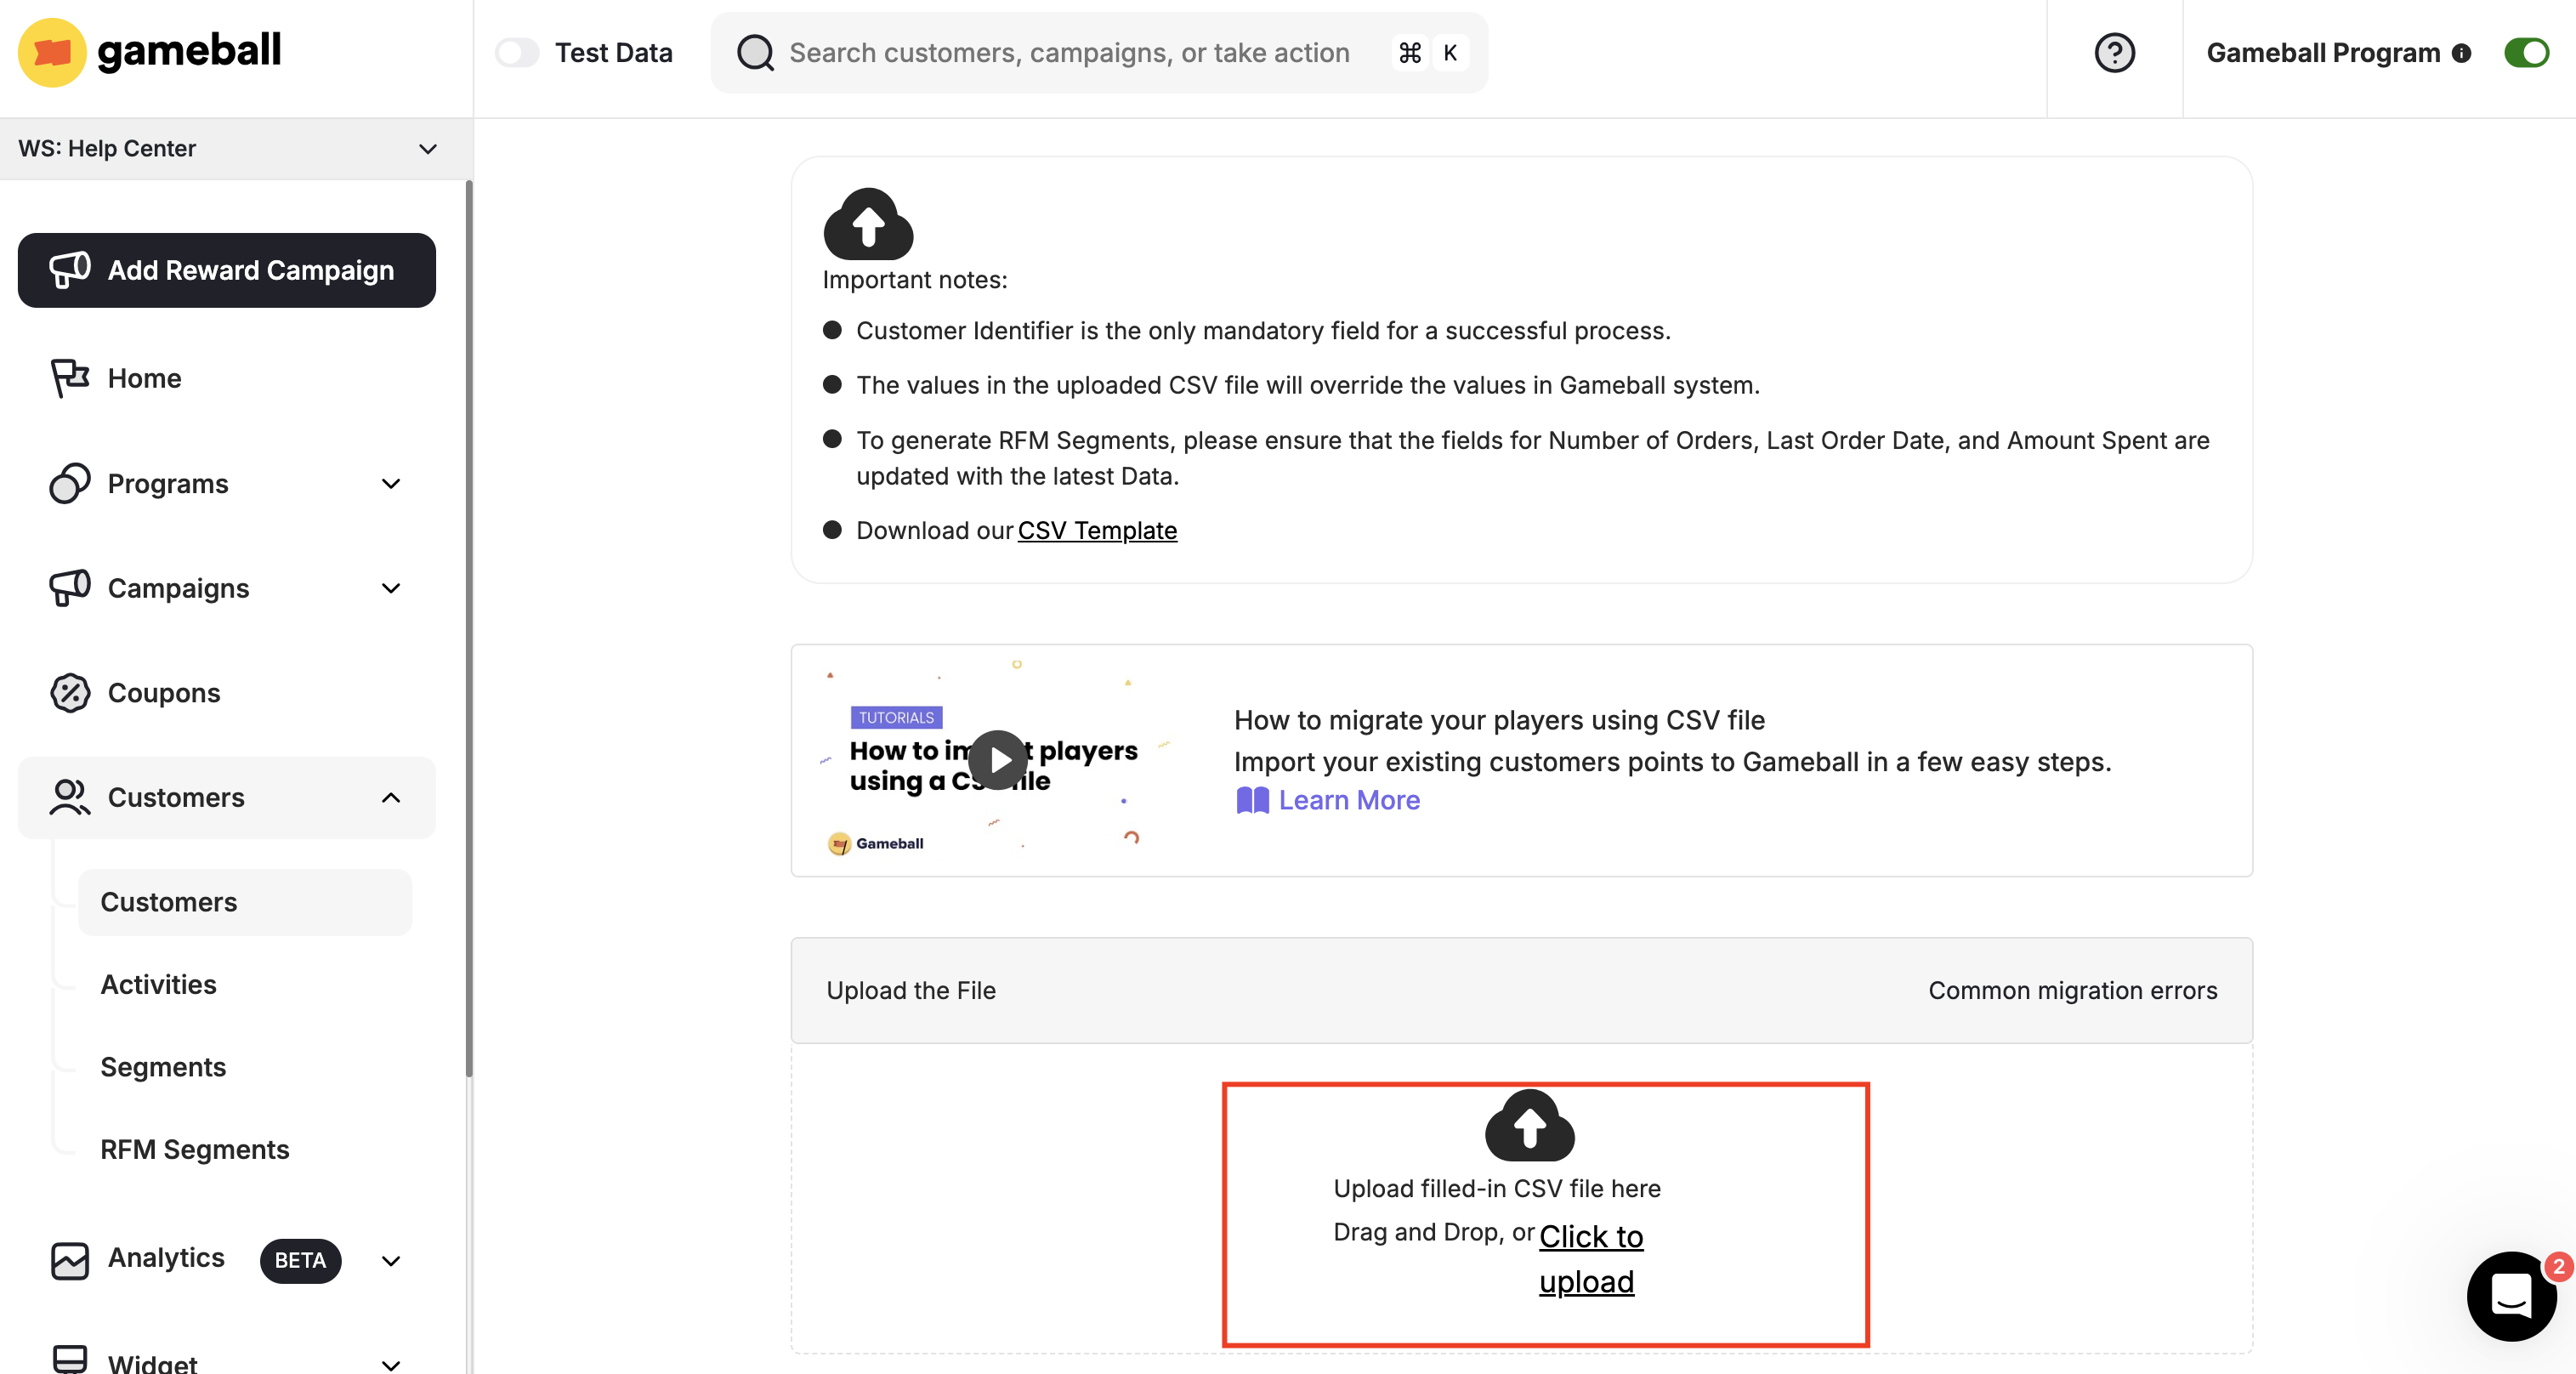
 Click on **"CSV."**
Click on **"Click to upload."**
Click on **"CSV."**
Click on **"Click to upload."**
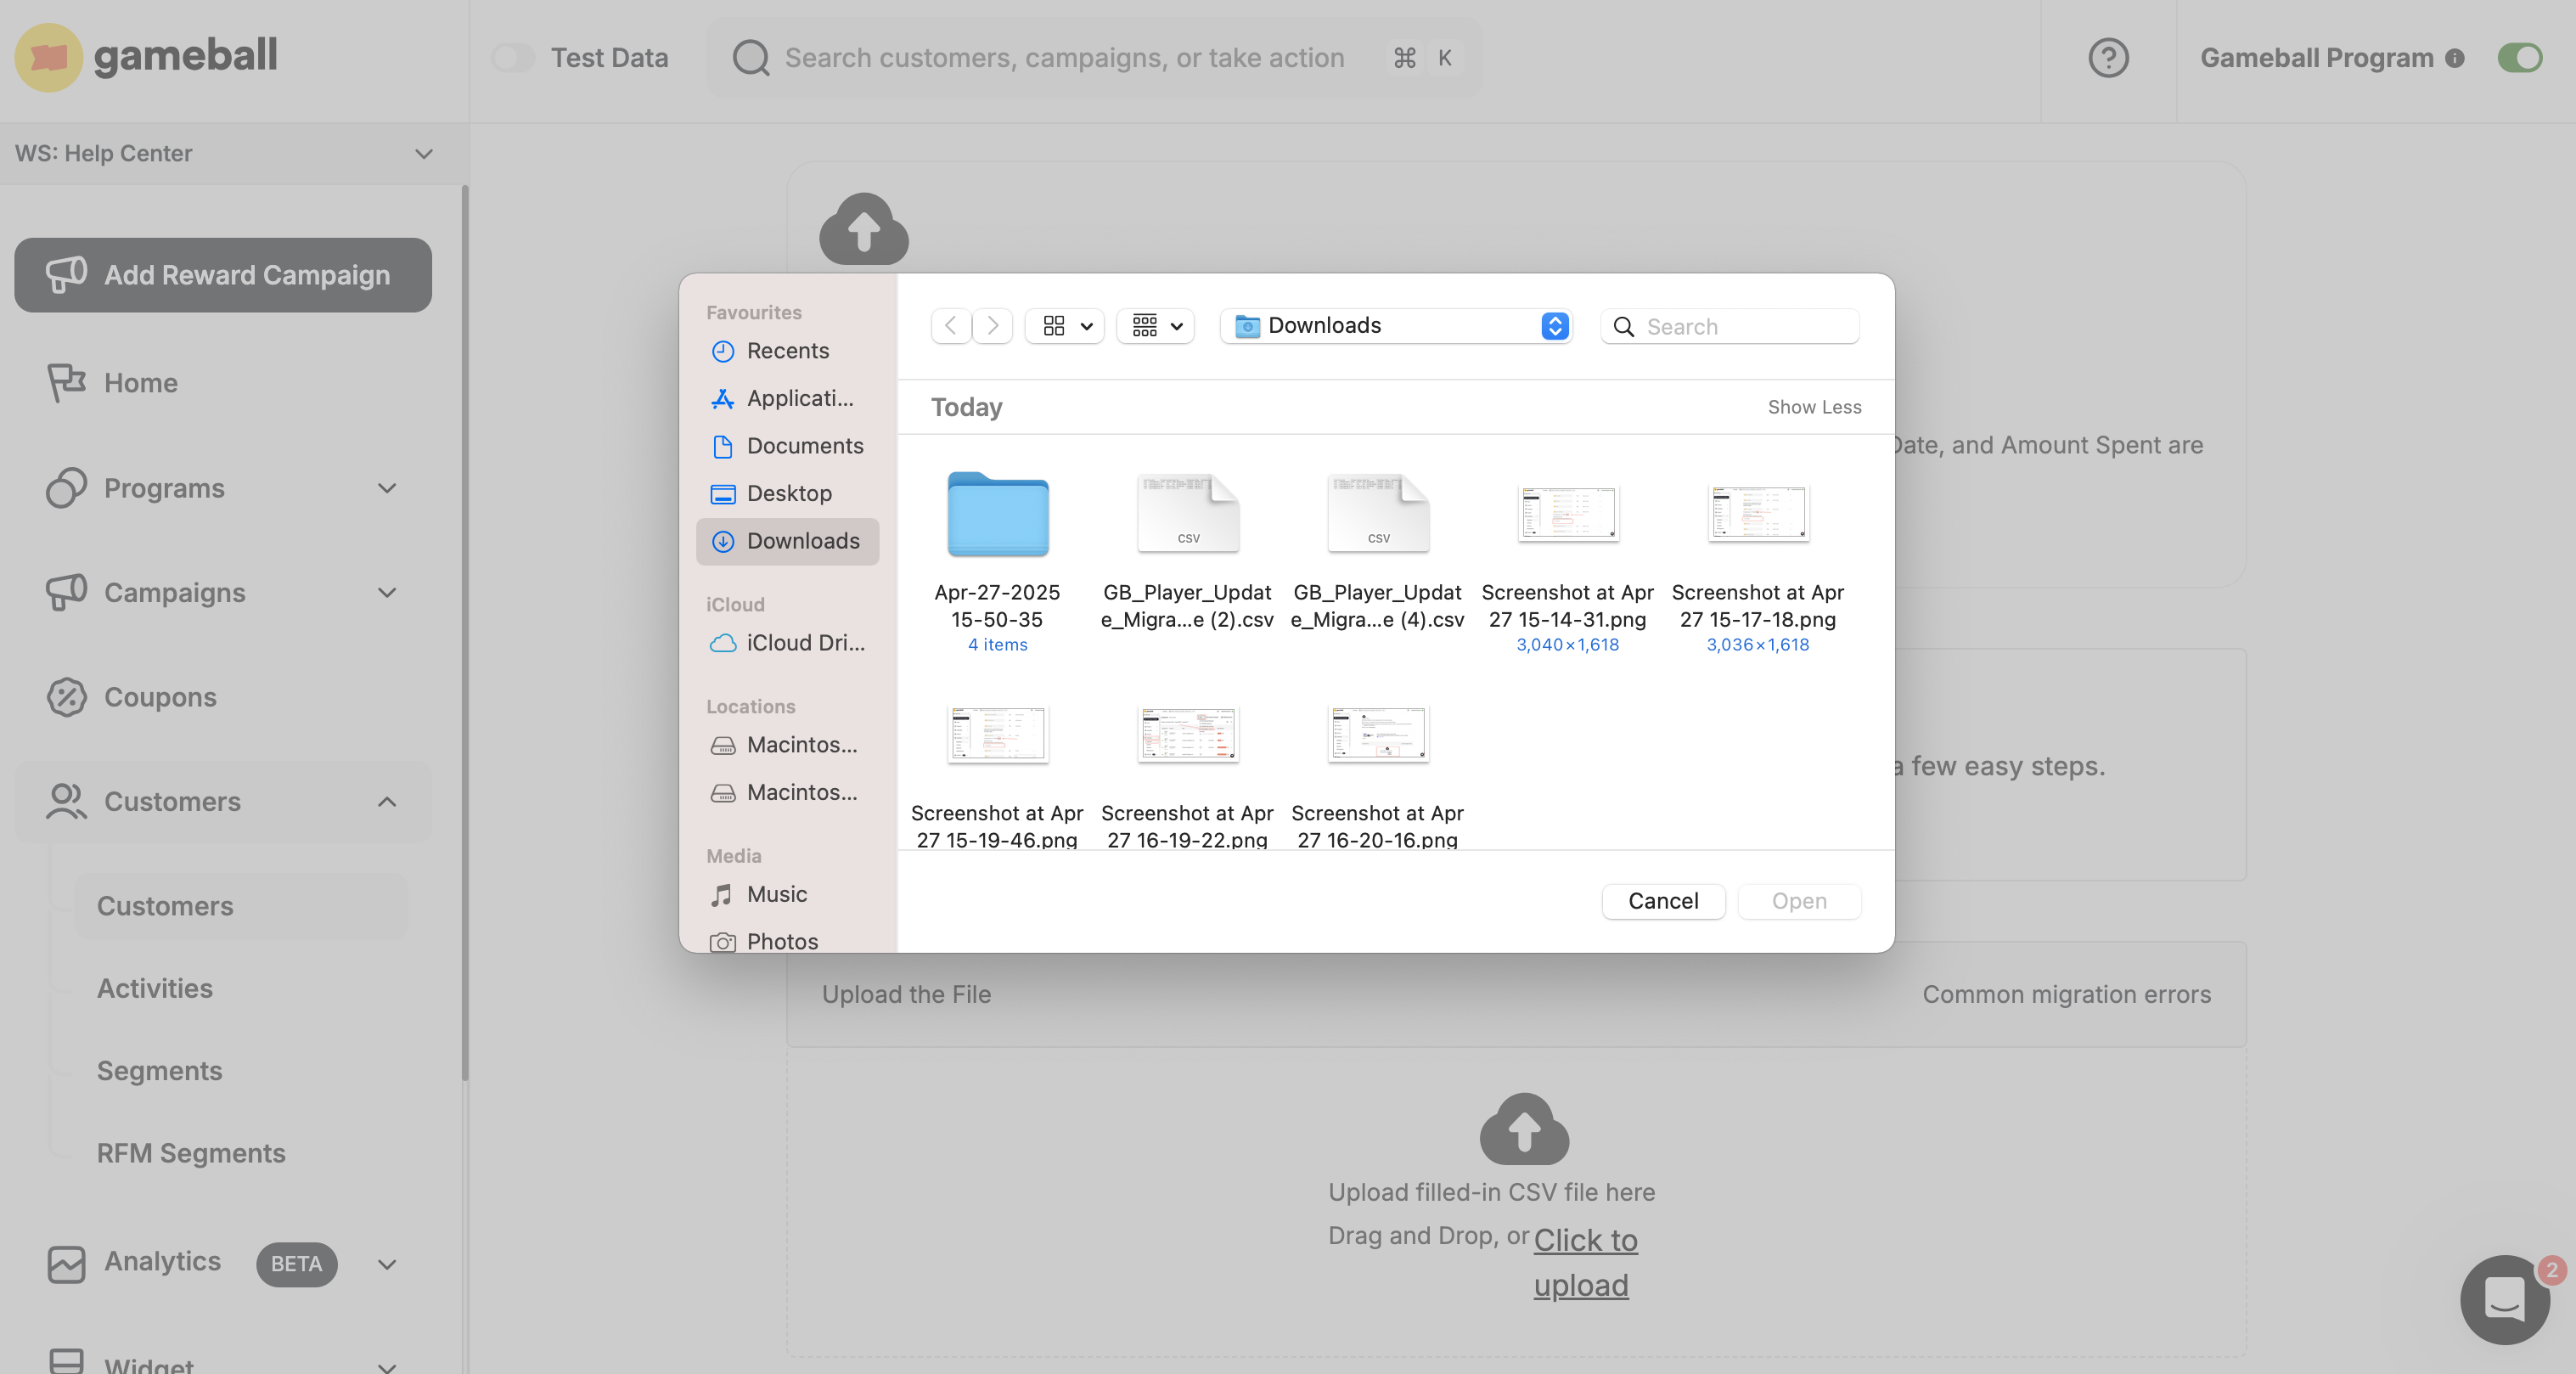
 Choose the downloaded CSV file and click **Open**.
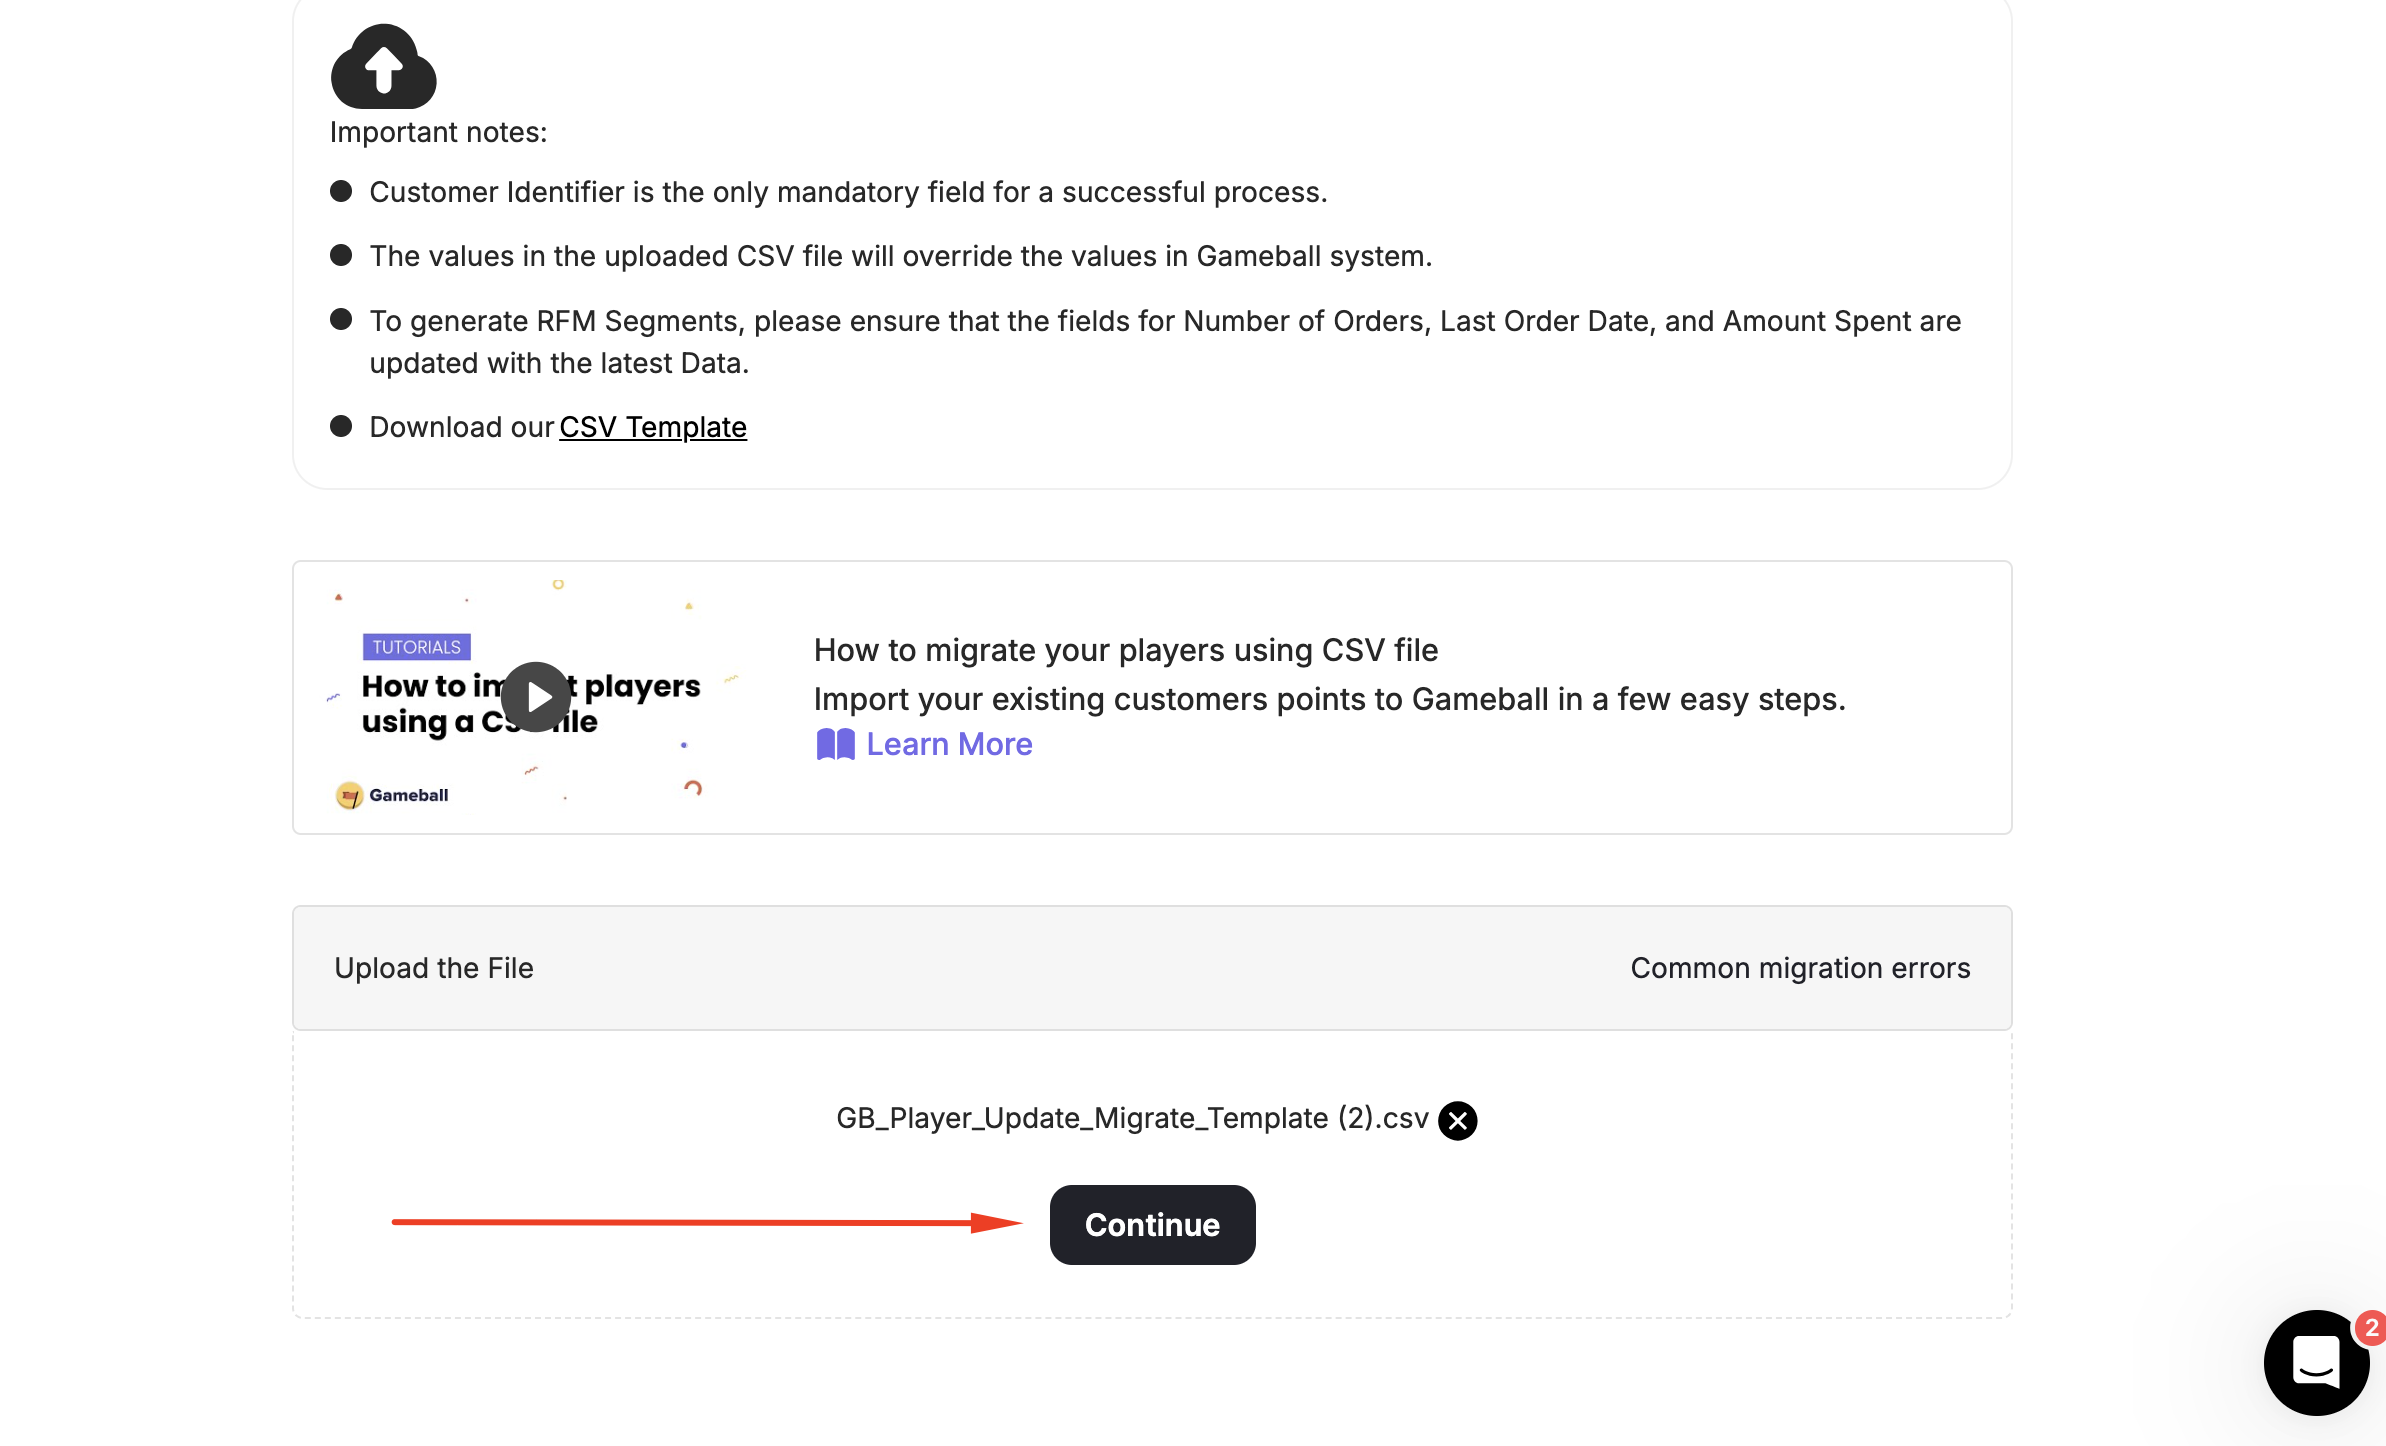
 Once the file is read by Gameball, click **Continue**.
 In order for Gameball to correctly place the customers' data into their corresponding attributes, you will have to map the CSV file headers with Gameball's requested attributes.
For example: if the CSV file has a column titled "Email address," then select this header under **Your File Attribute**, right beside **"Customer Email."** This way Gameball will understand that data under the "Email Address" column should be placed in the **Customer Email** attribute.
In order for Gameball to correctly place the customers' data into their corresponding attributes, you will have to map the CSV file headers with Gameball's requested attributes.
For example: if the CSV file has a column titled "Email address," then select this header under **Your File Attribute**, right beside **"Customer Email."** This way Gameball will understand that data under the "Email Address" column should be placed in the **Customer Email** attribute.
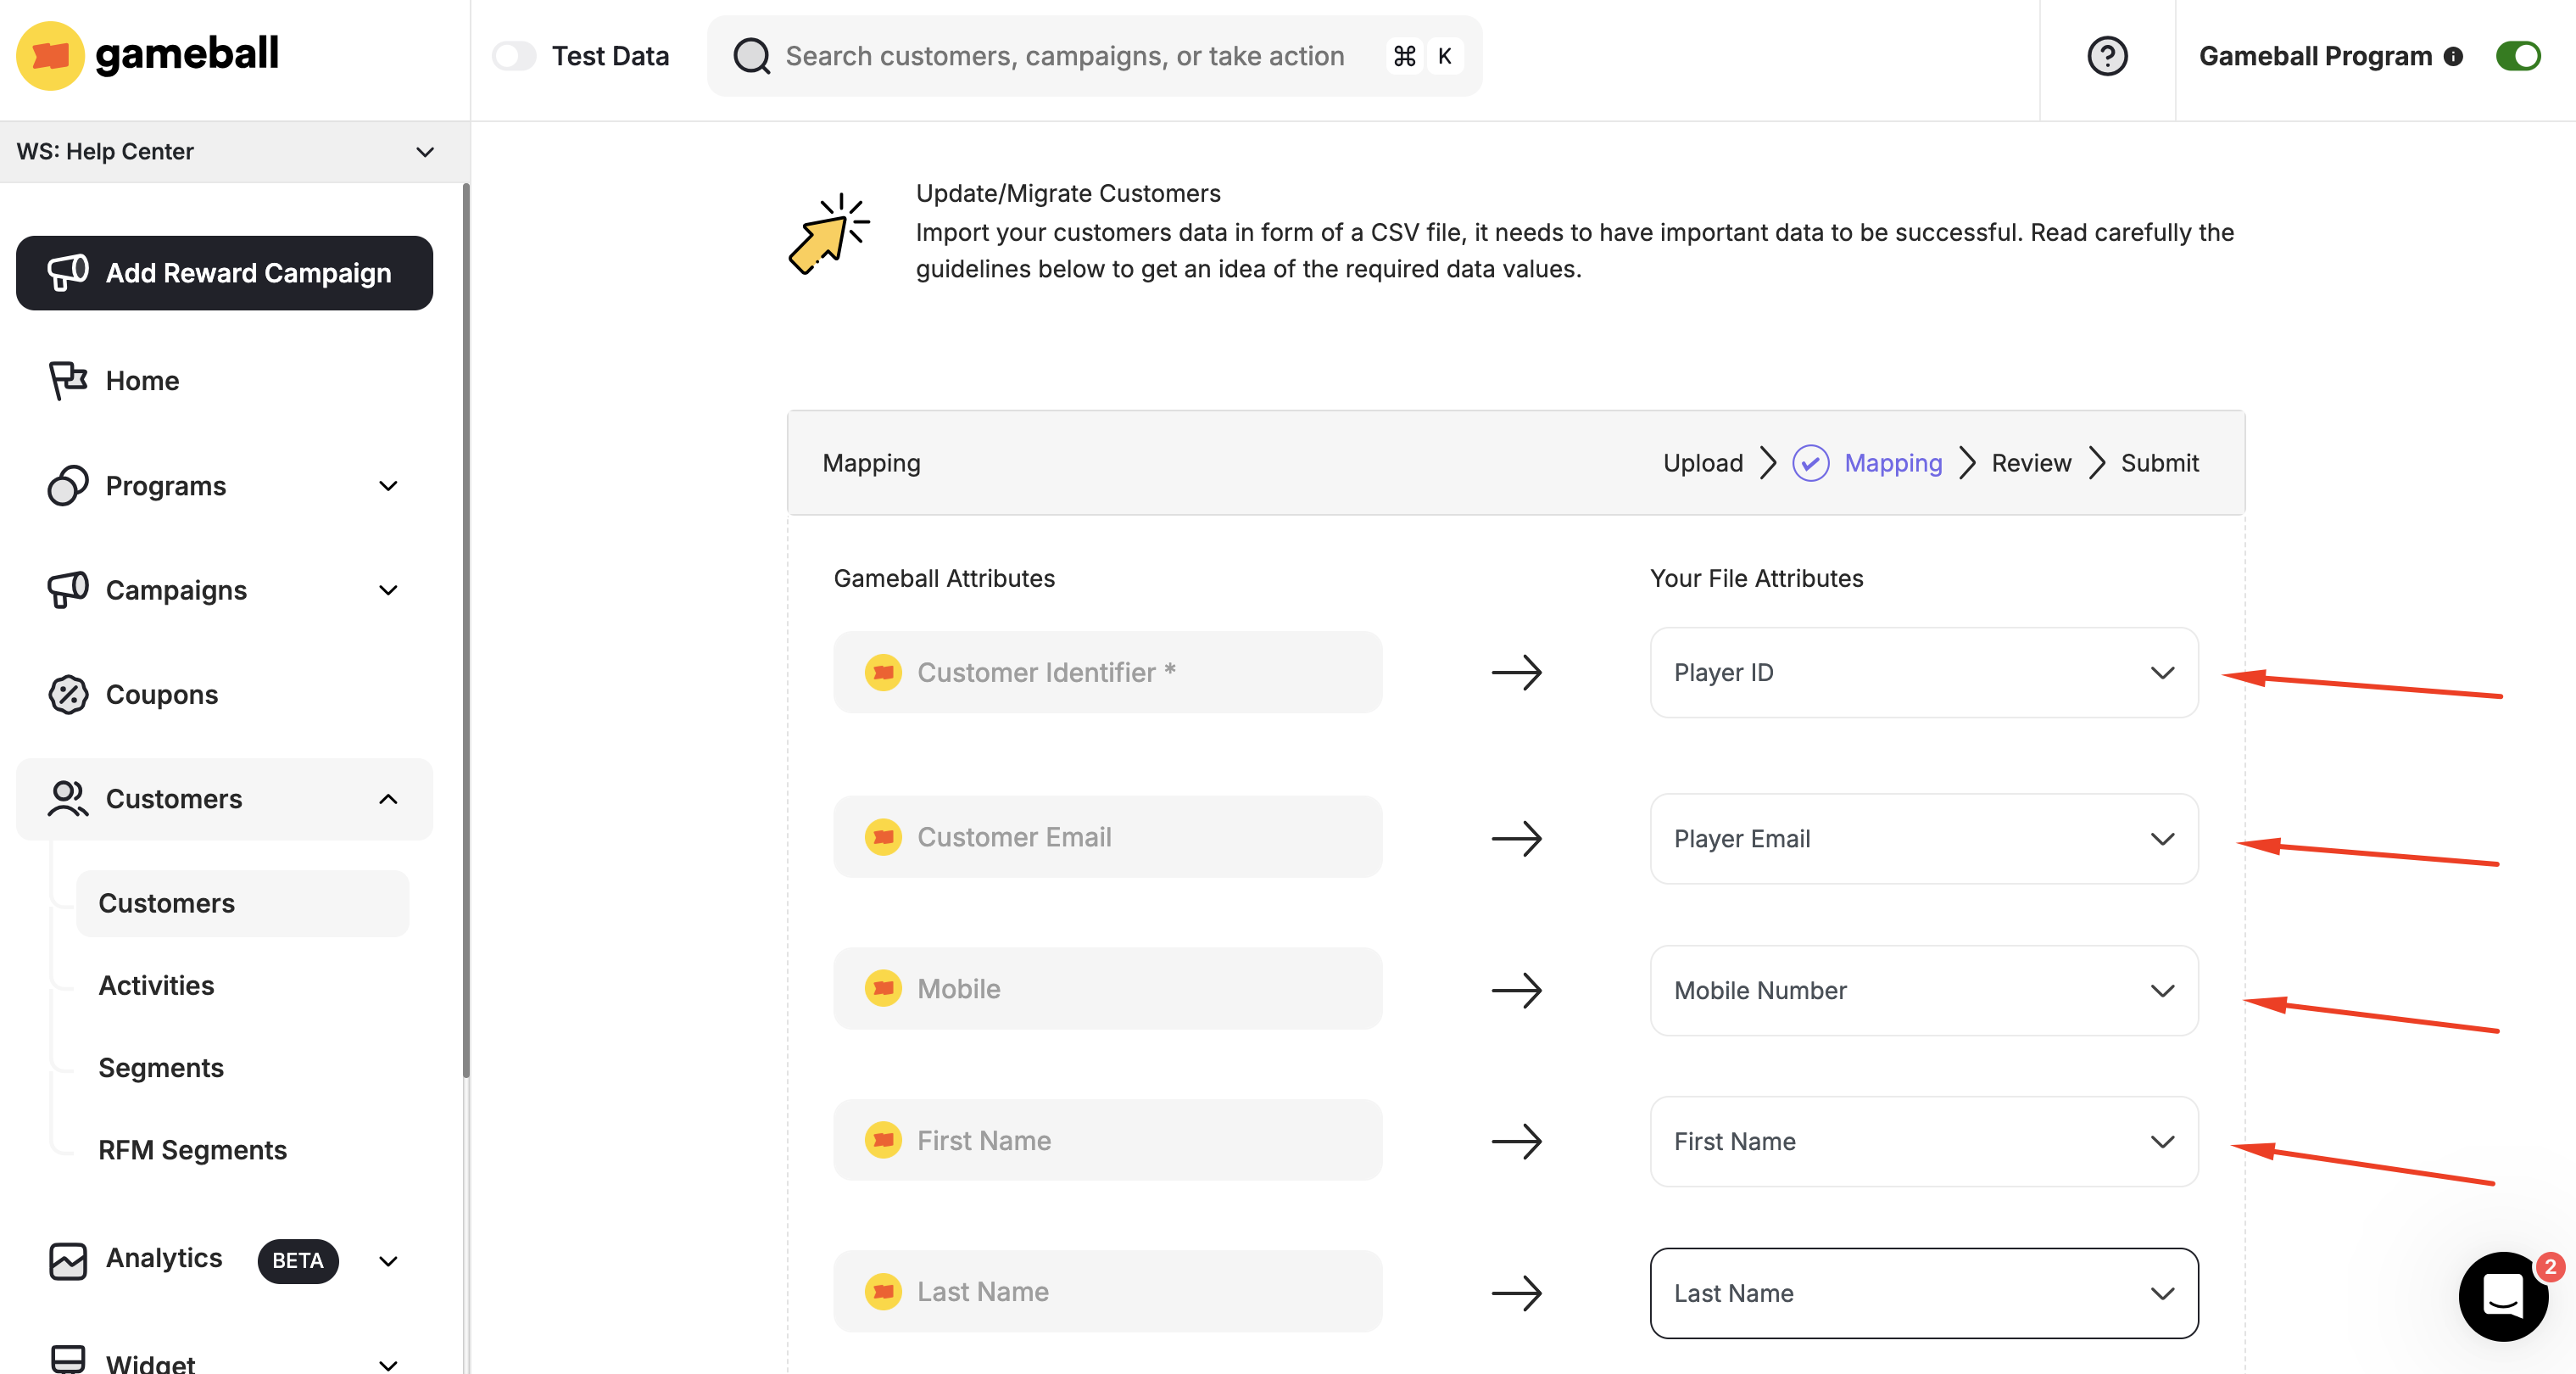 The only mandatory data/customer attribute is the **Customer Identifier**, which could be placed with the email address if no unique ID/number is assigned to each customer.
Choose the Tiering-up Recalculation Method by clicking on the **Edit Icon** under **"Tier Name"**:
The only mandatory data/customer attribute is the **Customer Identifier**, which could be placed with the email address if no unique ID/number is assigned to each customer.
Choose the Tiering-up Recalculation Method by clicking on the **Edit Icon** under **"Tier Name"**:
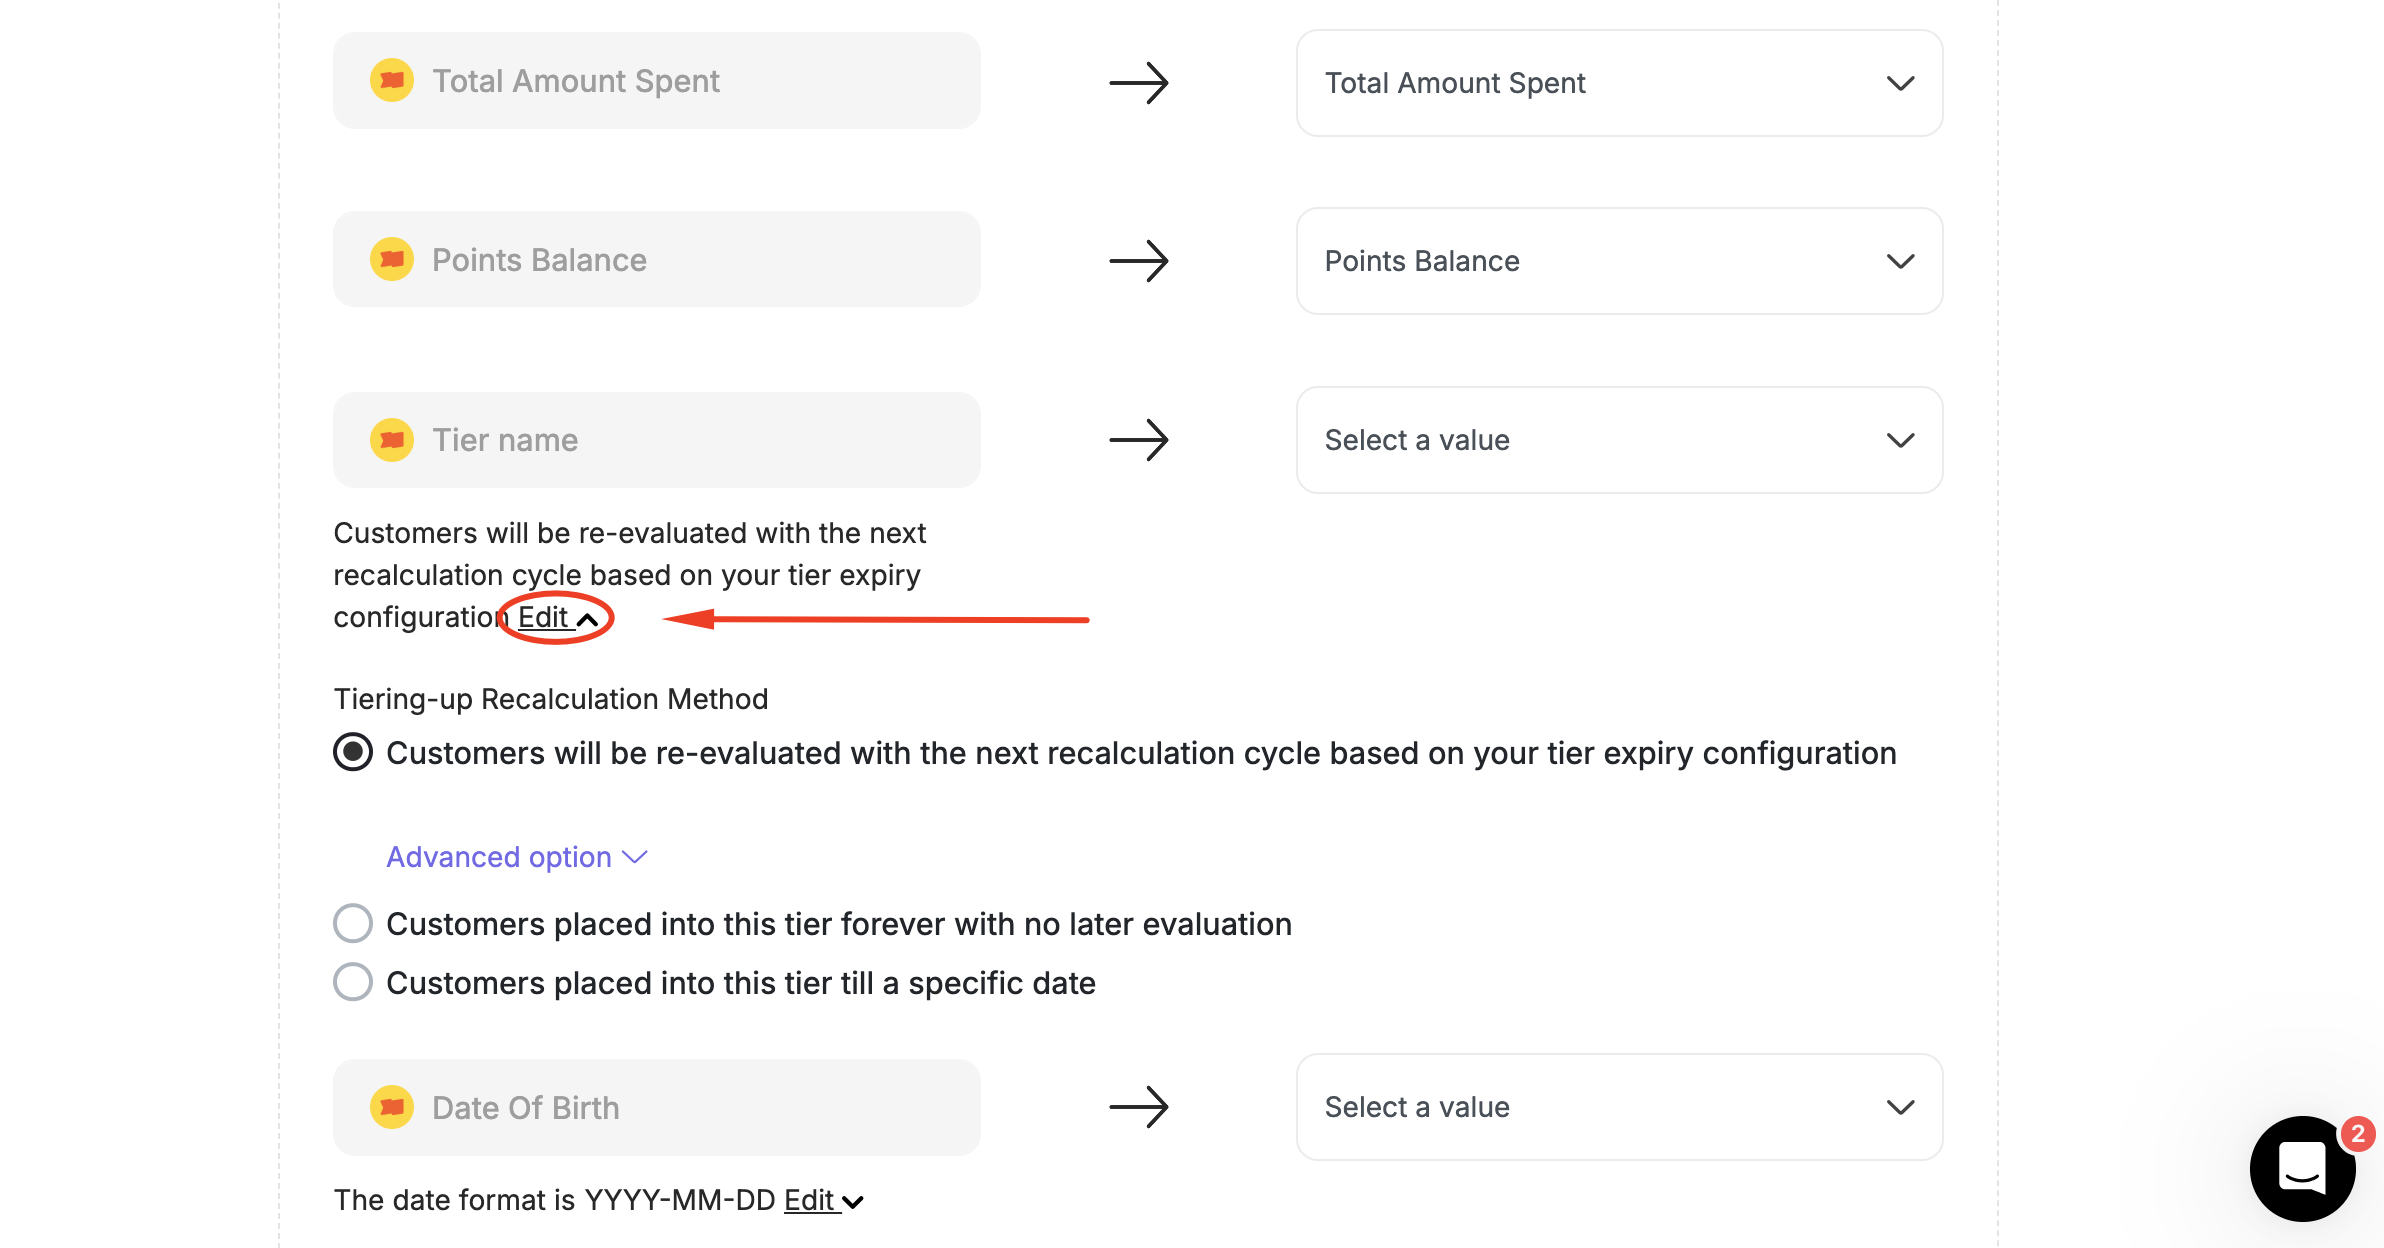 | Option | Description |
| -------------------------- | -------------------------------------------------------------------------------------------------------- |
| Re-evaluate on next cycle | Customers will be re-evaluated with the next recalculation cycle based on your tier expiry configuration |
| Place in tier forever | Customers are placed into this tier forever with no later evaluation |
| Place in tier until a date | Customers are placed into this tier until a specific date |
If you are adding customers' birth dates, choose the date format under **Date of Birth** that matches the format in the CSV file:
| Option | Description |
| -------------------------- | -------------------------------------------------------------------------------------------------------- |
| Re-evaluate on next cycle | Customers will be re-evaluated with the next recalculation cycle based on your tier expiry configuration |
| Place in tier forever | Customers are placed into this tier forever with no later evaluation |
| Place in tier until a date | Customers are placed into this tier until a specific date |
If you are adding customers' birth dates, choose the date format under **Date of Birth** that matches the format in the CSV file:
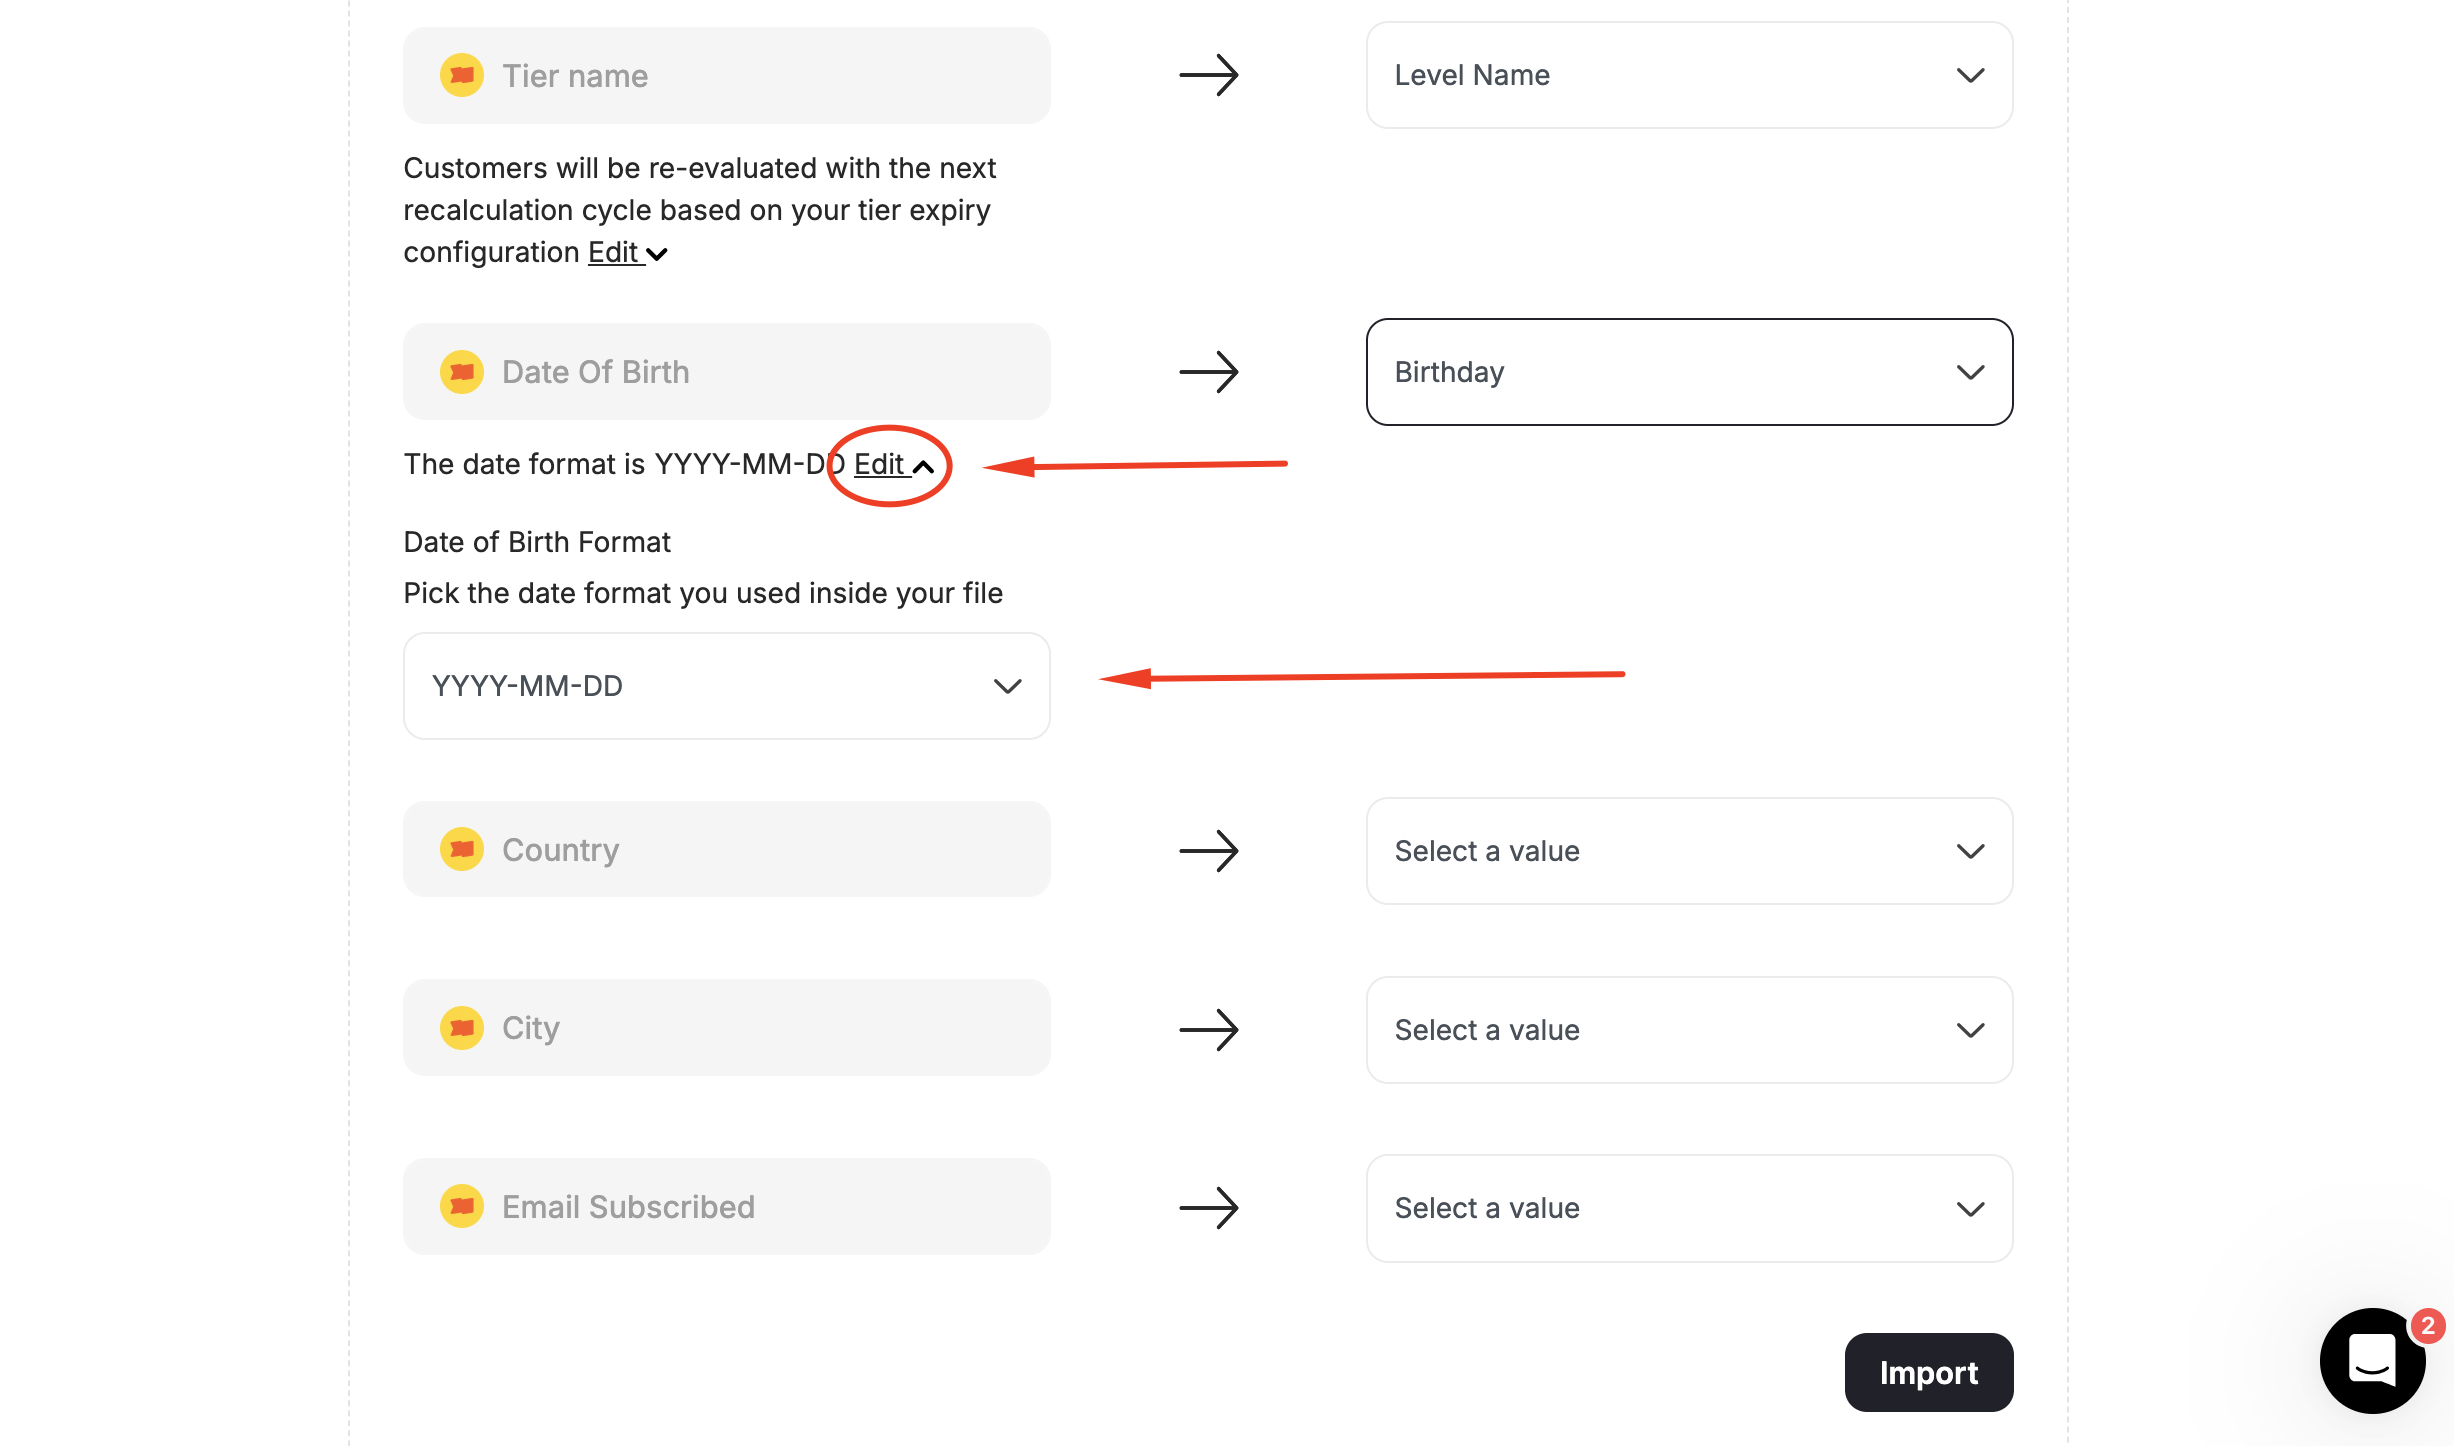 Supported formats: `YYYY-MM-DD`, `MM-DD-YYYY`, `DD-MM-YYYY`, `YYYY/MM/DD`, `DD/MM/YYYY`, `MM/DD/YYYY`
Click **Import**.
Supported formats: `YYYY-MM-DD`, `MM-DD-YYYY`, `DD-MM-YYYY`, `YYYY/MM/DD`, `DD/MM/YYYY`, `MM/DD/YYYY`
Click **Import**.
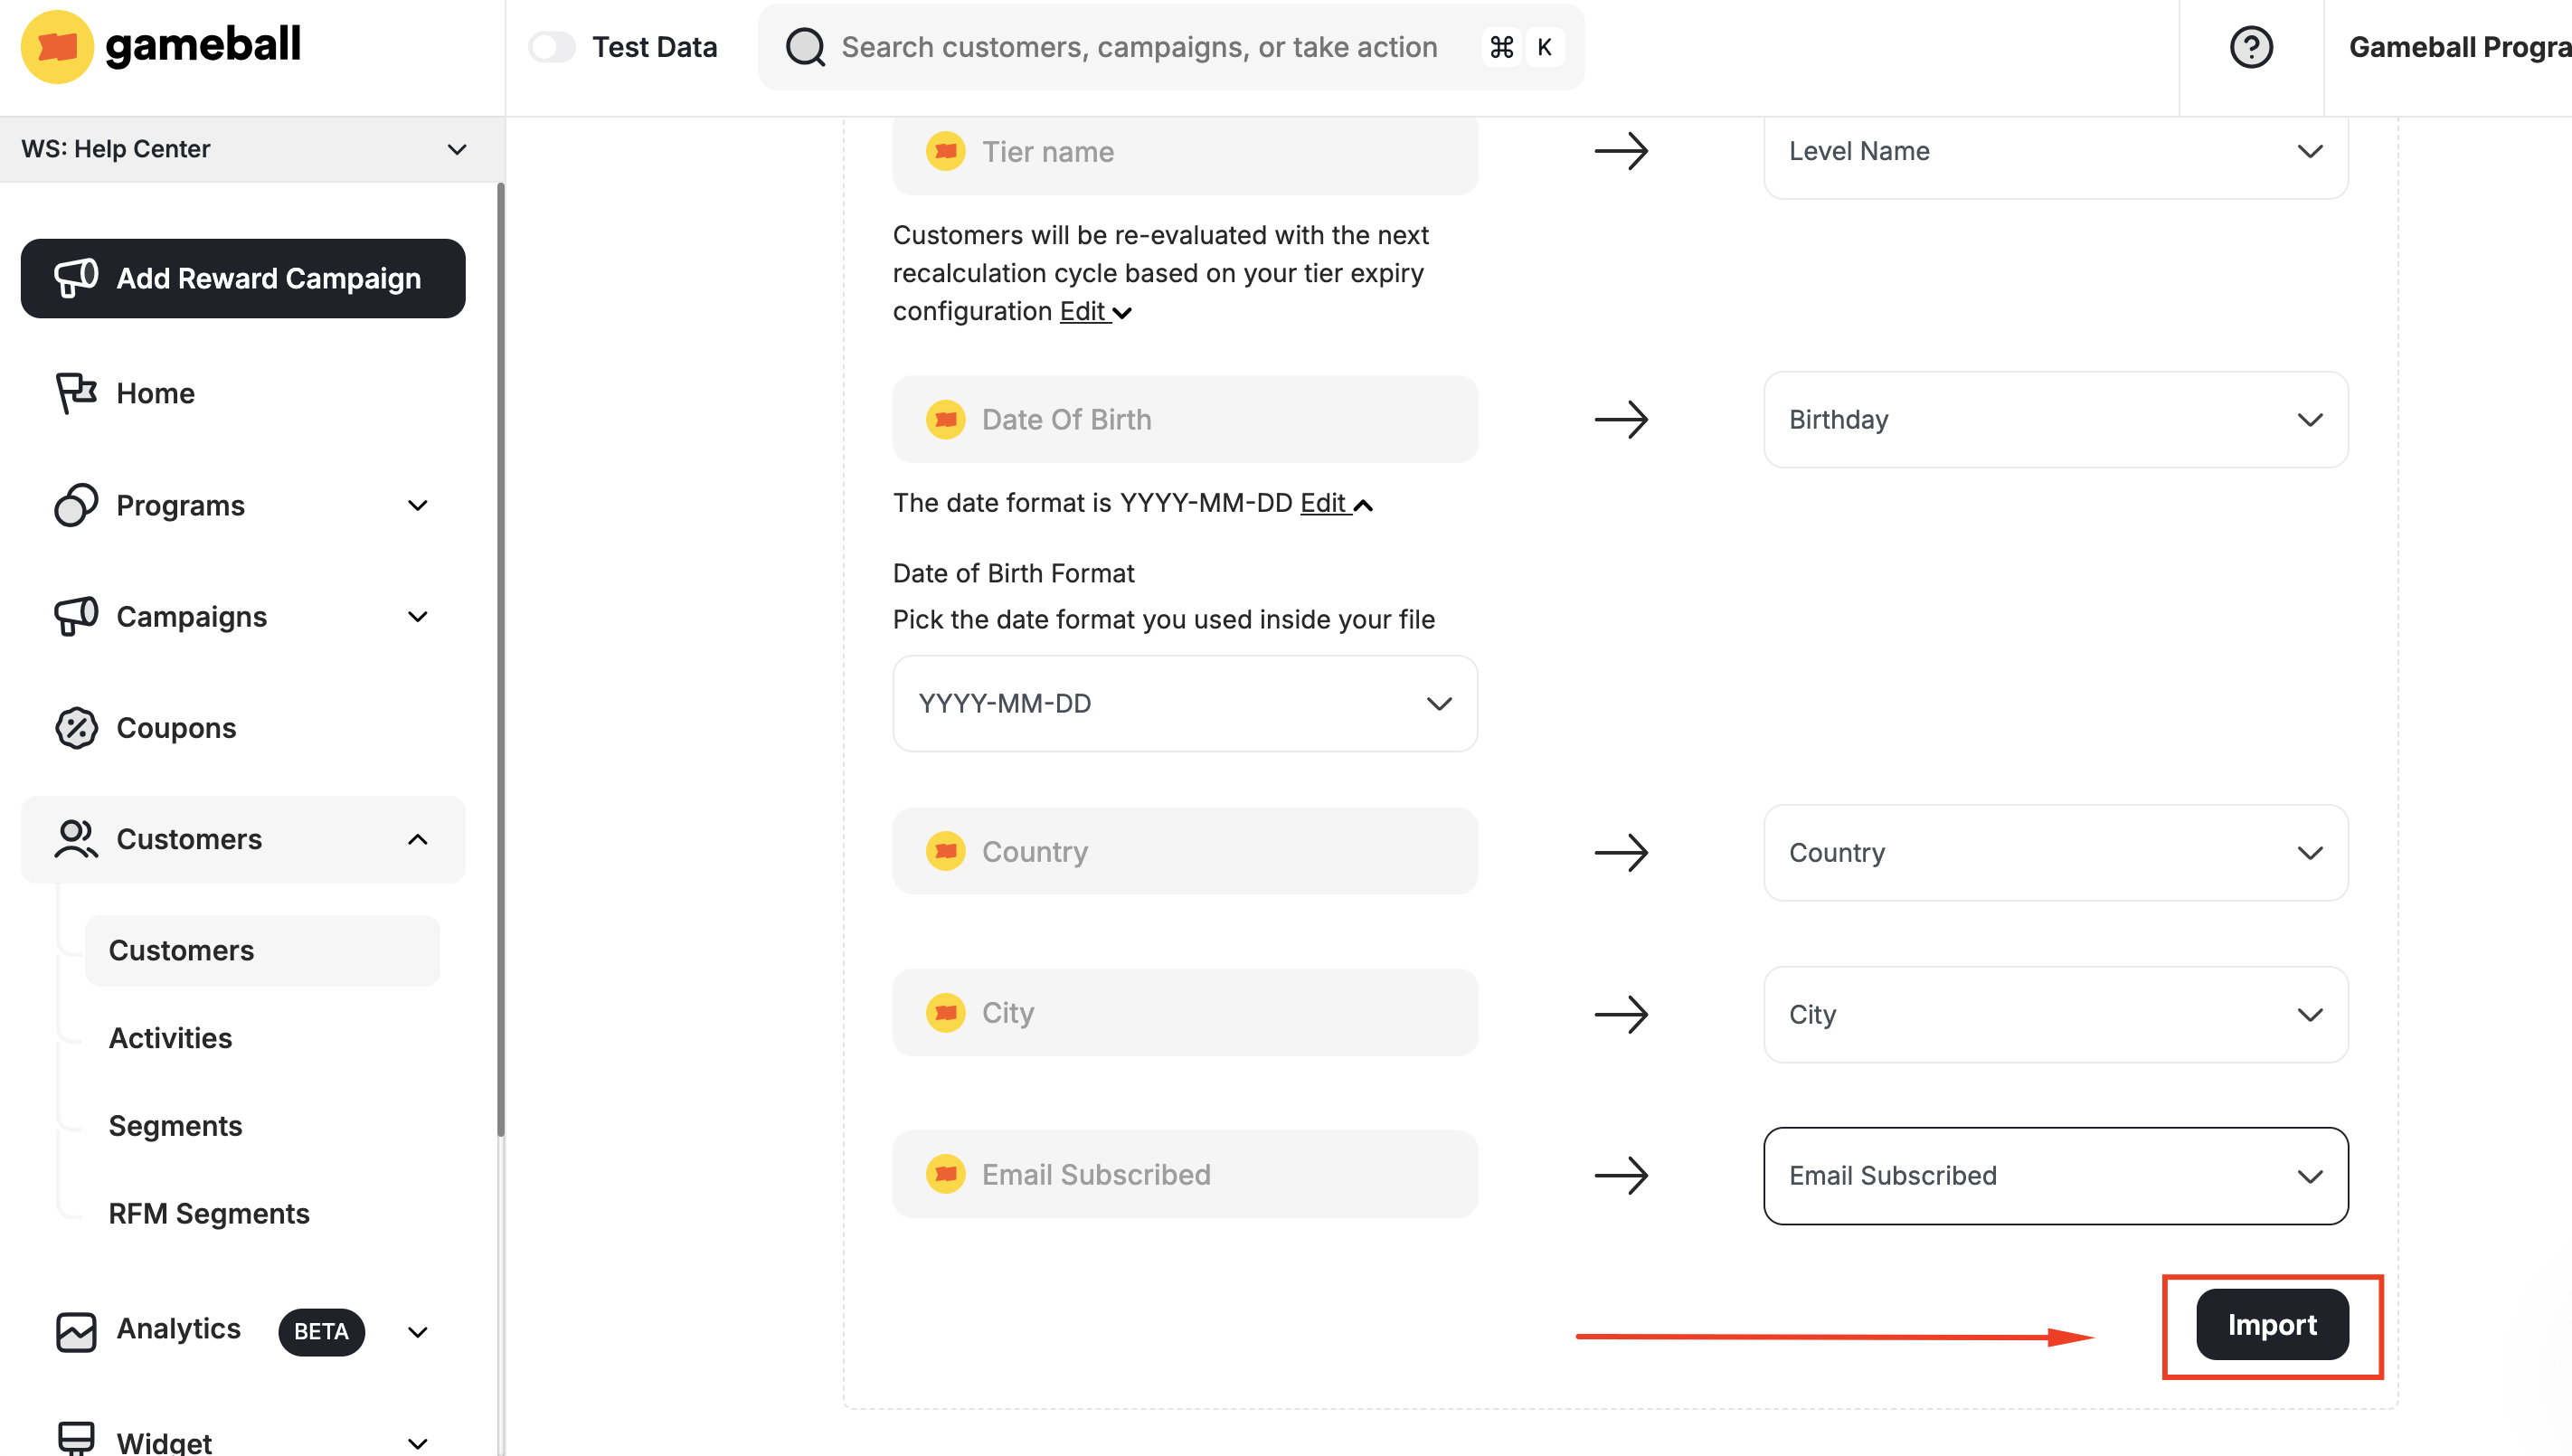 If the CSV file you uploaded has unmatching data that doesn't comply with the original format, Gameball will show you the errors that need to be fixed for a successful migration.
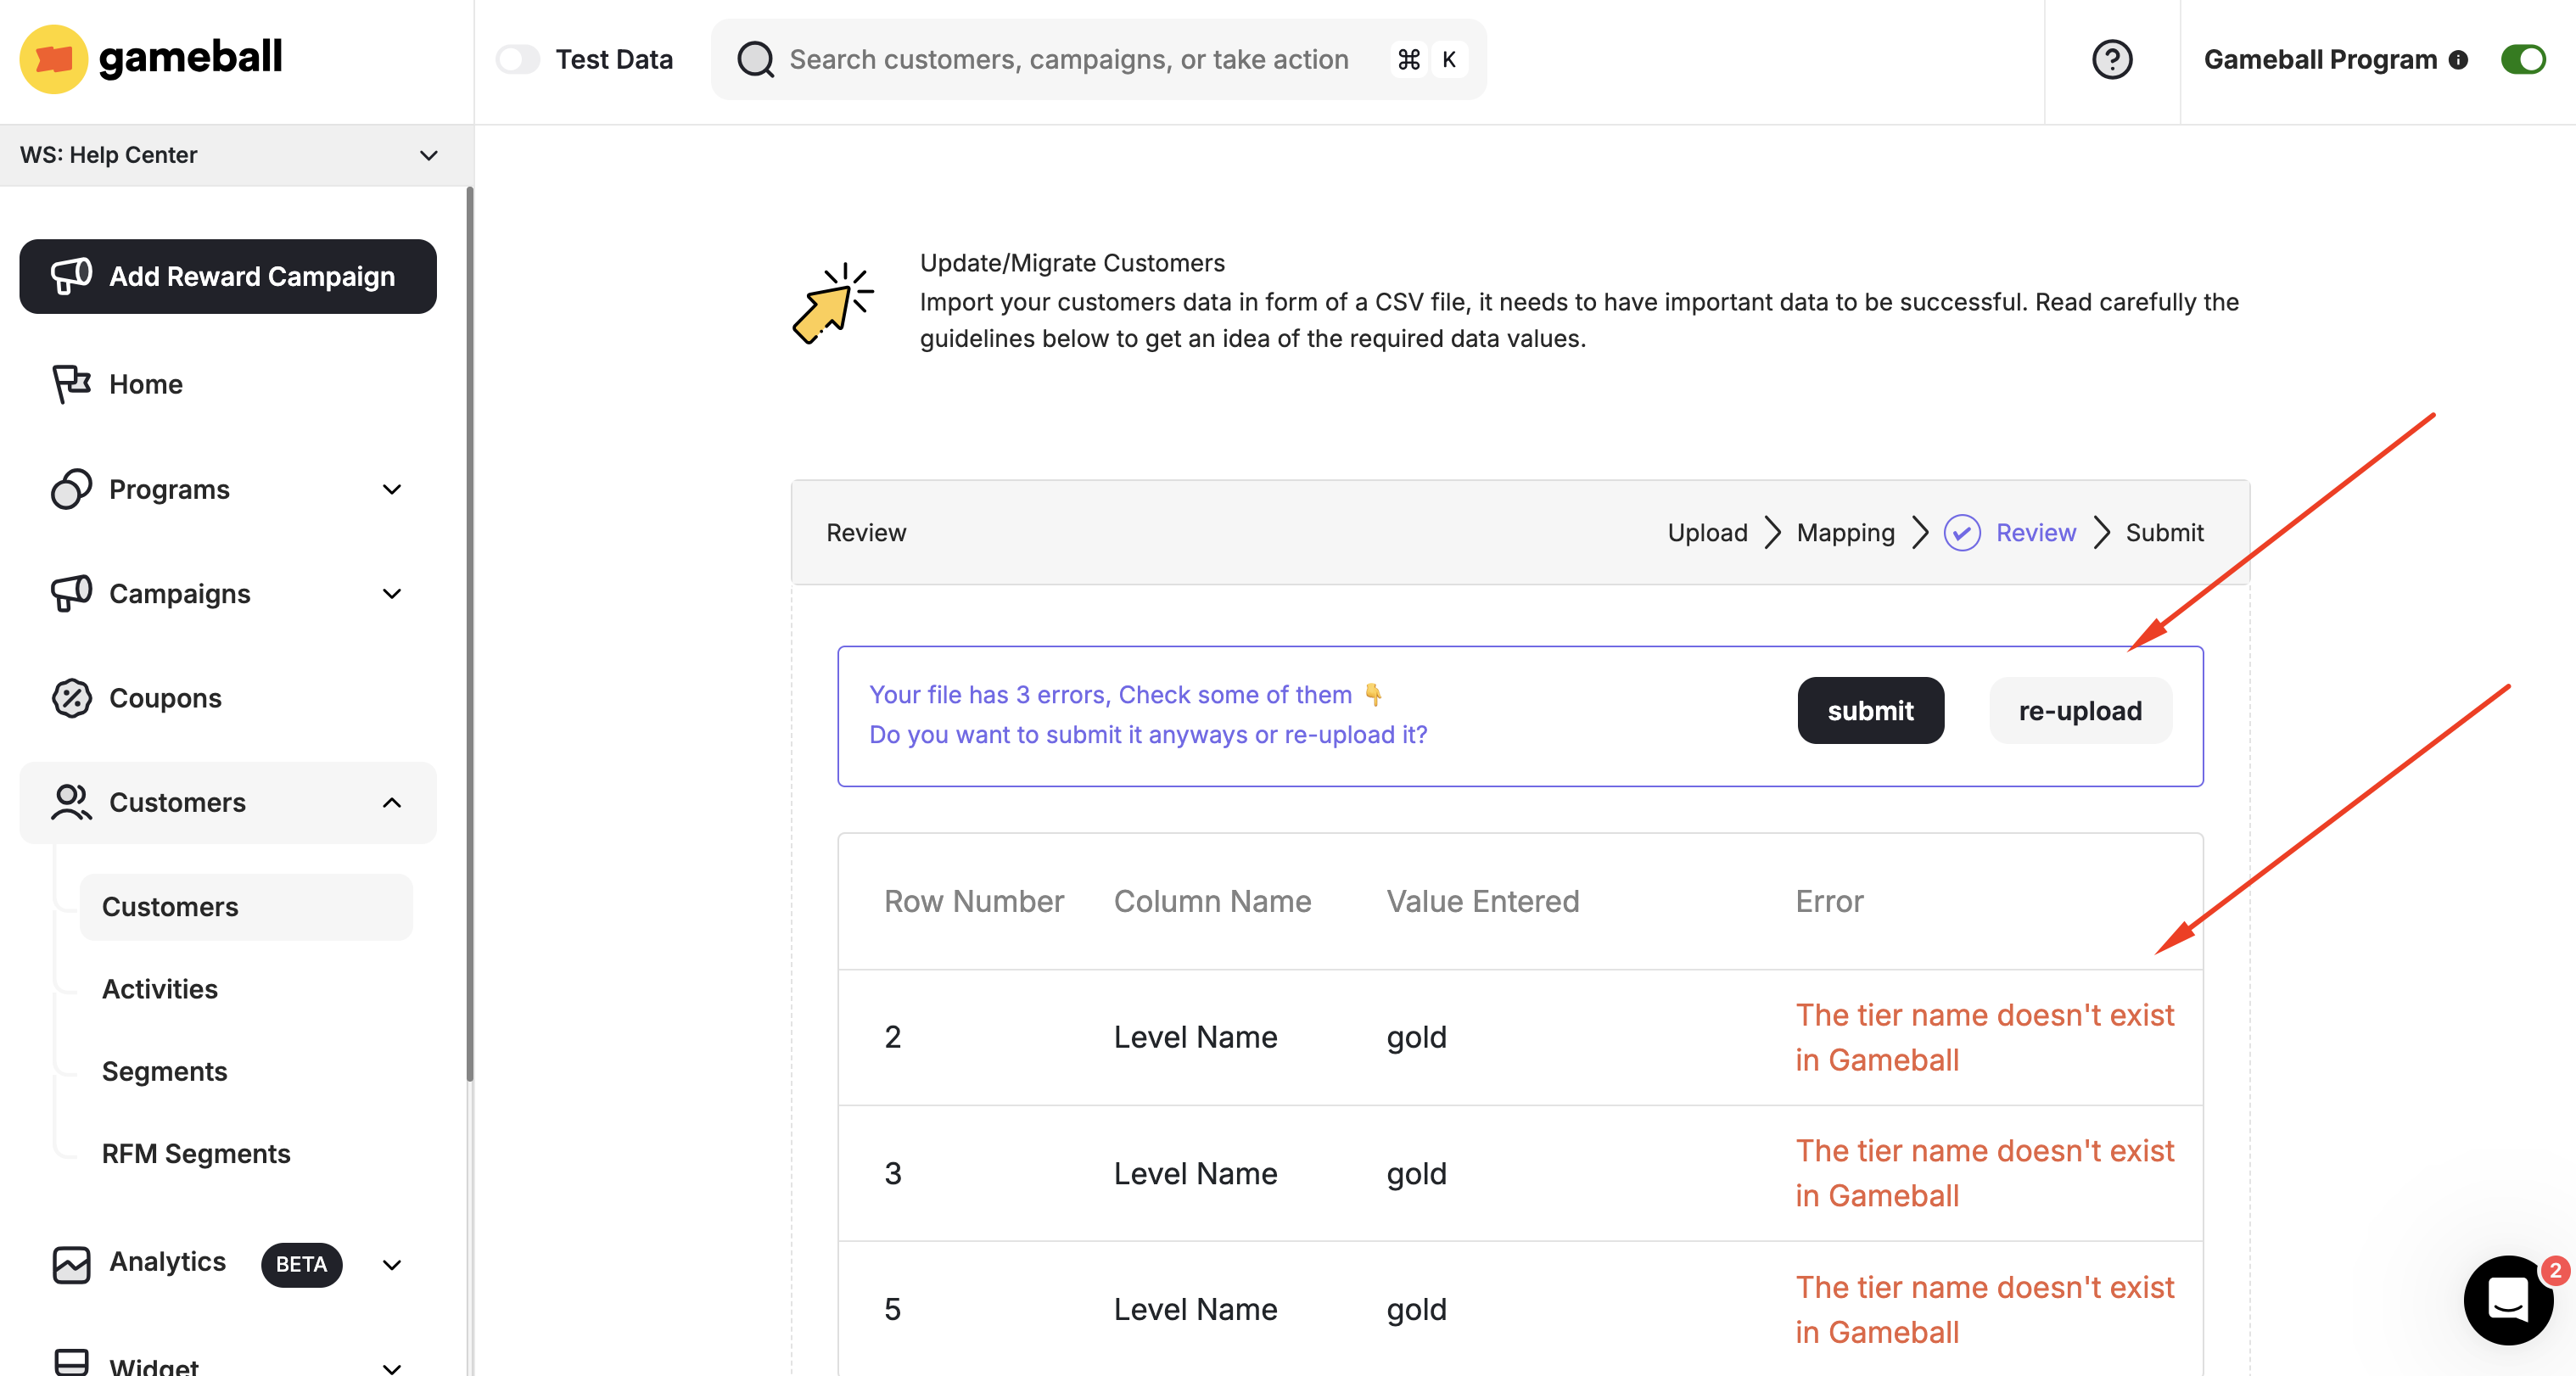 If there are more than 10 errors in the file, you will need to **download** the error sheet to check all your errors, as you will not see all the errors on the reviewing page.
After fixing all the errors on the sheet, click **re-upload**. If you find that the addressed errors will not cause a problem, click **Submit**.
If you have fixed all your errors, you can submit your file.
You will then be redirected to the Customers page, where you will find the list of the new customers added, as well as a sheet of all the existing errors to be downloaded.
An email will be sent with the errors sheet to the admin account's registered email.
If there are more than 10 errors in the file, you will need to **download** the error sheet to check all your errors, as you will not see all the errors on the reviewing page.
After fixing all the errors on the sheet, click **re-upload**. If you find that the addressed errors will not cause a problem, click **Submit**.
If you have fixed all your errors, you can submit your file.
You will then be redirected to the Customers page, where you will find the list of the new customers added, as well as a sheet of all the existing errors to be downloaded.
An email will be sent with the errors sheet to the admin account's registered email.
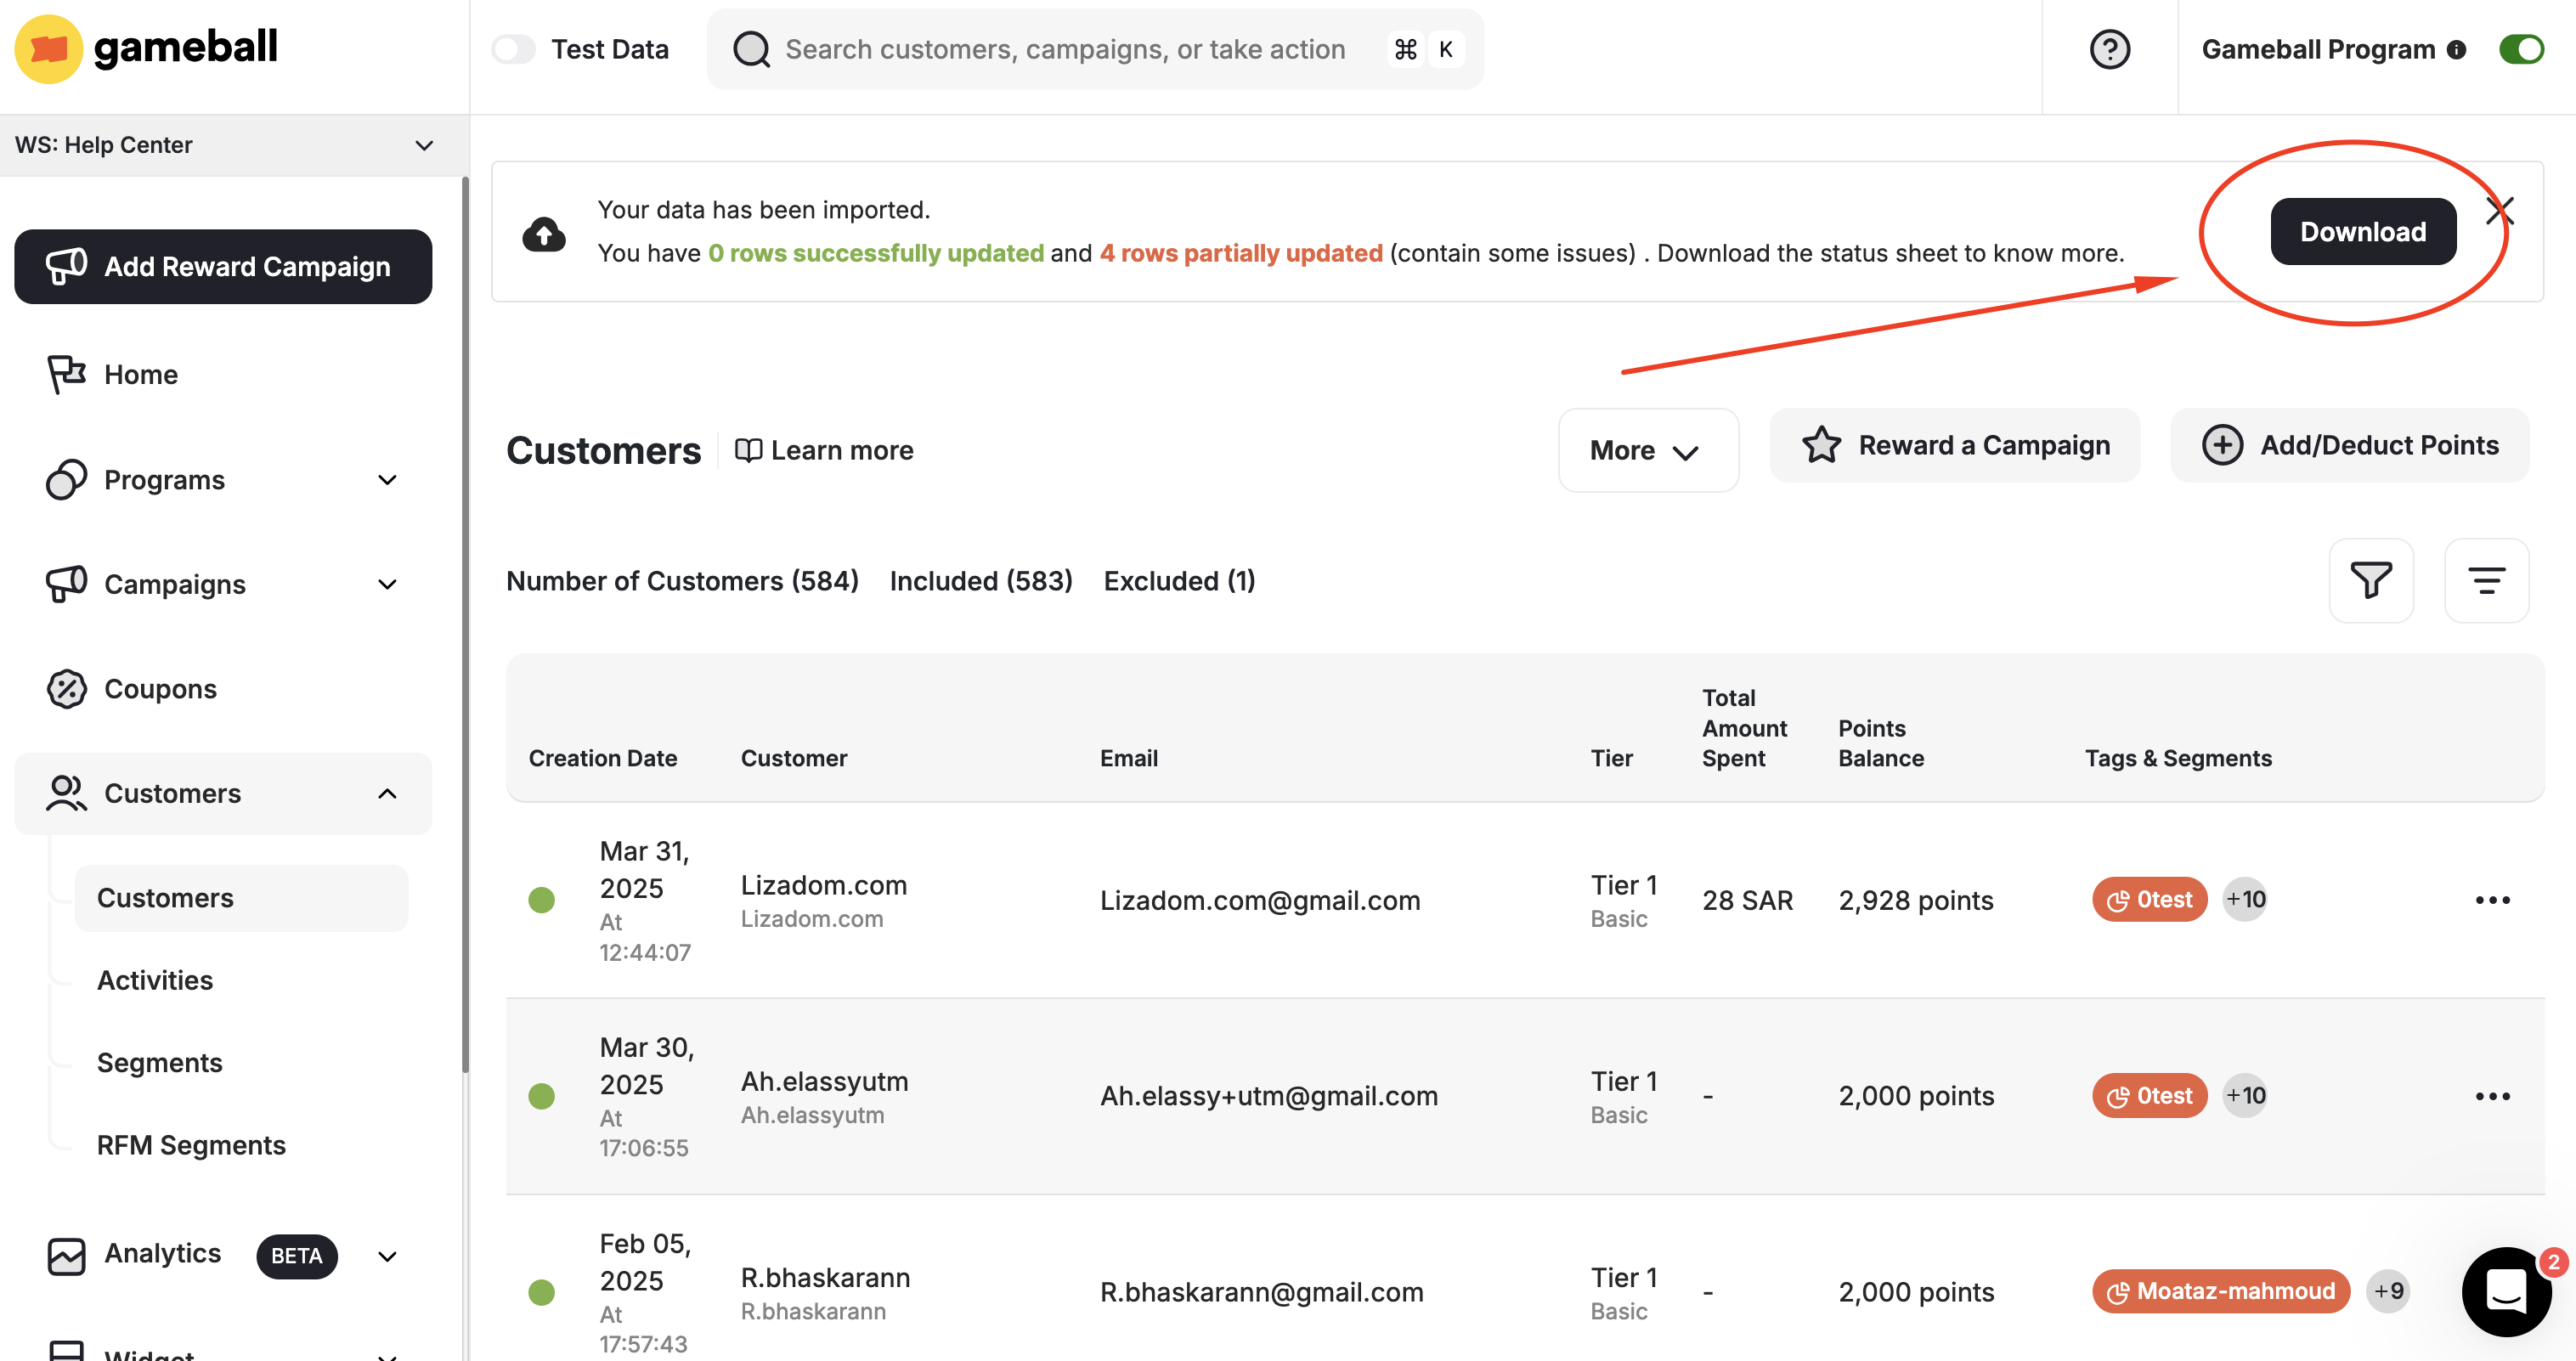 The migration/customer update process is now over, and the new customers are now part of your Gameball loyalty program.
* If you are a Shopify user, you can only update the information of existing customers from your customer list that was automatically migrated to Gameball during the integration process. As for non-Shopify users, by following this process, you will be able to migrate your customers or update the information of existing ones.
* In the case of updating the data of an existing customer, any value in the migration sheet overrides what exists in the system. Example: if the customer has 300 points in the system and the sheet value for the same customer is 100, the customer's balance will be 100 after the successful migration. If the customer has 0 points on the sheet, the customer's balance will be 0 after migration. If the points cell is empty, the customer balance will be 300.
***
## How to Migrate Guests (Customers Who Are Not Registered)
When migrating your customers from other loyalty programs or through a CSV file, some of the customers' data might not be registered. If you still want these customers to be part of your loyalty program, you will have to enable guest customers to integrate them with your loyalty program. [Learn how to integrate your guest customers into your rewards program](/product-documentation/guides-strategies-faqs/supportive-guides/integrate-guest-customers).
***
## How to Extract Your Current Customer Data
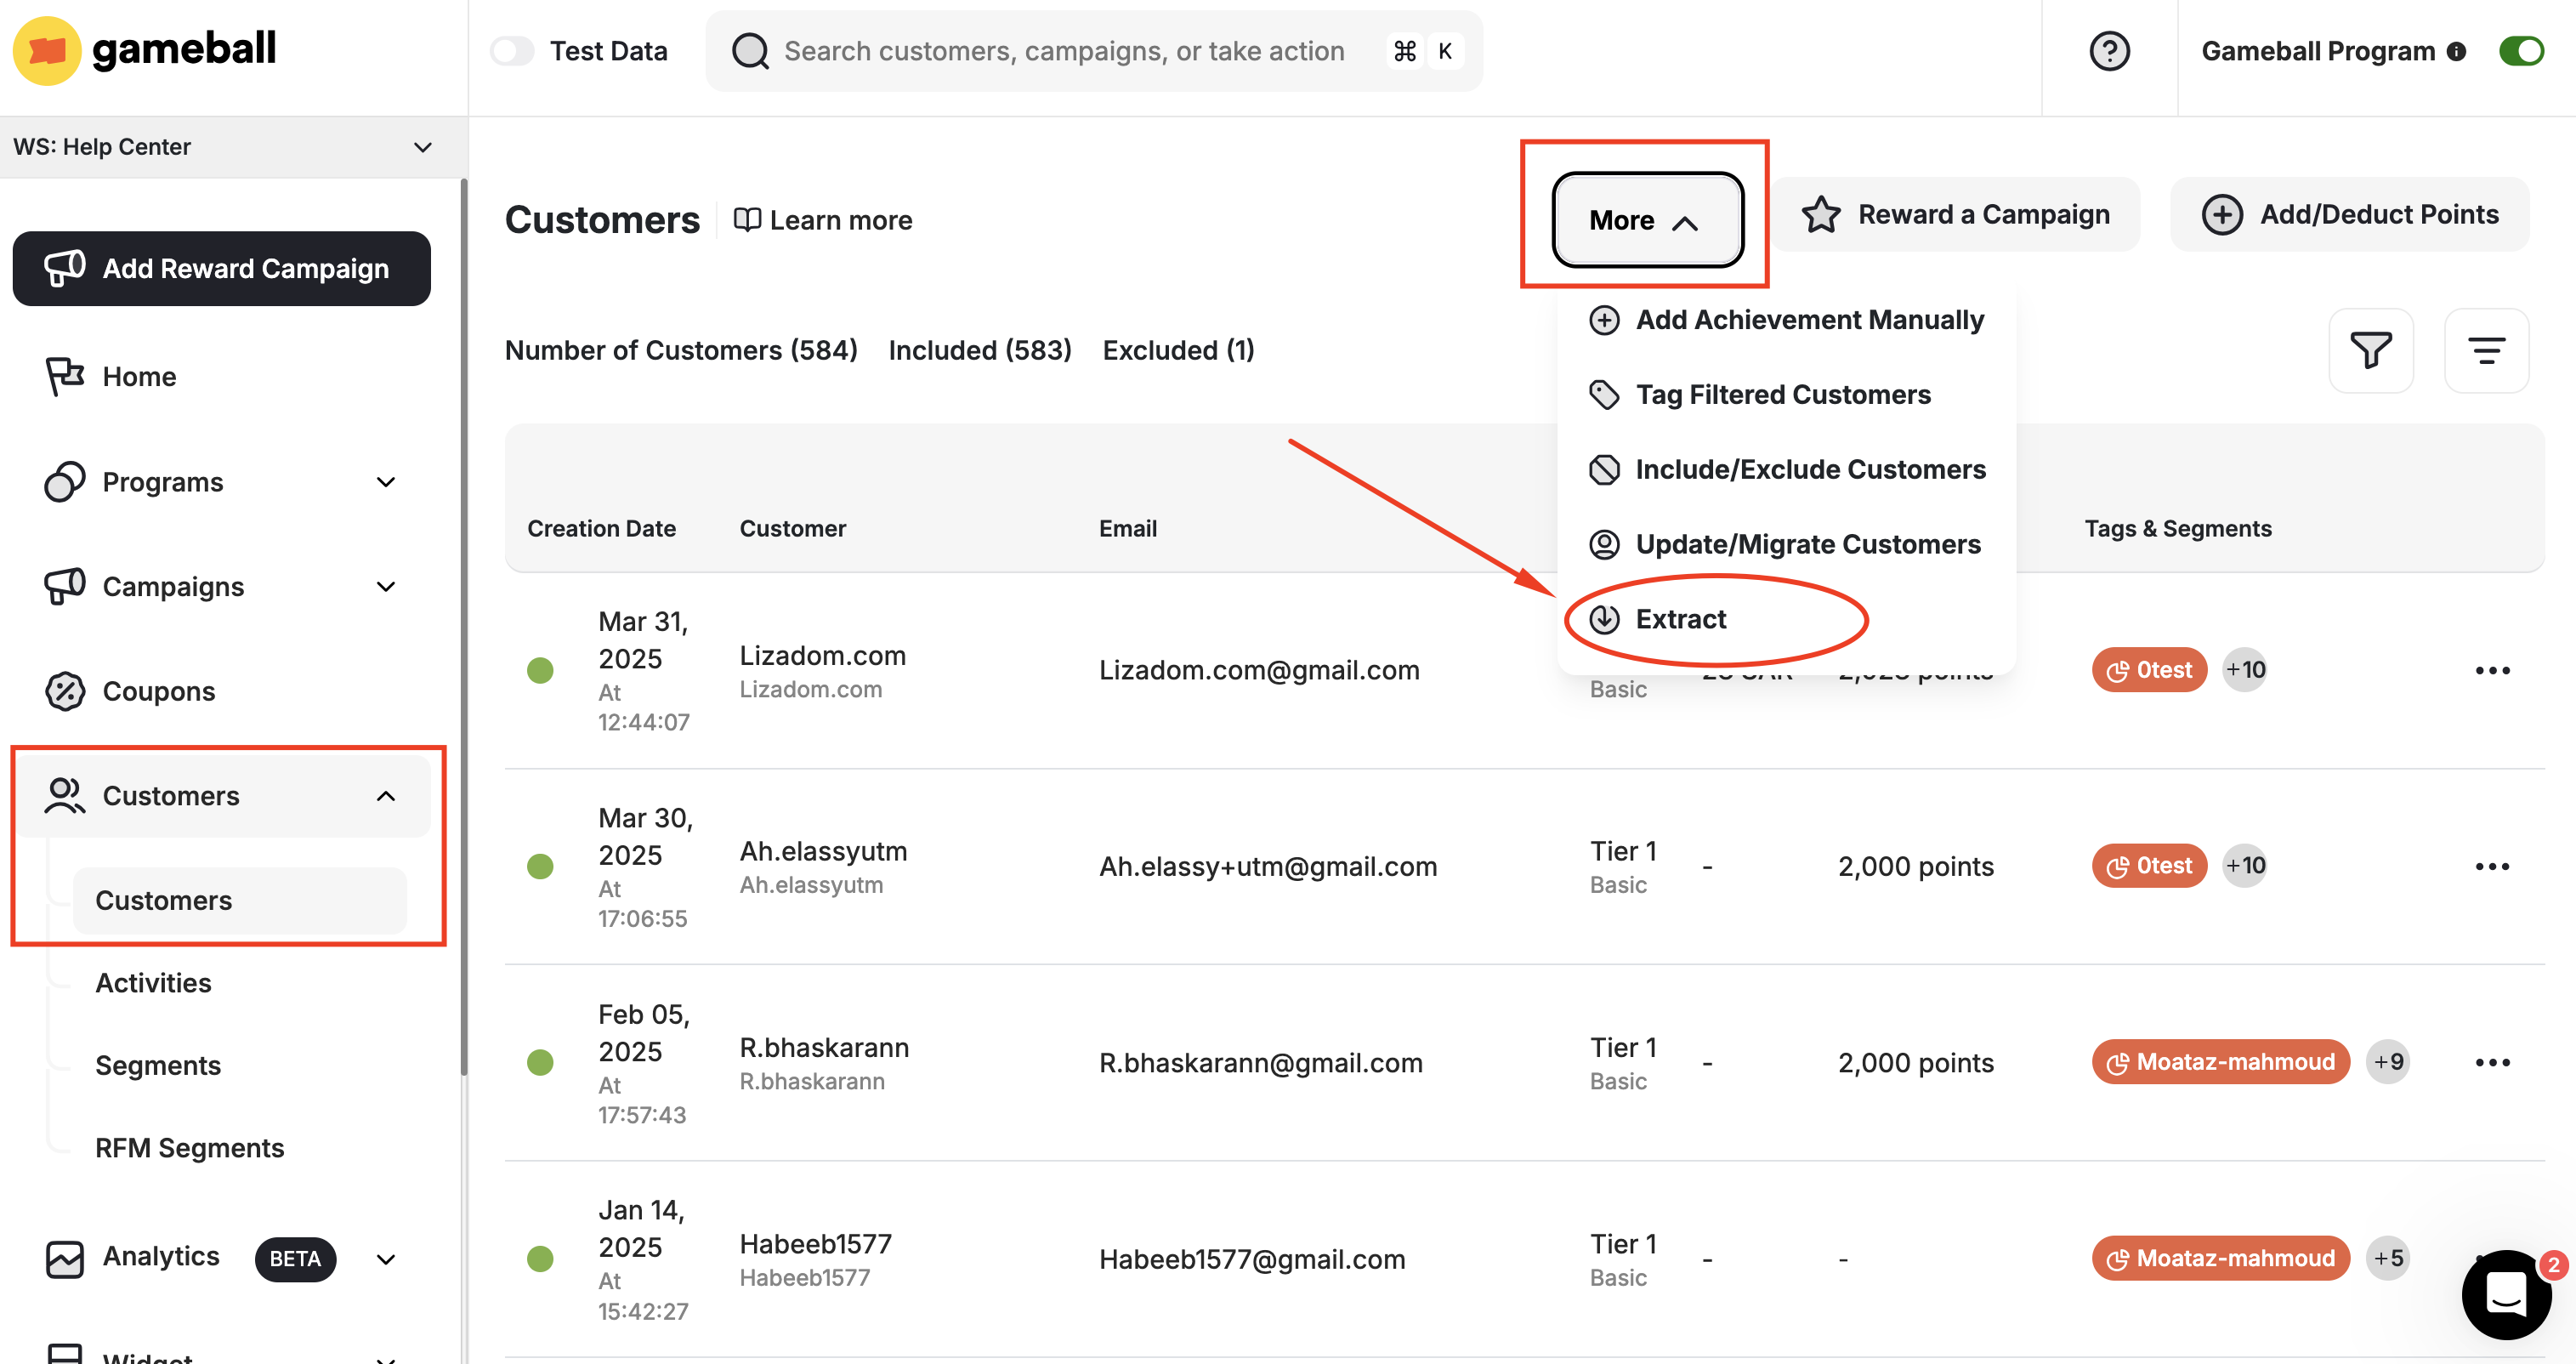
Navigate to your **Customers section** on the **Gameball Admin Dashboard**.
On the top right of the page, click **More**, then **Extract**.
The migration/customer update process is now over, and the new customers are now part of your Gameball loyalty program.
* If you are a Shopify user, you can only update the information of existing customers from your customer list that was automatically migrated to Gameball during the integration process. As for non-Shopify users, by following this process, you will be able to migrate your customers or update the information of existing ones.
* In the case of updating the data of an existing customer, any value in the migration sheet overrides what exists in the system. Example: if the customer has 300 points in the system and the sheet value for the same customer is 100, the customer's balance will be 100 after the successful migration. If the customer has 0 points on the sheet, the customer's balance will be 0 after migration. If the points cell is empty, the customer balance will be 300.
***
## How to Migrate Guests (Customers Who Are Not Registered)
When migrating your customers from other loyalty programs or through a CSV file, some of the customers' data might not be registered. If you still want these customers to be part of your loyalty program, you will have to enable guest customers to integrate them with your loyalty program. [Learn how to integrate your guest customers into your rewards program](/product-documentation/guides-strategies-faqs/supportive-guides/integrate-guest-customers).
***
## How to Extract Your Current Customer Data
Navigate to your **Customers section** on the **Gameball Admin Dashboard**.
On the top right of the page, click **More**, then **Extract**.
 ***
## Related Articles
Learn more about how customer data is managed in Gameball.
Troubleshoot errors that may occur during the customer migration process.
***
## Related Articles
Learn more about how customer data is managed in Gameball.
Troubleshoot errors that may occur during the customer migration process.