> ## Documentation Index
> Fetch the complete documentation index at: https://docs.gameball.co/llms.txt
> Use this file to discover all available pages before exploring further.
# How Do I Create a Point Multiplier Reward Campaign?
> Learn how to create and configure a Point Multiplier reward campaign from scratch.
## Plan Availability
| Plan | Available |
| ---------- | --------- |
| Starter | Yes |
| Pro & Guru | Yes |
| Plan | Available |
| ---------- | --------- |
| Growth | Yes |
| Enterprise | Yes |
Let's say you have the cashback set up for your customers to gain 1 point for every pound that they spend, but on certain occasions, you want to reward your customers with more than one point, let's say for example, on Black Fridays. This is where the **Point Multiplier Reward Campaign** comes into play. It's a campaign that you set on certain dates that multiply the number of points that a customer earns when they complete a purchase.
***
## Creating a New Point Multiplier Reward Campaign
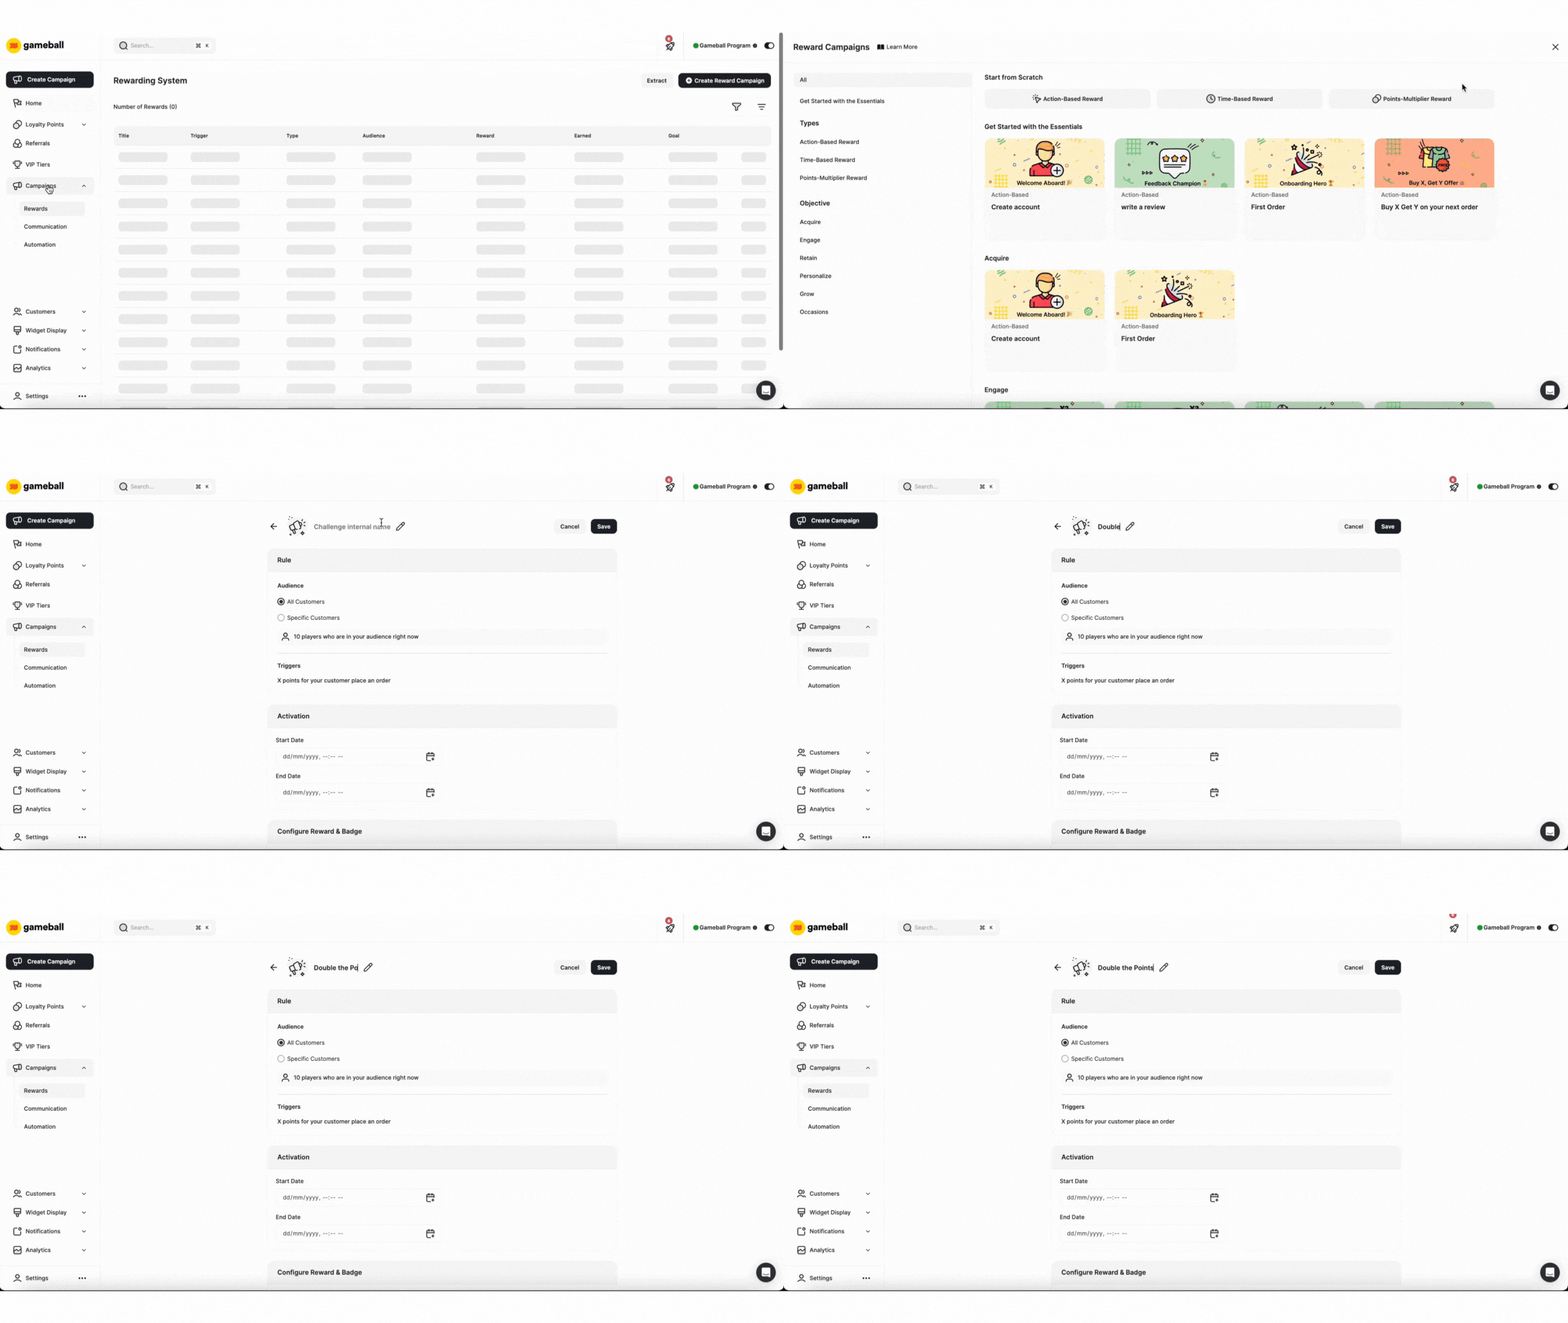
Log in to your **Gameball Dashboard**. Navigate to the **Campaigns** section on the left side menu and click on **Rewards**.
Choose **Points Multiplier Reward** under the **'Start from Scratch'** section.
Give your new campaign an **internal name** for your team, and then start the configuration.
 ***
## Configuration of a Point Multiplier Reward Campaign
Define the rules that determine when customers receive the campaign's rewards. Utilize Gameball's event-based engine to create sequences of rules that customers must follow to earn rewards.
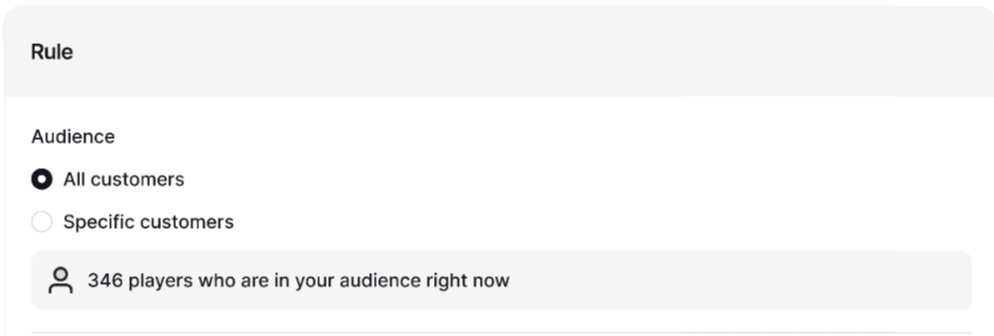
Choose who is eligible to view and participate in this campaign:
* All Customers
* Specific Customers:
* Segments
* Tags
* Customer Attributes
* Combination of Segments, Tags, or Customer Attributes
After choosing the campaign's audience, you will be able to view the number of customers that are currently eligible to participate in this campaign.
***
## Configuration of a Point Multiplier Reward Campaign
Define the rules that determine when customers receive the campaign's rewards. Utilize Gameball's event-based engine to create sequences of rules that customers must follow to earn rewards.
Choose who is eligible to view and participate in this campaign:
* All Customers
* Specific Customers:
* Segments
* Tags
* Customer Attributes
* Combination of Segments, Tags, or Customer Attributes
After choosing the campaign's audience, you will be able to view the number of customers that are currently eligible to participate in this campaign.
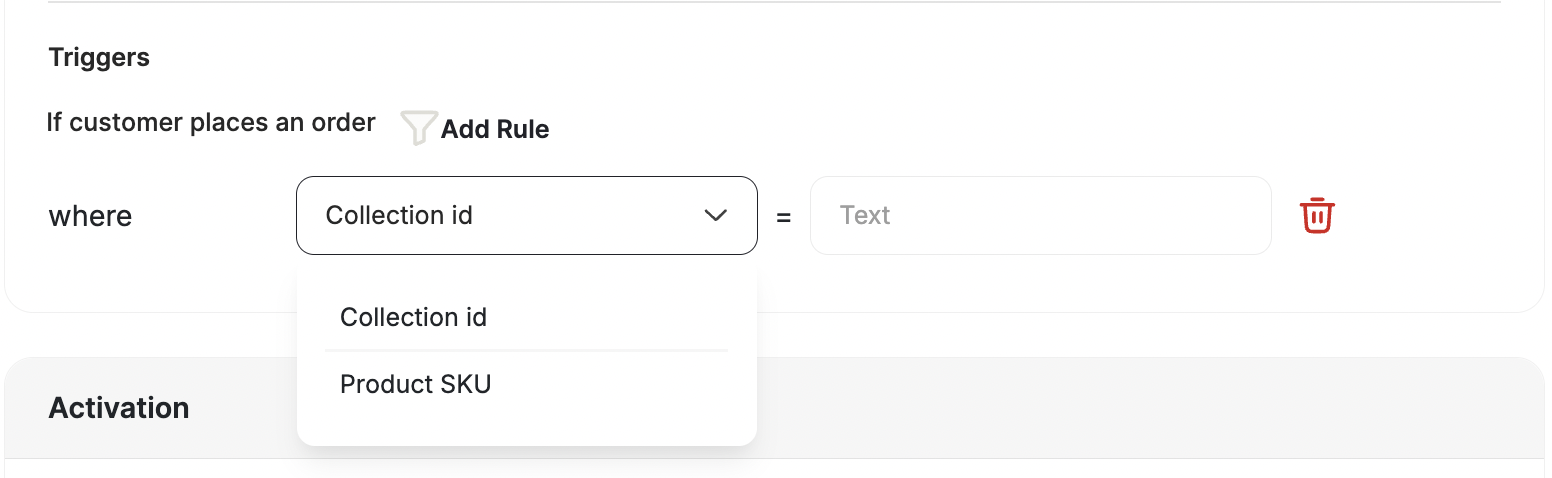
 For Points Multiplier rewards, the trigger is automatically set to the event "Place Order." You now have two options to configure this campaign:
1. **Apply the Points Multiplier to All Orders**: By default, the multiplier will apply to every order placed by your customers.
For Points Multiplier rewards, the trigger is automatically set to the event "Place Order." You now have two options to configure this campaign:
1. **Apply the Points Multiplier to All Orders**: By default, the multiplier will apply to every order placed by your customers.
 2. **Apply the Points Multiplier to Specific Collections or Product SKU**: If you only want to apply the multiplier to a specific collection or a product (e.g., during a sale or promotion), you can add a rule that includes the collection's ID. This way, the multiplier will only be applied to orders that include items from that particular collection or the product alone.
You can enter **multiple SKUs** in the SKU field using comma separation (e.g., `SKU01, SKU02, SKU03`). Multiple values use **OR logic** — an order qualifies if it contains any one of the listed SKUs.
The SKU field has a **100-character limit** (total field length, not a count of SKUs). On average, this accommodates approximately 10 SKUs.
2. **Apply the Points Multiplier to Specific Collections or Product SKU**: If you only want to apply the multiplier to a specific collection or a product (e.g., during a sale or promotion), you can add a rule that includes the collection's ID. This way, the multiplier will only be applied to orders that include items from that particular collection or the product alone.
You can enter **multiple SKUs** in the SKU field using comma separation (e.g., `SKU01, SKU02, SKU03`). Multiple values use **OR logic** — an order qualifies if it contains any one of the listed SKUs.
The SKU field has a **100-character limit** (total field length, not a count of SKUs). On average, this accommodates approximately 10 SKUs.
 This feature (editing rules) is available on the **Enterprise** & **Guru** plans only.
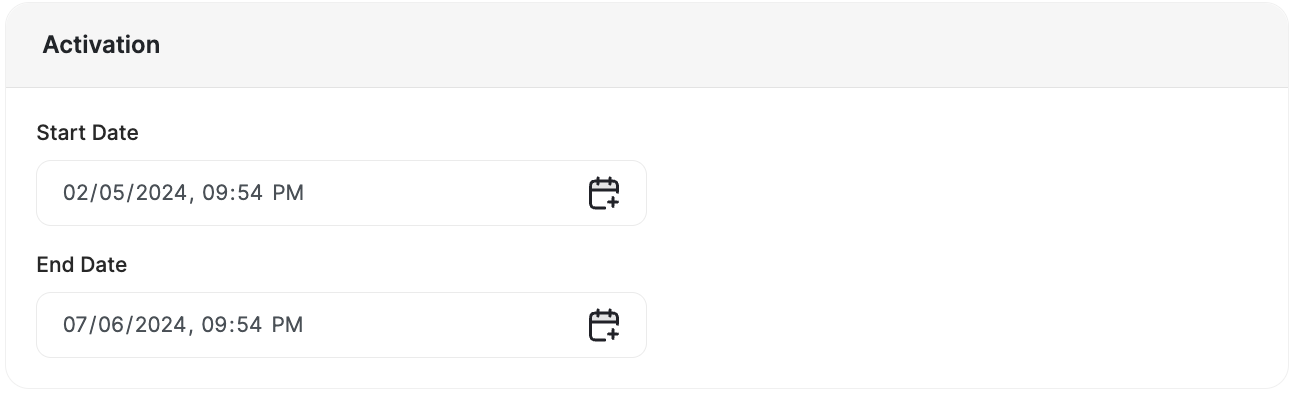
Choose when this campaign will be available for your customers:
* **Always Active**: The campaign will always be available for its audience unless you deactivate it.
* **Scheduled**: The campaign will have a certain **start date** and **end date**. Before and after these dates the campaign will not be visible to the audience.
This feature (editing rules) is available on the **Enterprise** & **Guru** plans only.
Choose when this campaign will be available for your customers:
* **Always Active**: The campaign will always be available for its audience unless you deactivate it.
* **Scheduled**: The campaign will have a certain **start date** and **end date**. Before and after these dates the campaign will not be visible to the audience.
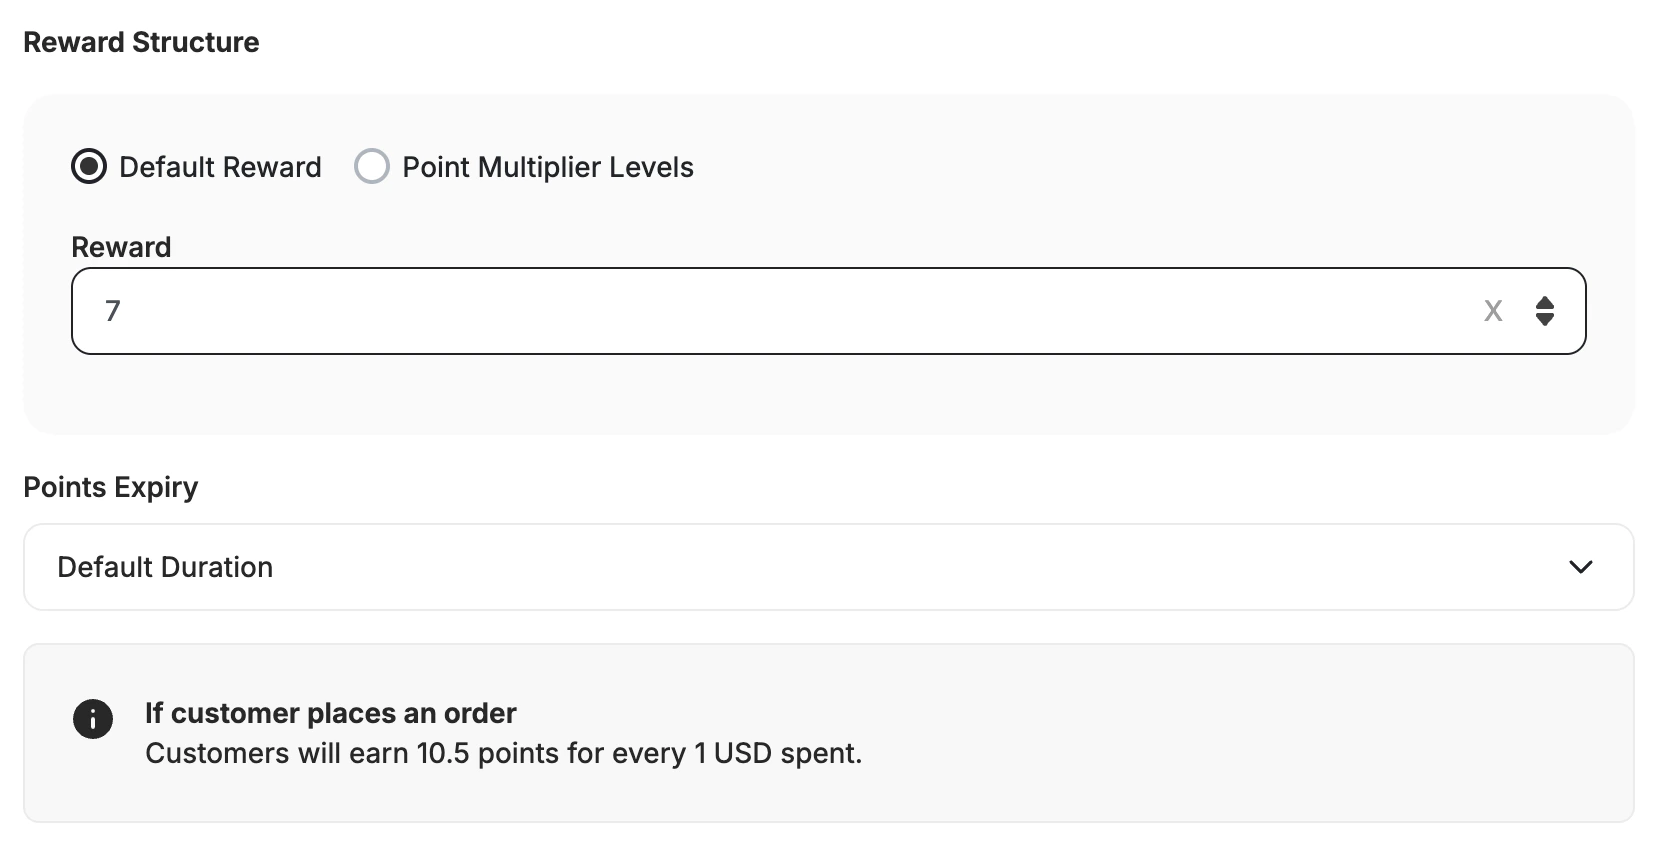
 Under **Reward Structure**, choose how you want to apply the multiplier:
**Default Reward** — Enter any custom multiplier value. You are not limited to preset options; you can set any number (e.g., 7x). As you type, the preview at the bottom updates in real time to show the resulting earn rate based on your base earn rule (e.g., "Customers will earn 10.5 points for every 1 USD spent").
Under **Reward Structure**, choose how you want to apply the multiplier:
**Default Reward** — Enter any custom multiplier value. You are not limited to preset options; you can set any number (e.g., 7x). As you type, the preview at the bottom updates in real time to show the resulting earn rate based on your base earn rule (e.g., "Customers will earn 10.5 points for every 1 USD spent").
 **Point Multiplier Levels** — Set up spend-based tiers so customers earn different multipliers depending on how much they spend in a single order. Select the spend attribute (e.g., **Total Price**), then define each tier with a **Min Spend**, **Max Spend**, and **Multiplier** value. Use **Add Tier** to add more levels. The preview at the bottom shows the resulting equation for each tier based on your base earn rule.
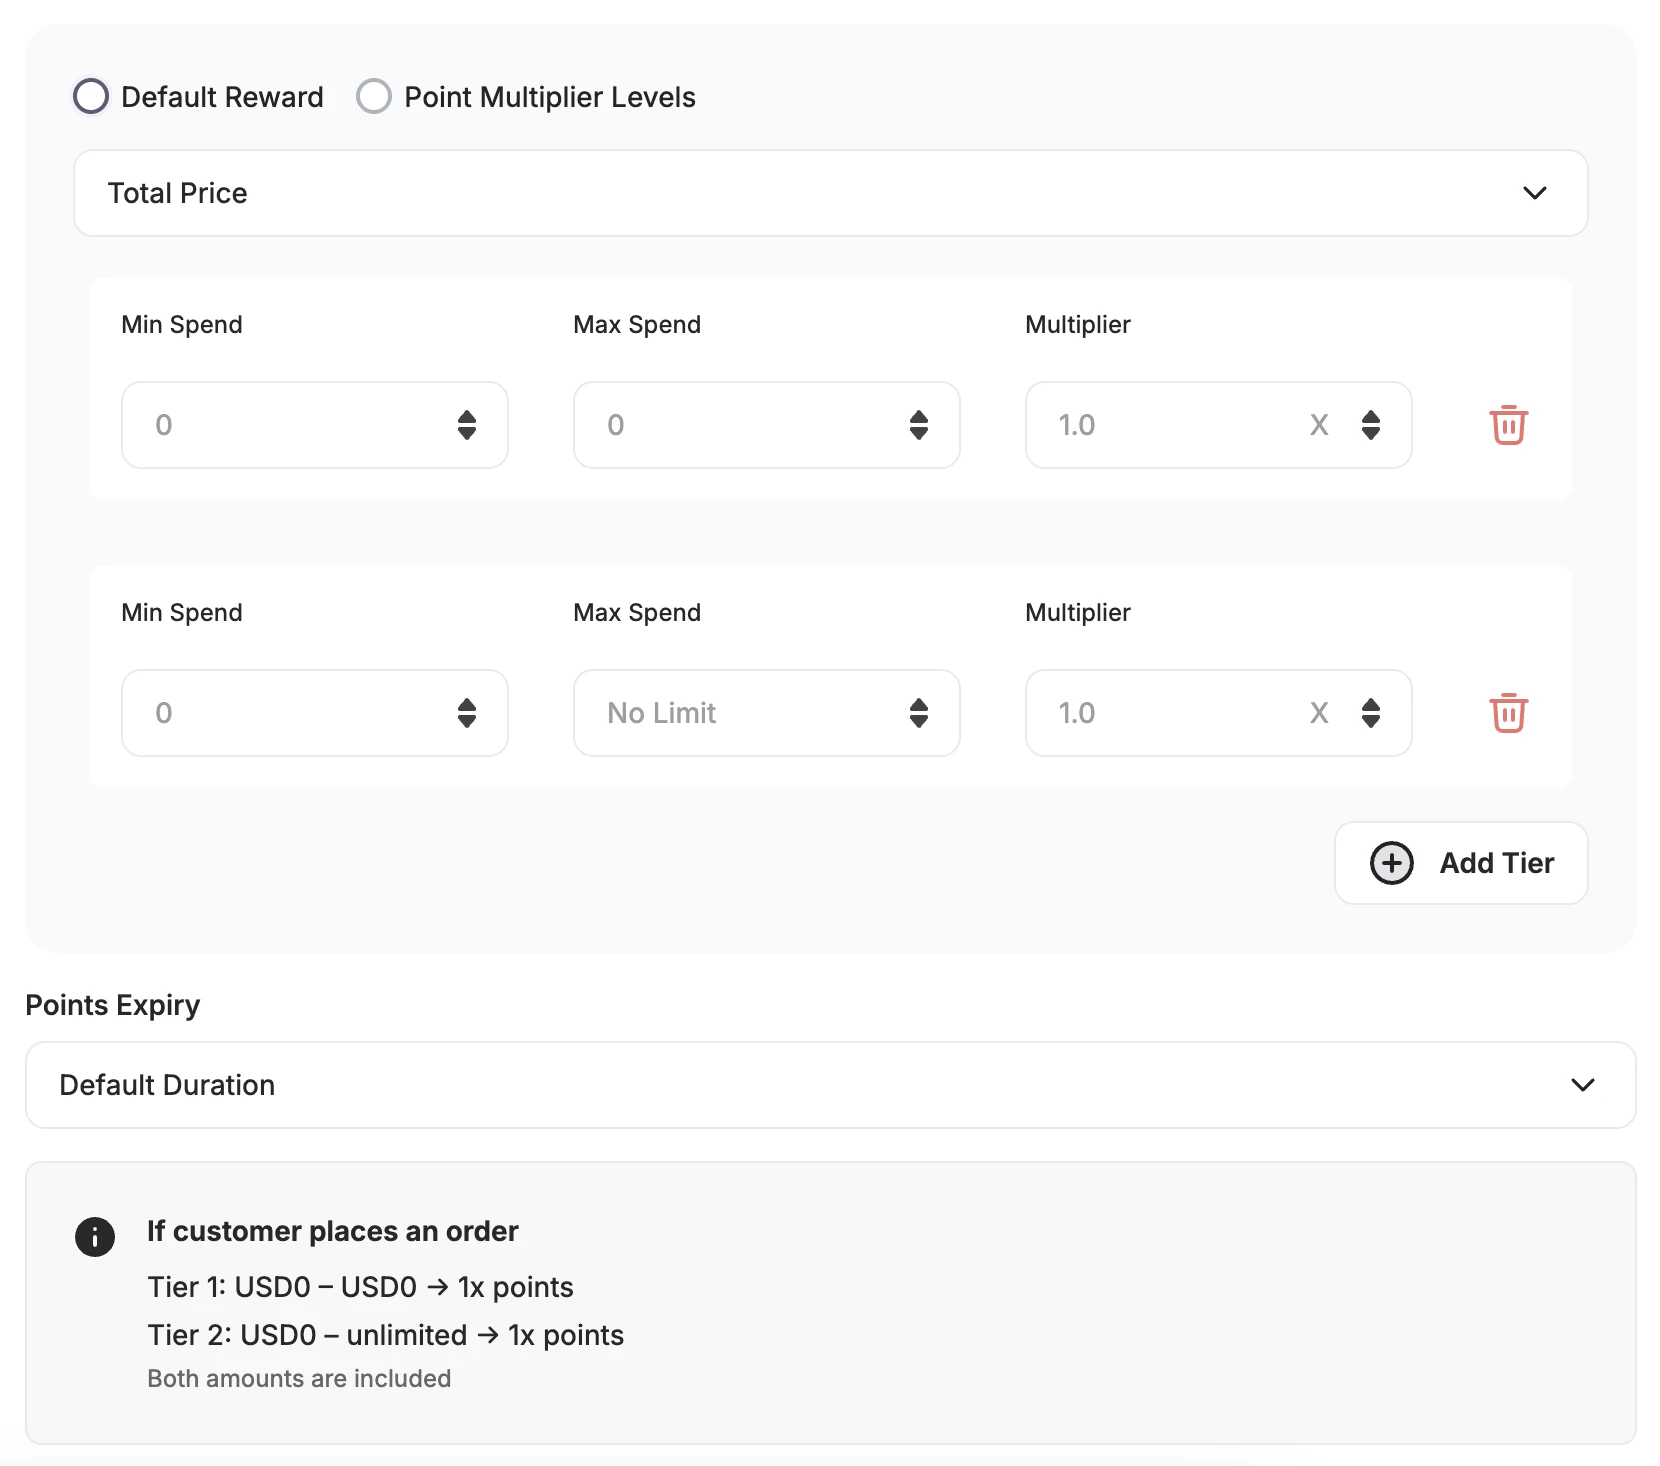 The active tier and next-tier progress are available via the API, so you can surface the earning opportunity directly in your storefront or app.
Now that you have created and configured your campaign, remember to press **Save**, **Preview**, and then **Activate** your campaign.
***
## Custom Expiry for Points Multiplier Campaigns
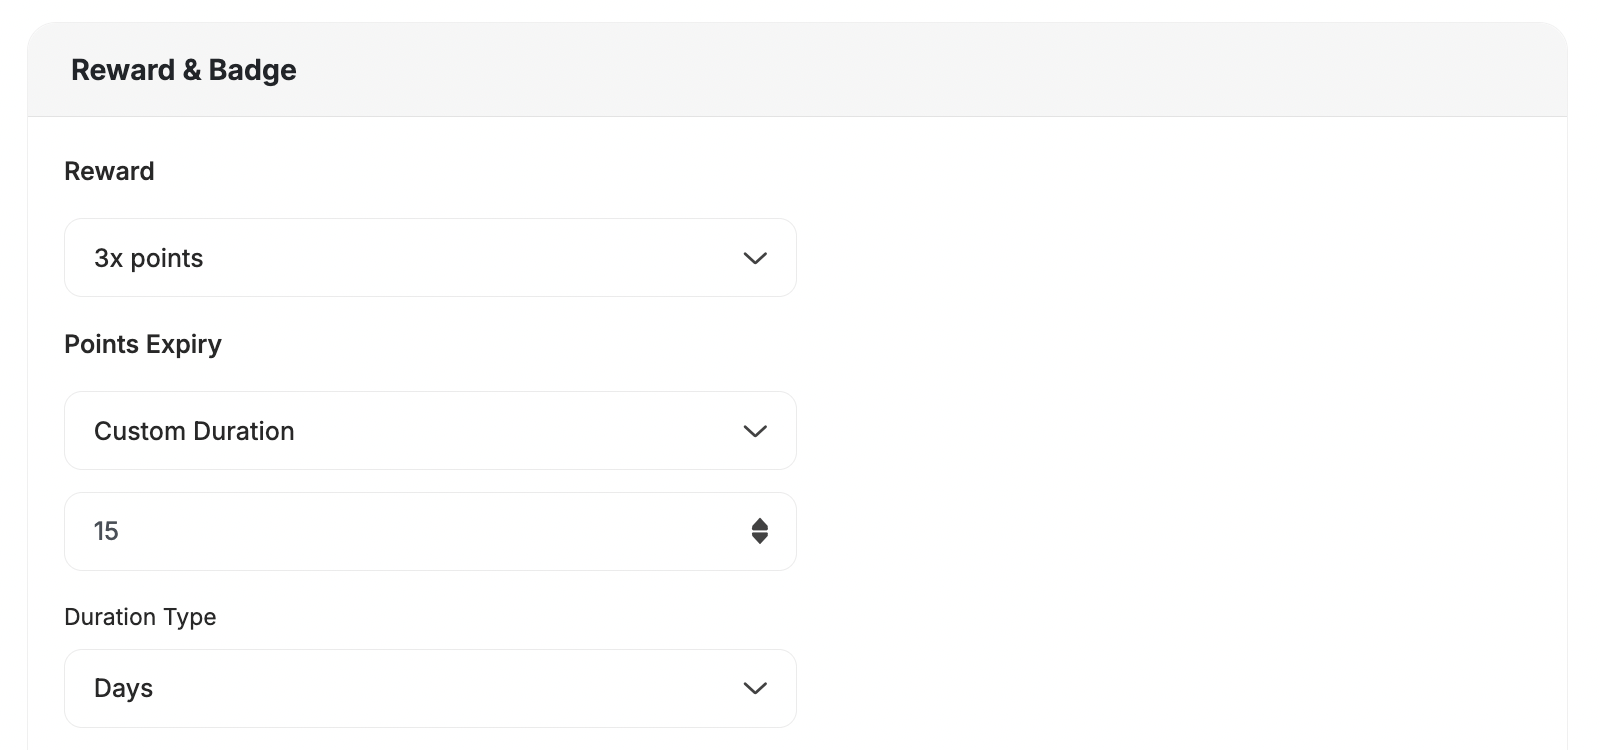
Set a configurable expiry period for points earned through point multiplier campaigns. This gives you full control over when bonus points are activated (respecting your return window) and when they expire, helping reduce fraud risk and liability.
The active tier and next-tier progress are available via the API, so you can surface the earning opportunity directly in your storefront or app.
Now that you have created and configured your campaign, remember to press **Save**, **Preview**, and then **Activate** your campaign.
***
## Custom Expiry for Points Multiplier Campaigns
Set a configurable expiry period for points earned through point multiplier campaigns. This gives you full control over when bonus points are activated (respecting your return window) and when they expire, helping reduce fraud risk and liability.
 ### Why This Matters
Previously, points earned from multiplier campaigns (e.g., Double Points) were **activated immediately** without considering your return/refund window. This exposed merchants to:
| Risk | Description |
| ---------------------- | ----------------------------------------------------------------------- |
| **Fraud risk** | Customers could earn and use points before returning items. |
| **Inflated liability** | Early activation of bonus points inflated outstanding loyalty balances. |
With this update, you can now:
* Delay **point activation** until after the return window passes.
* Define a **custom expiry period (days)** for multiplier campaign points, just like in other reward campaigns.
* Align rewards with **finalized, eligible transactions** only.
### Partial Returns and Condition Thresholds
If a customer earns a multiplier by meeting a condition (e.g., ordering 2 or more items) and then returns part of the order — dropping below the qualifying threshold — **Gameball does not reverse the bonus points already earned**. Points are deducted proportionally based on the returned item's value (including the multiplier), but there is no retroactive reversal of the multiplier itself.
For example: a customer orders 2 items, qualifies for a 2x multiplier, earns 200 points (100 base + 100 bonus), then returns 1 item. Gameball deducts 100 points (50 base + 50 bonus). The remaining 100 points stay with the customer even though they no longer meet the 2-item condition.
To reduce exposure to this, use the **Return Window** setting to delay point activation until after your return window closes.
There are other types of Reward Campaigns. Learn how to create and configure each of them below:
* [Create & Configure a Time-based Reward Campaign](/product-documentation/rewards-campaigns/start-from-scratch/create-time-based-reward-campaign)
* [Create & Configure an Action-based Reward Campaign](/product-documentation/rewards-campaigns/start-from-scratch/create-action-based-reward-campaign)
***
## Related Articles
Explore the full setup guide for reward campaigns, including events, rewards, and notifications.
### Why This Matters
Previously, points earned from multiplier campaigns (e.g., Double Points) were **activated immediately** without considering your return/refund window. This exposed merchants to:
| Risk | Description |
| ---------------------- | ----------------------------------------------------------------------- |
| **Fraud risk** | Customers could earn and use points before returning items. |
| **Inflated liability** | Early activation of bonus points inflated outstanding loyalty balances. |
With this update, you can now:
* Delay **point activation** until after the return window passes.
* Define a **custom expiry period (days)** for multiplier campaign points, just like in other reward campaigns.
* Align rewards with **finalized, eligible transactions** only.
### Partial Returns and Condition Thresholds
If a customer earns a multiplier by meeting a condition (e.g., ordering 2 or more items) and then returns part of the order — dropping below the qualifying threshold — **Gameball does not reverse the bonus points already earned**. Points are deducted proportionally based on the returned item's value (including the multiplier), but there is no retroactive reversal of the multiplier itself.
For example: a customer orders 2 items, qualifies for a 2x multiplier, earns 200 points (100 base + 100 bonus), then returns 1 item. Gameball deducts 100 points (50 base + 50 bonus). The remaining 100 points stay with the customer even though they no longer meet the 2-item condition.
To reduce exposure to this, use the **Return Window** setting to delay point activation until after your return window closes.
There are other types of Reward Campaigns. Learn how to create and configure each of them below:
* [Create & Configure a Time-based Reward Campaign](/product-documentation/rewards-campaigns/start-from-scratch/create-time-based-reward-campaign)
* [Create & Configure an Action-based Reward Campaign](/product-documentation/rewards-campaigns/start-from-scratch/create-action-based-reward-campaign)
***
## Related Articles
Explore the full setup guide for reward campaigns, including events, rewards, and notifications.