> ## Documentation Index
> Fetch the complete documentation index at: https://docs.gameball.co/llms.txt
> Use this file to discover all available pages before exploring further.
# What Are Group Your Customers by Tags?
> Use tags to manually group customers and customize special rewards and communication campaigns to be sent only to your tagged customers.
Tags let you group your customers manually. They are great for highlighting VIP customers who may need VIP rewards, loyal customers who should be treated differently, or when you need to simulate different rewards based on the assigned tags. For example, if you want to create and send communication campaigns, notifications, or assign reward campaigns to only a specific group of customers, tags are a great way to link between these customers and the assigned notifications, emails, or reward campaigns.
The maximum number of tags that can be created is **15 tags**.
***
## How to Create Customer Tags
The following steps are also what you need to completely remove or delete a tag.
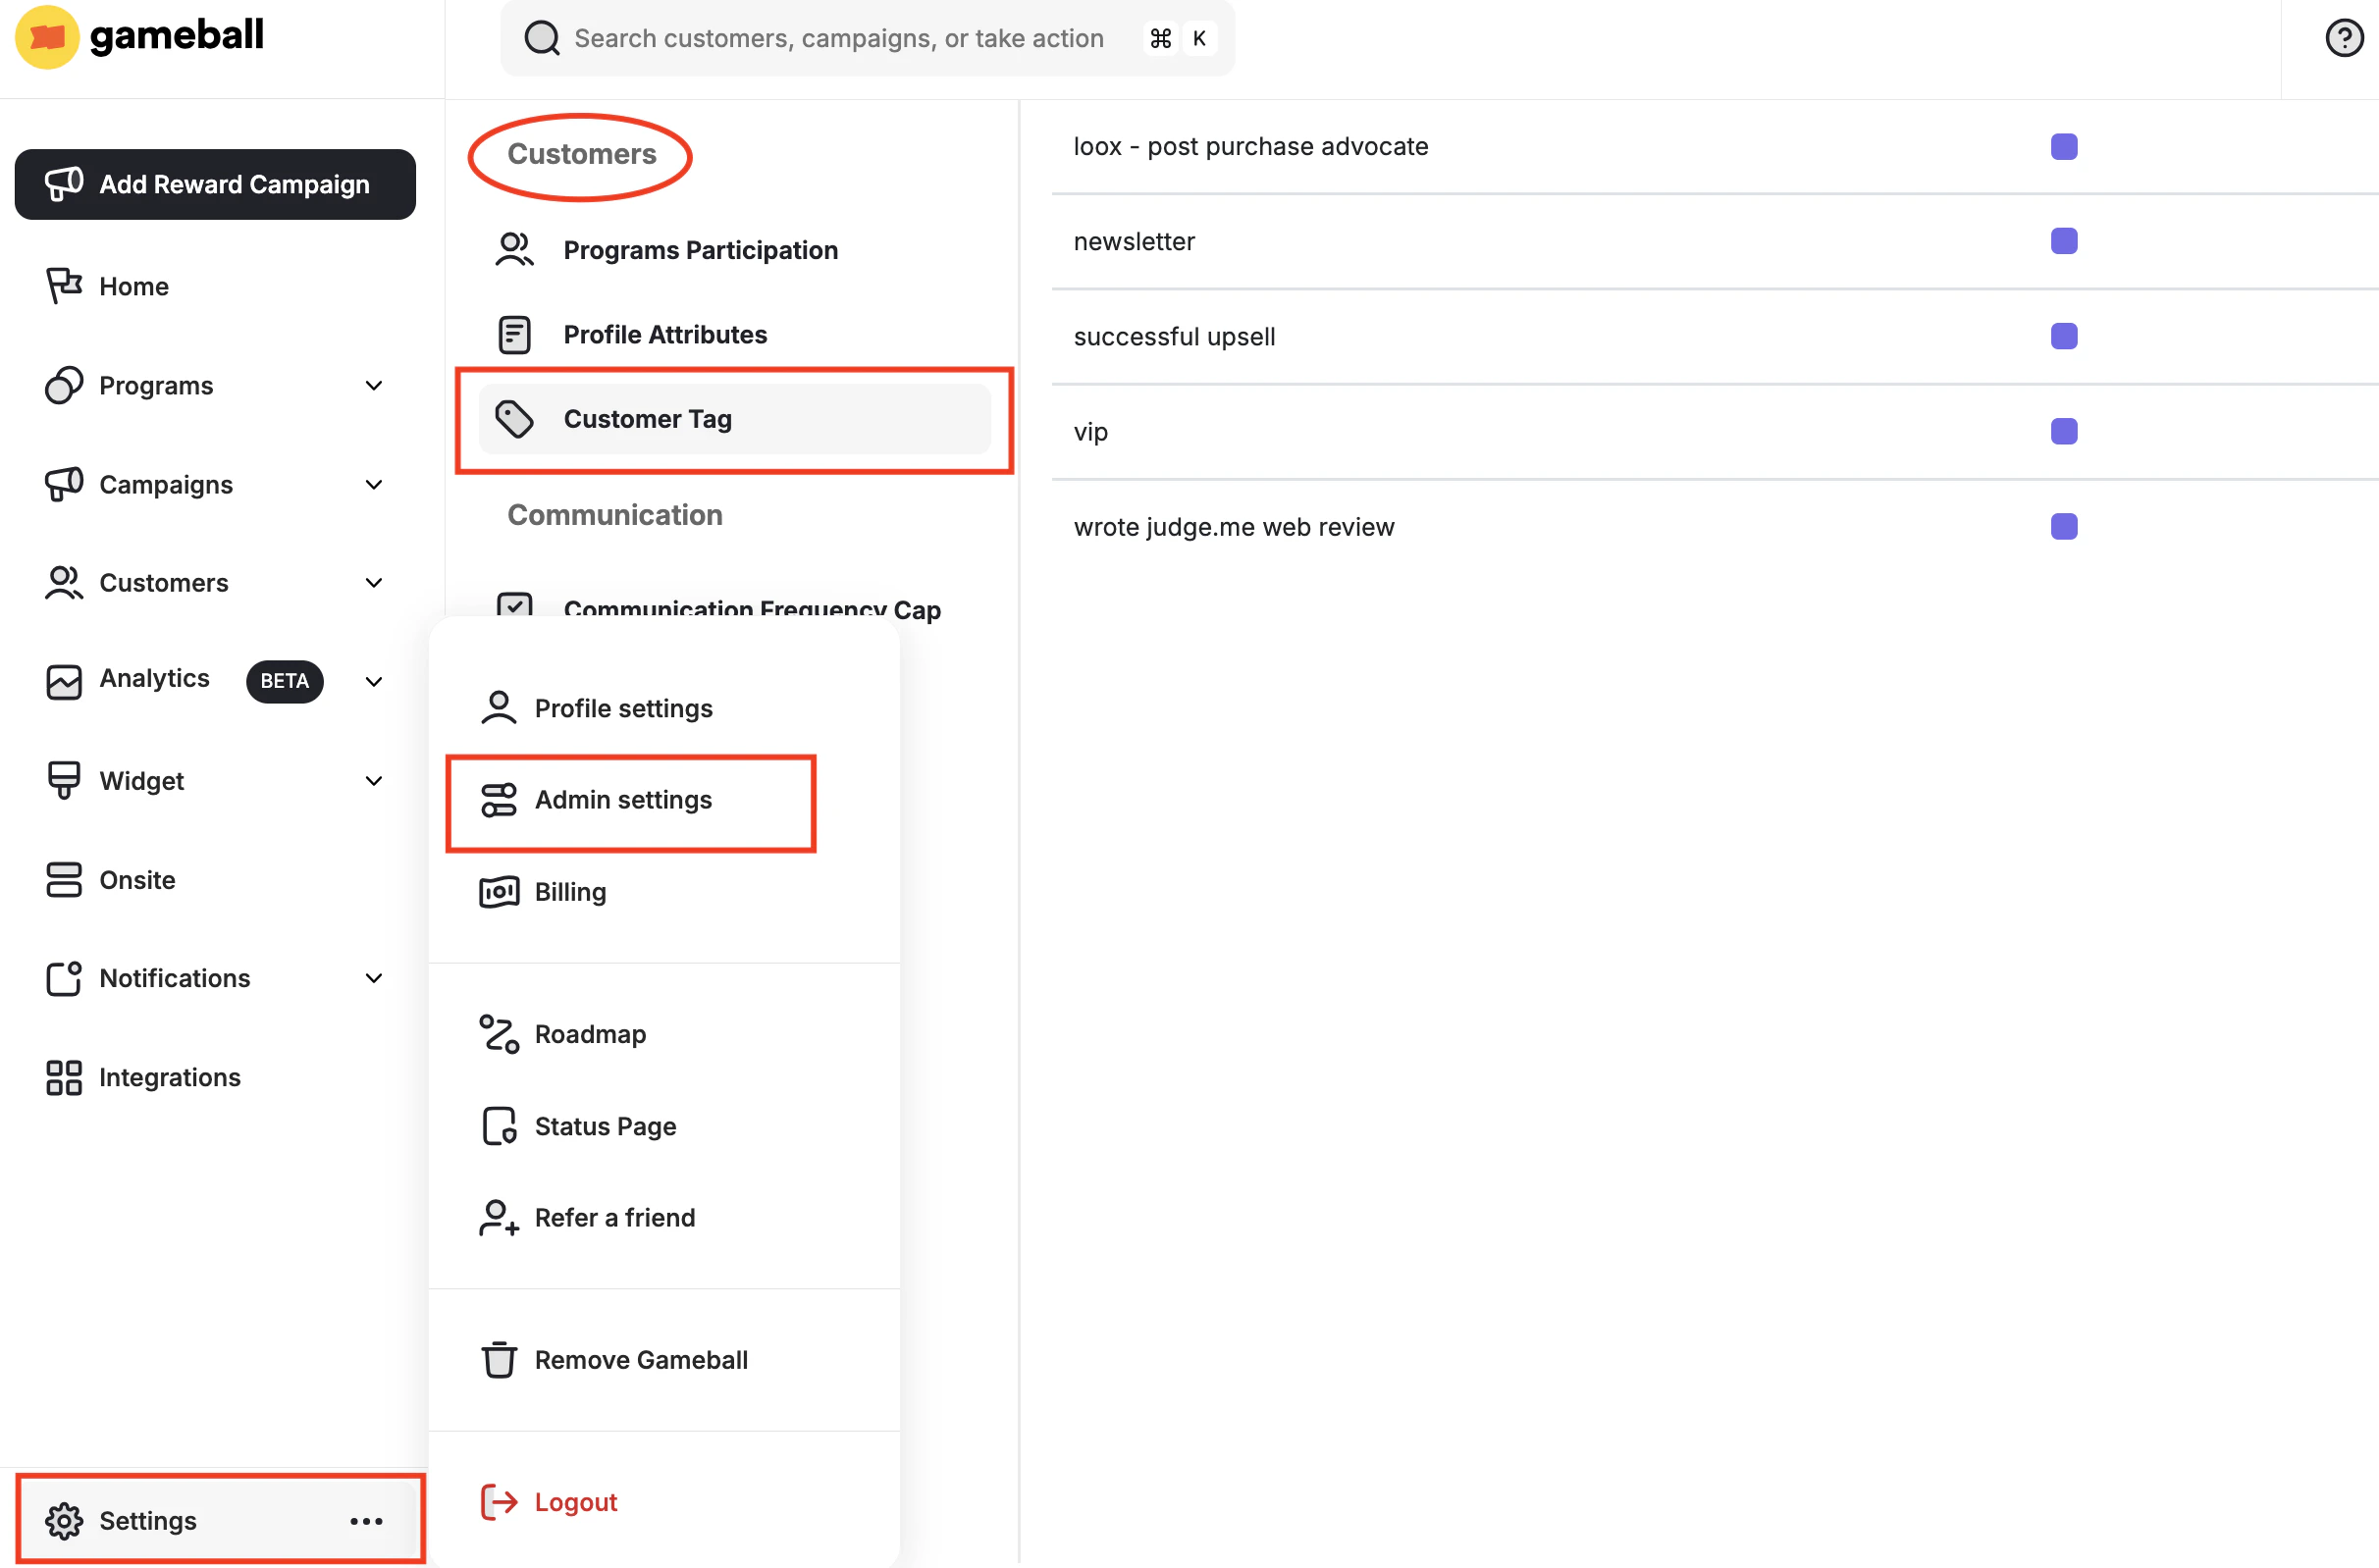
On your Gameball dashboard, go to **Settings > Admin Settings > Customer Tags**.
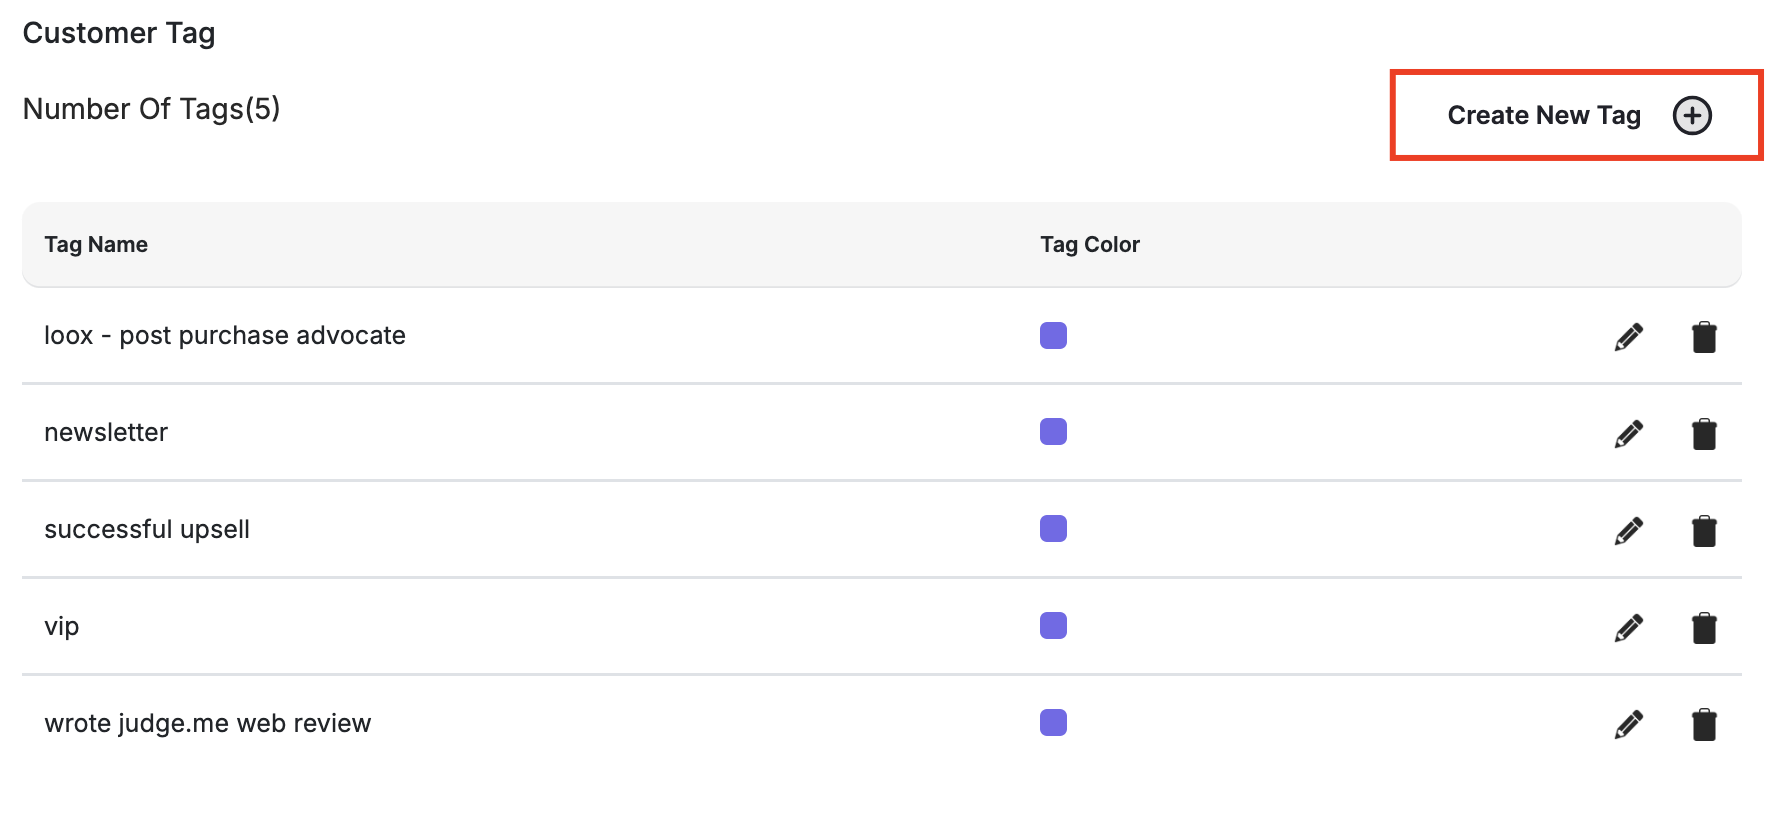
 On the top right of the page, click **Create New Tag**.
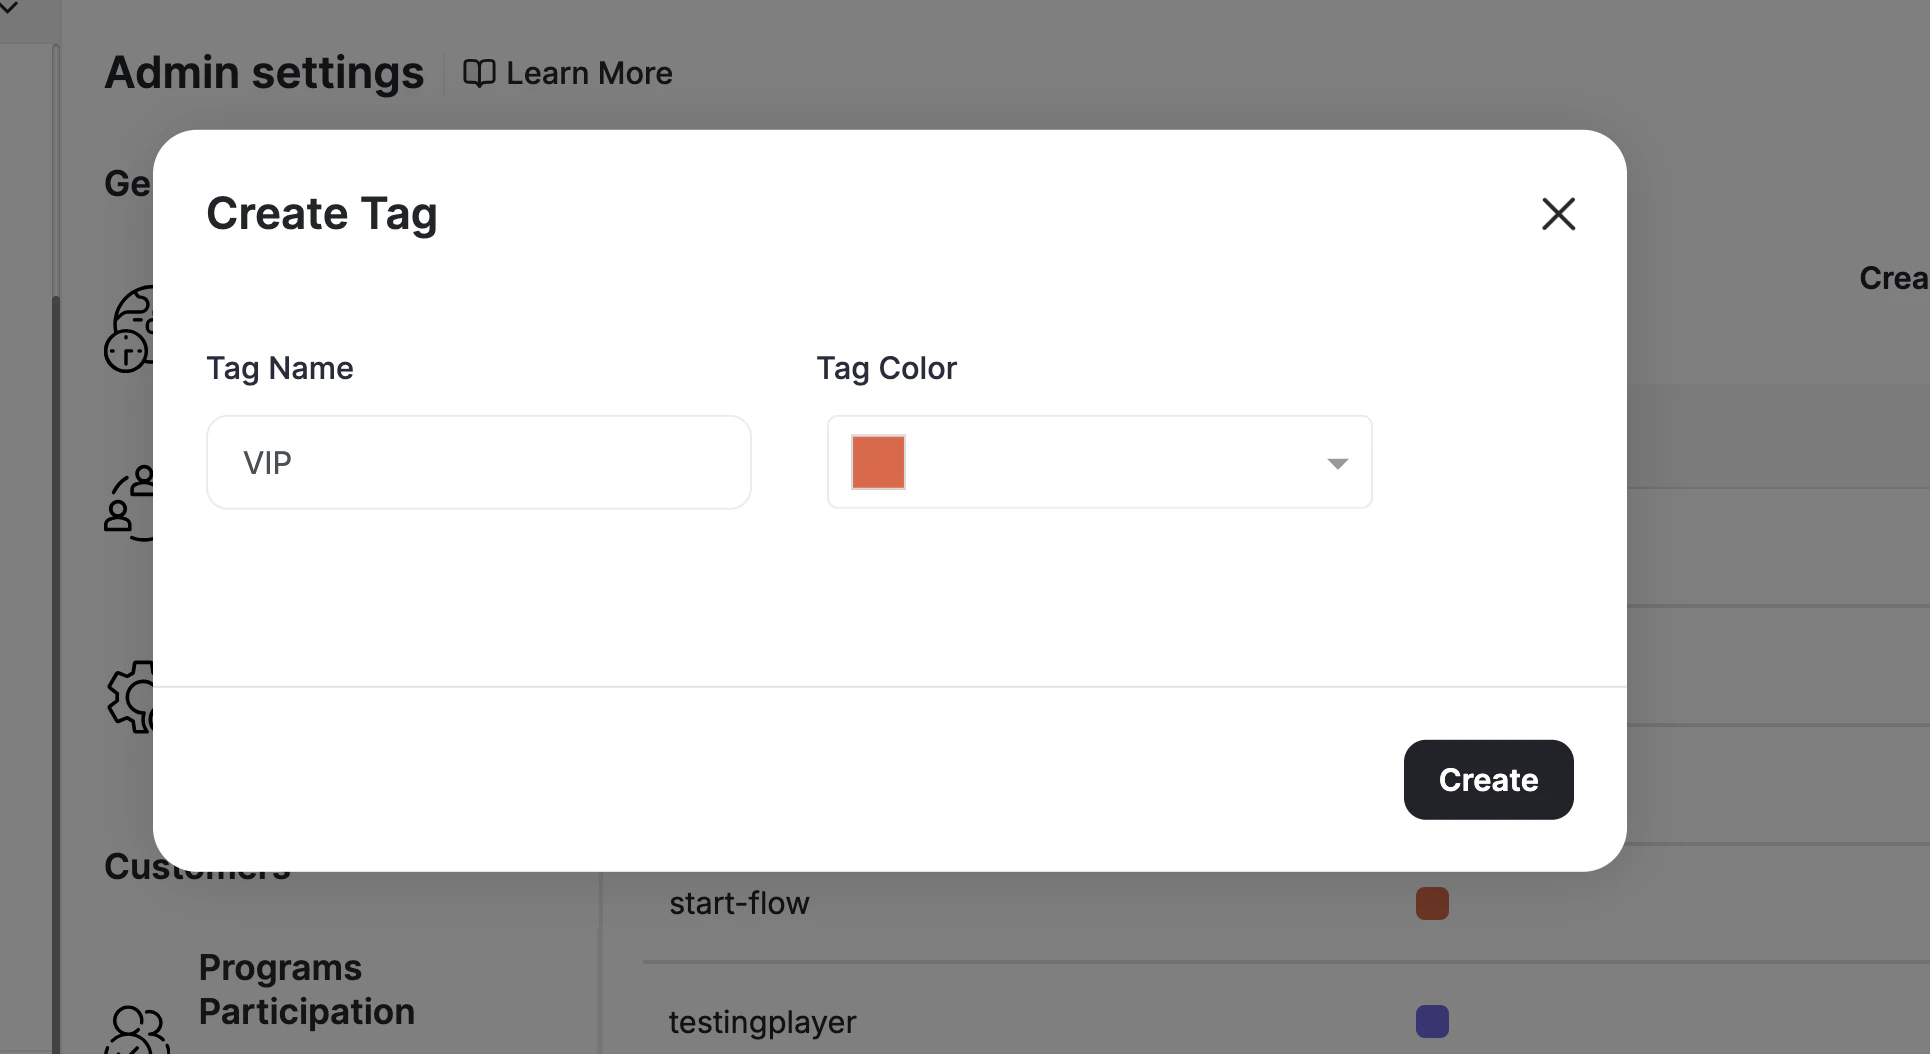
 Add the tag **name** and choose the tag **color**, then click **Create**.
 ***
## How to Tag Your Customers
The following steps are also what you need to remove tags from a customer.
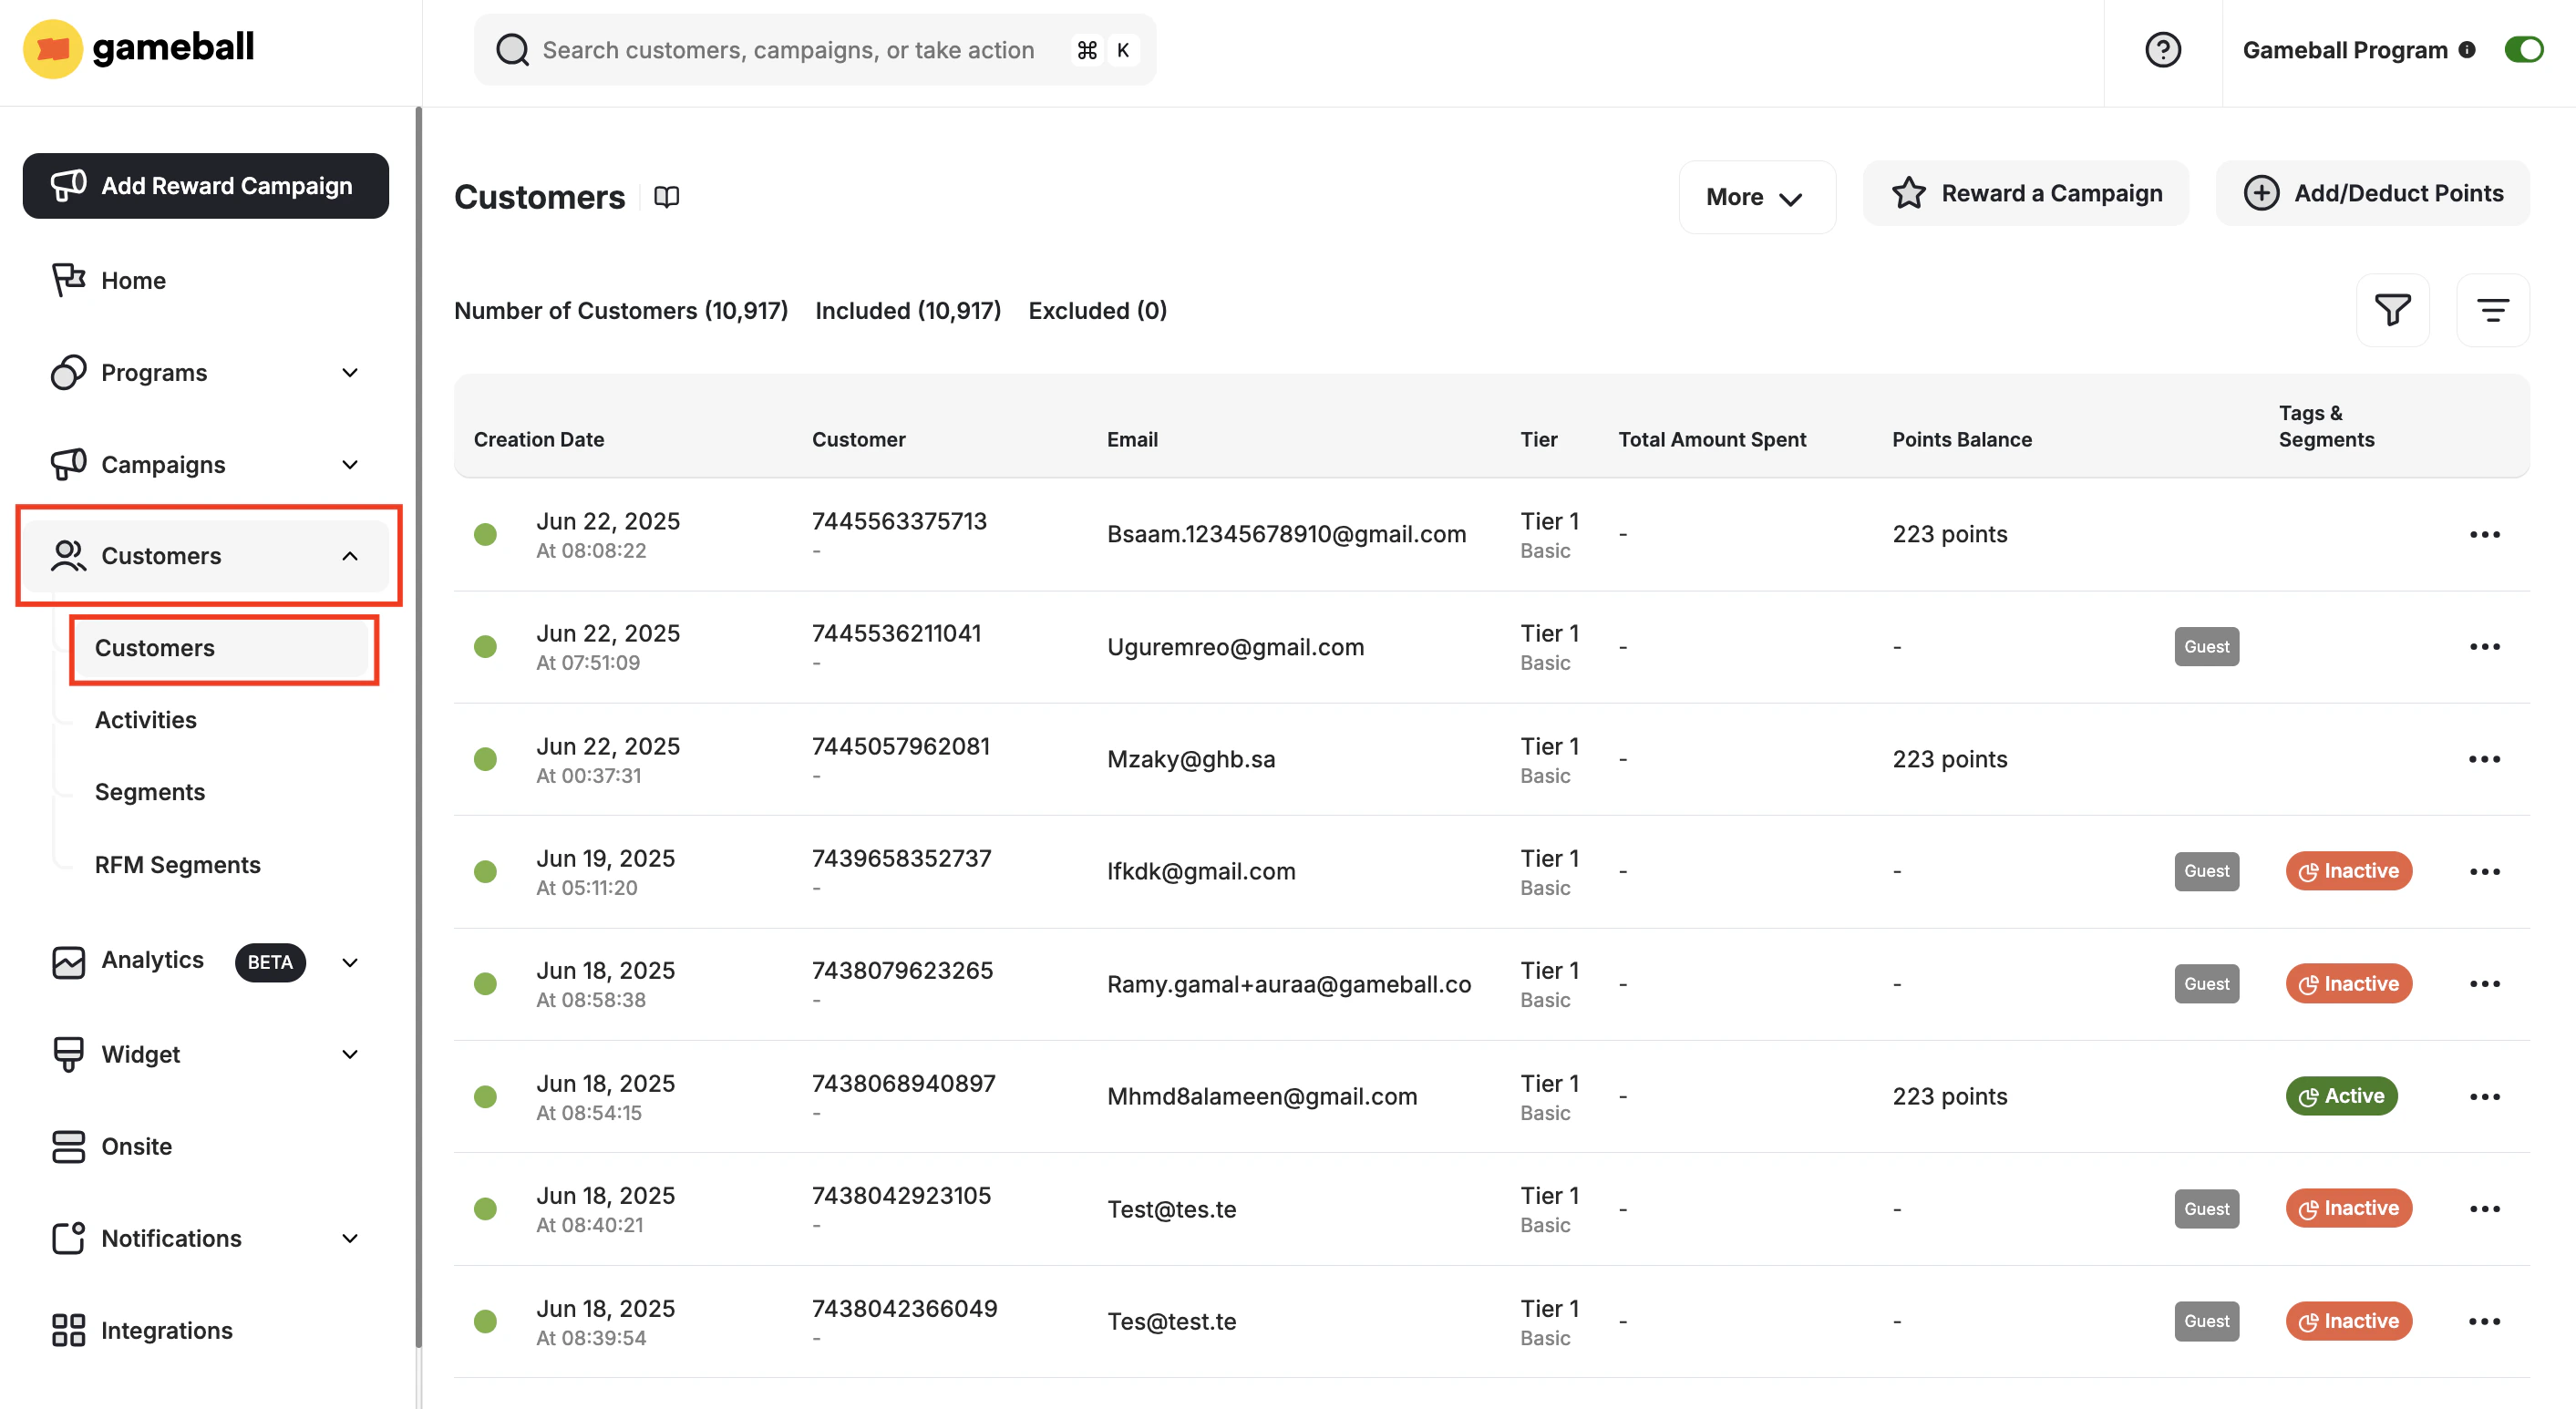
On your Gameball dashboard, go to **Customers**, then open any customer page.
***
## How to Tag Your Customers
The following steps are also what you need to remove tags from a customer.
On your Gameball dashboard, go to **Customers**, then open any customer page.
 Under the **Segments** section, beside **Tags**, click on **+Add**.
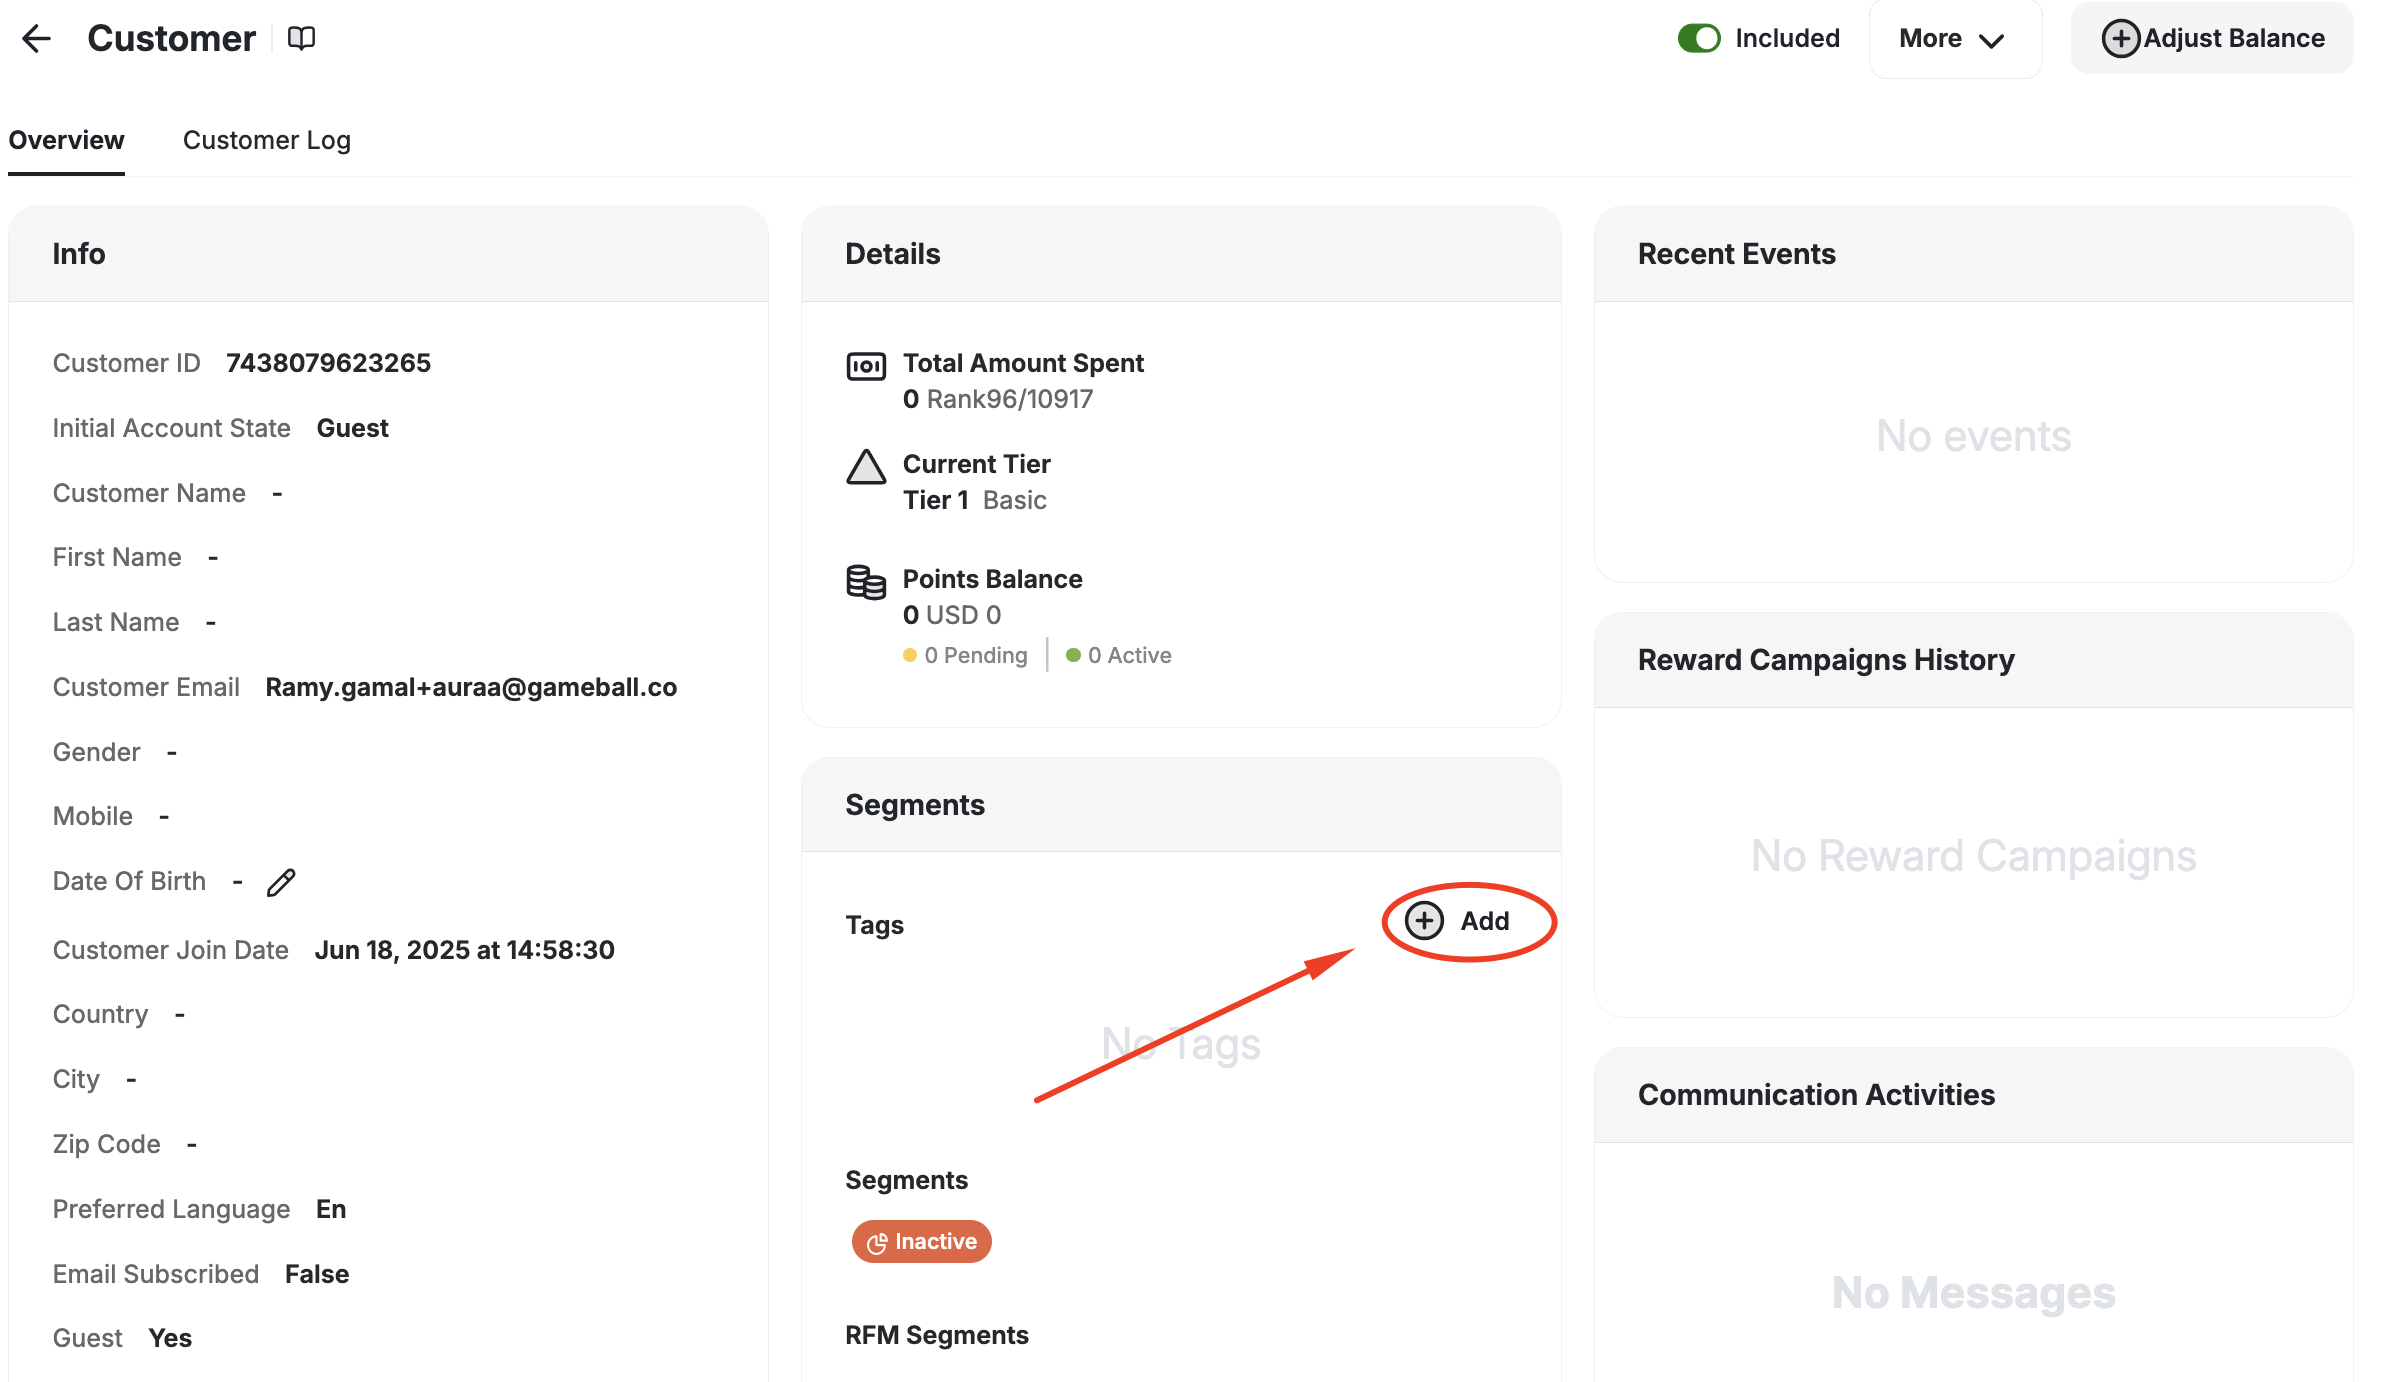 Search for the available tags and assign the tag to the customer.
This is also where you remove a tag from a customer.
On your Gameball dashboard, go to **Customers**.
Search for the available tags and assign the tag to the customer.
This is also where you remove a tag from a customer.
On your Gameball dashboard, go to **Customers**.
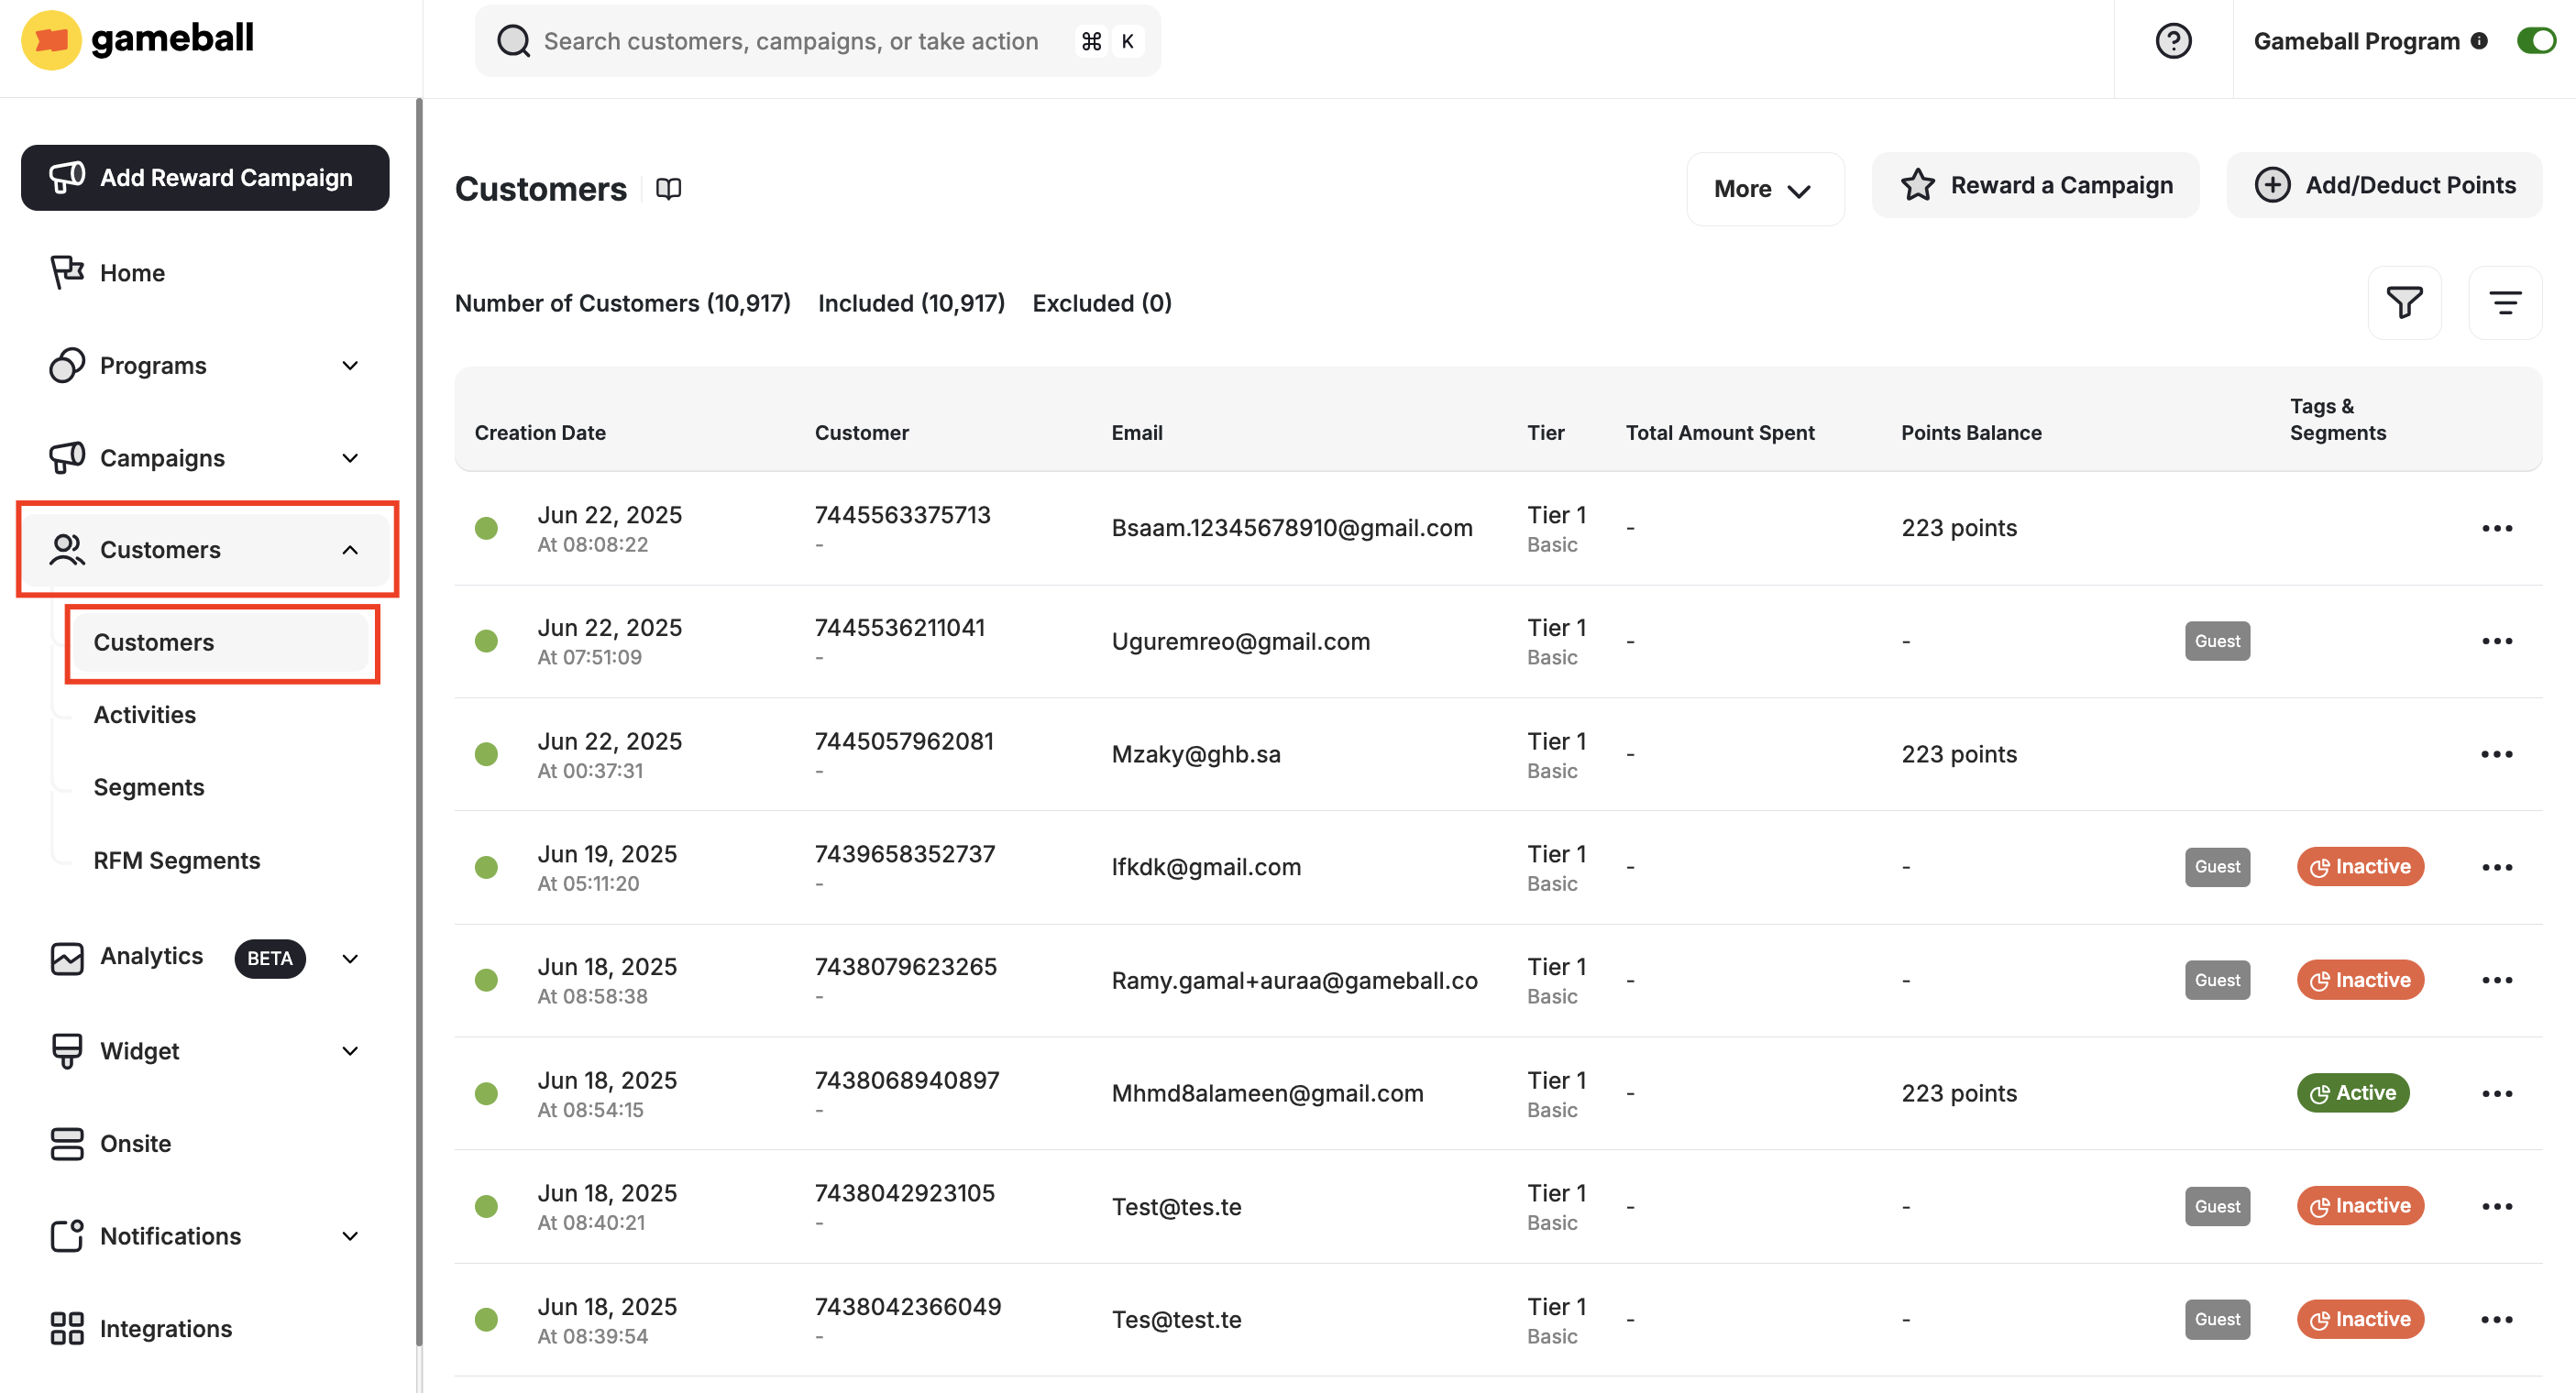 Click on the **Filter Icon**.
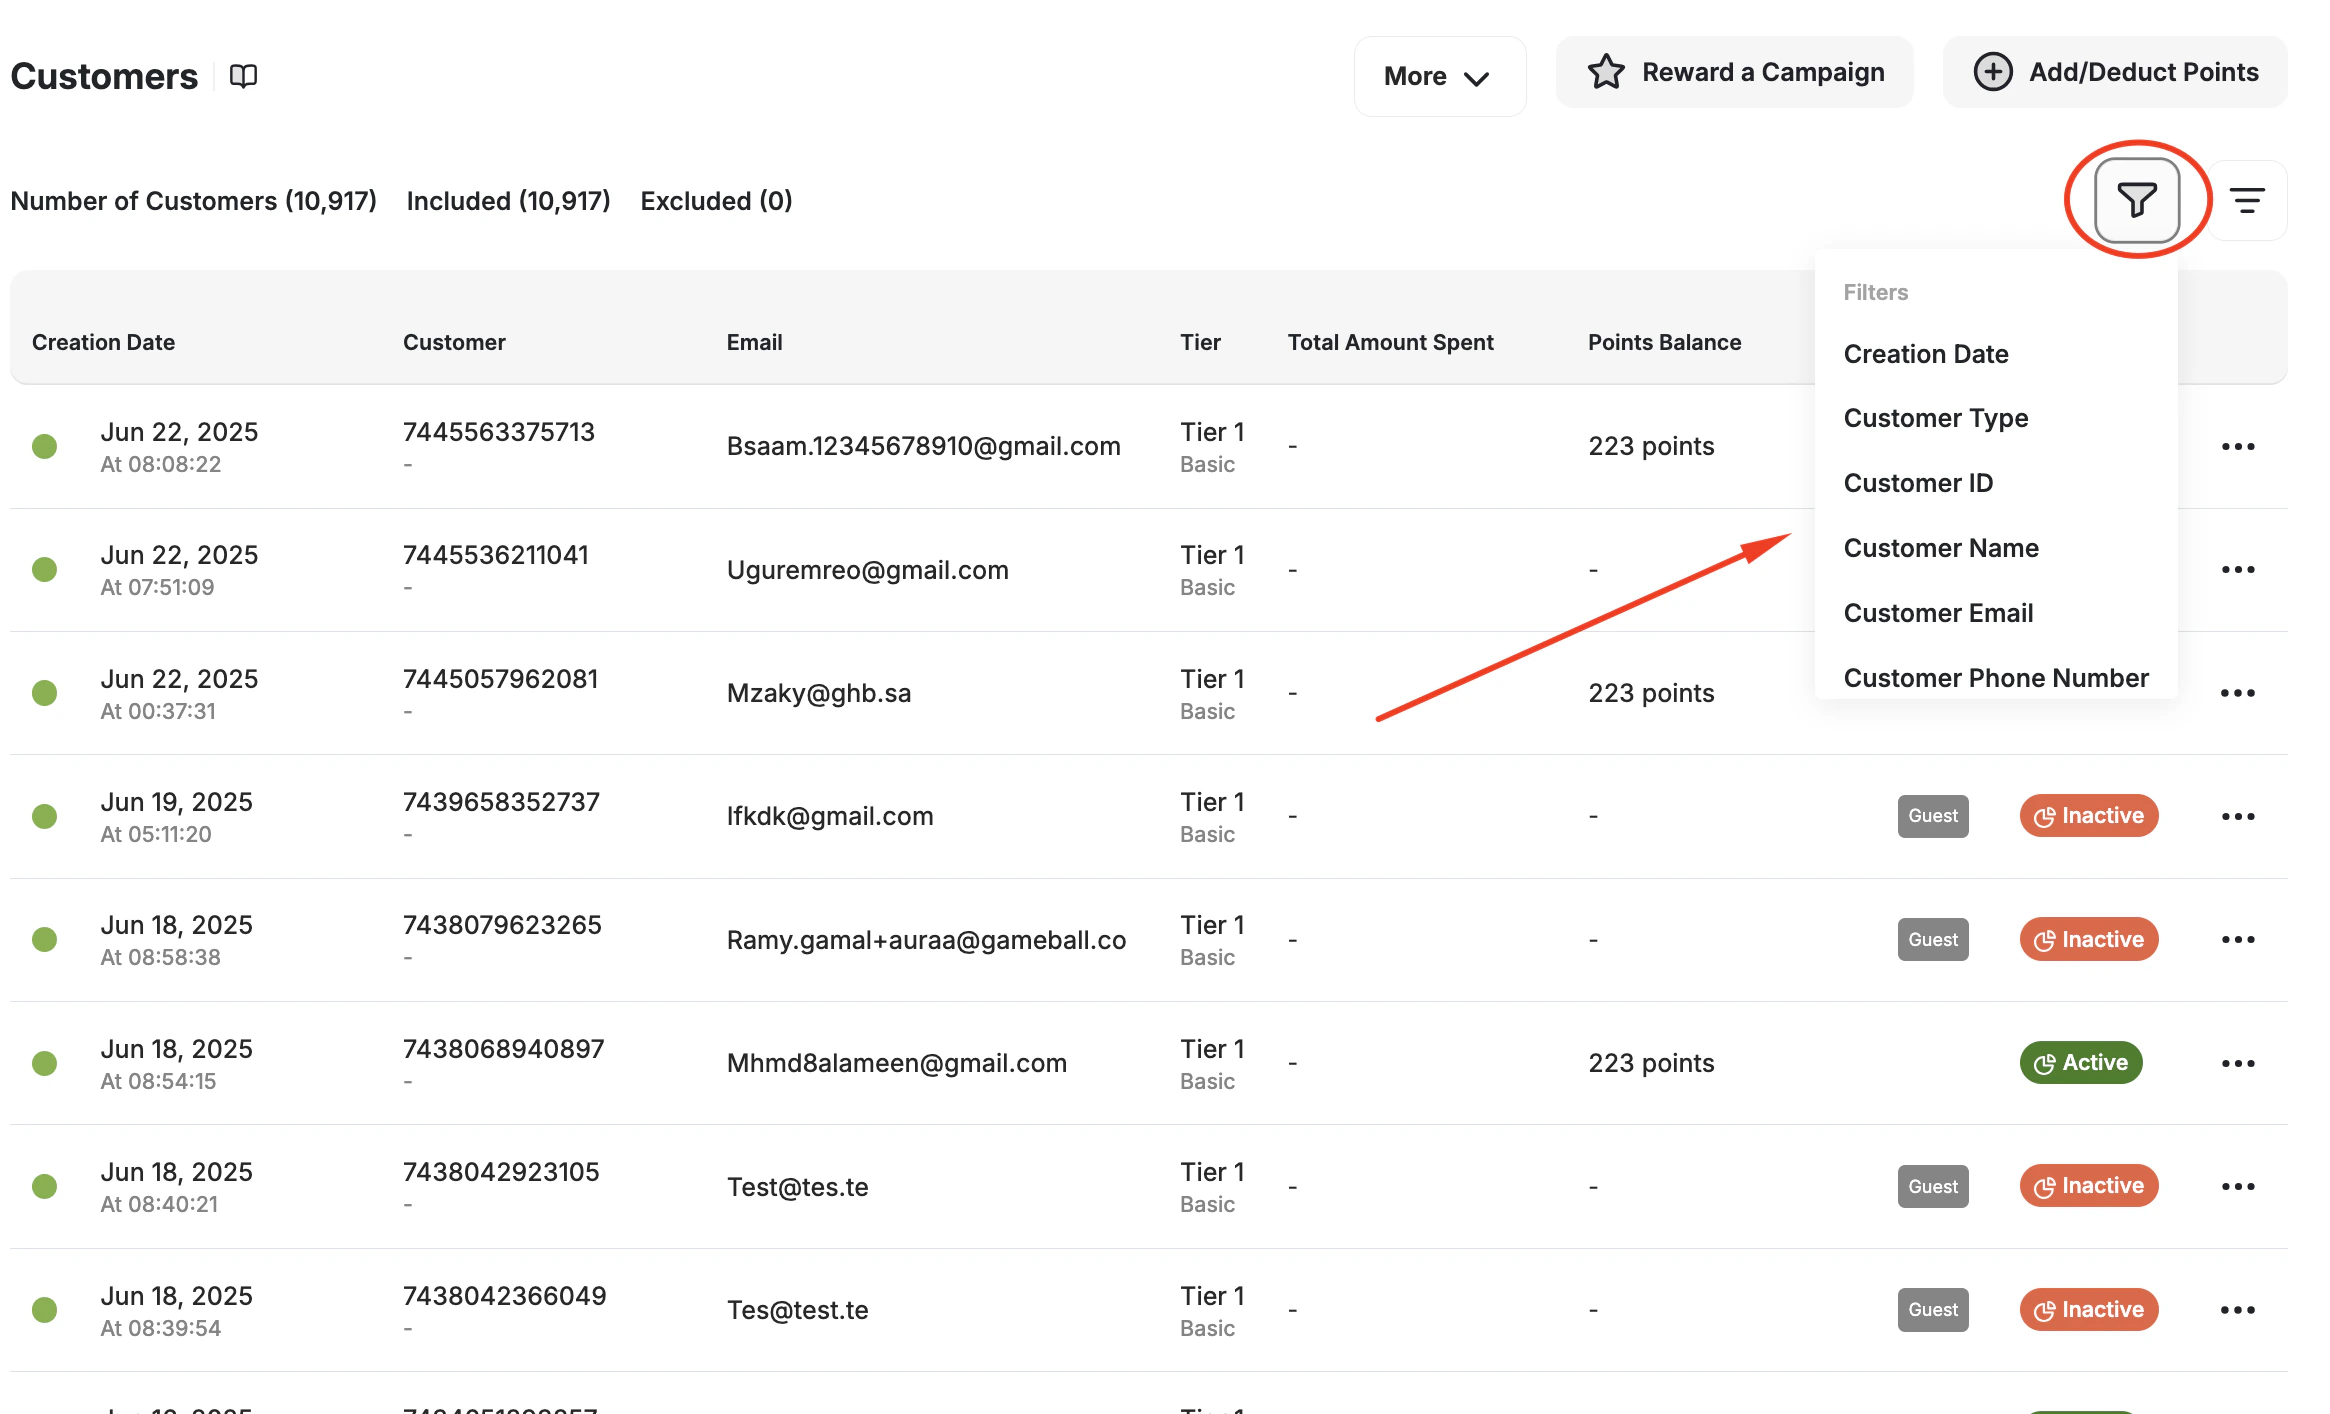 Filter your customers according to your needs, then click **More**.
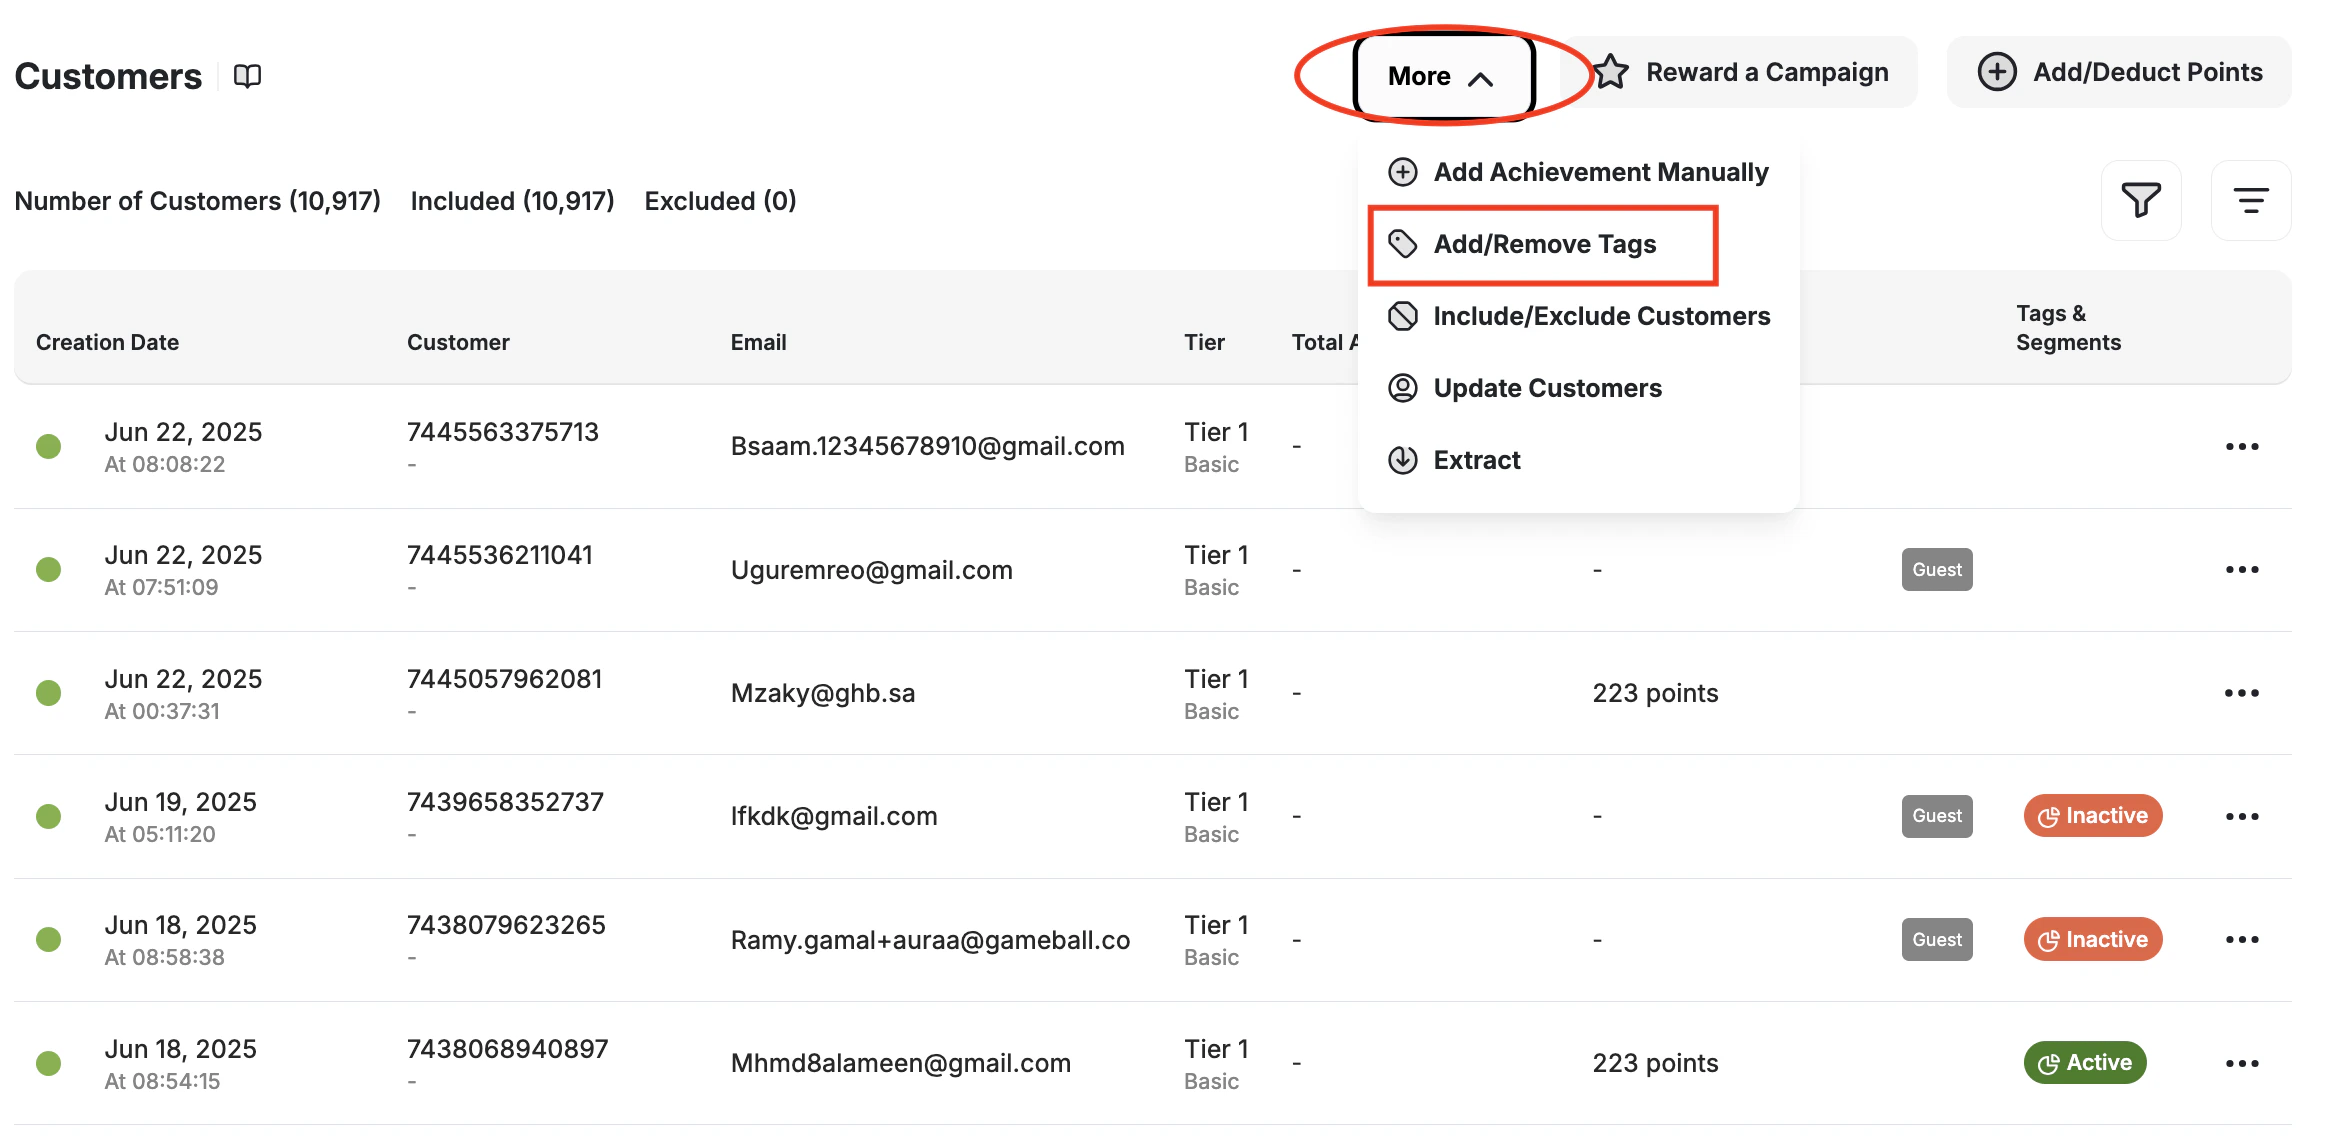 Choose between adding or removing tags, then click on **+Add**.
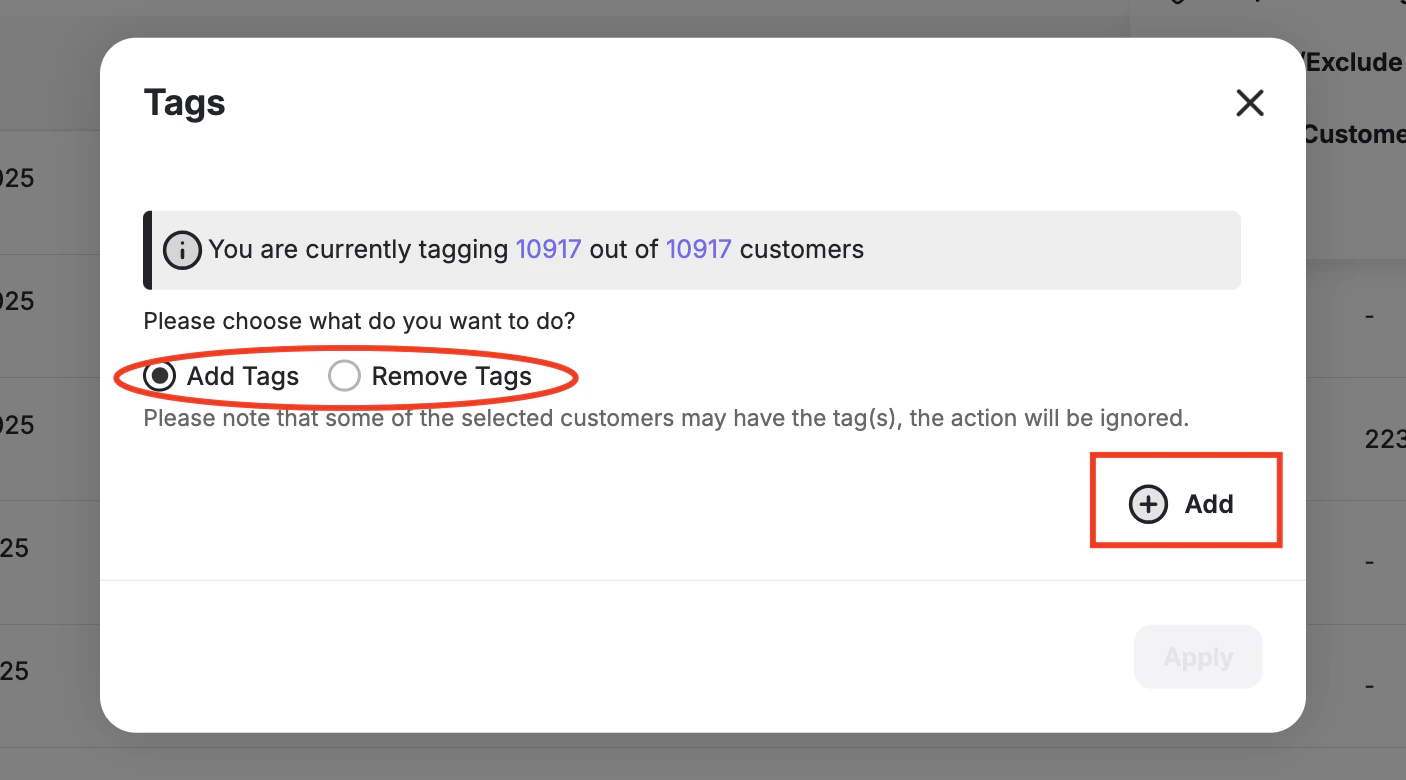 Scroll down and pick the desired tag(s), then click **Apply**.
All customers in the currently active filter will be tagged with the selected tags.
If no filter is applied, the operation will automatically tag all customers on Gameball at the moment of the operation.
You can also tag customers using Gameball APIs. Check our [technical documentation](https://developer.gameball.co/rest-api/customers/customer-tags) for more details.
***
## What is Next?
Configure different rewards through reward campaigns for your customers based on tags.
Customer tags automatically sync with Gameball customers' tags on Shopify.
Scroll down and pick the desired tag(s), then click **Apply**.
All customers in the currently active filter will be tagged with the selected tags.
If no filter is applied, the operation will automatically tag all customers on Gameball at the moment of the operation.
You can also tag customers using Gameball APIs. Check our [technical documentation](https://developer.gameball.co/rest-api/customers/customer-tags) for more details.
***
## What is Next?
Configure different rewards through reward campaigns for your customers based on tags.
Customer tags automatically sync with Gameball customers' tags on Shopify.